Struggling with multiple programming languages? No worries. Our Code Converter has got you covered. Give it a go!
Web APIs are application programming interfaces over the web that can be accessed using HTTP protocol. Server hosting providers such as Veesp provide programmatic access to get and post data to manage our servers and the services that they provide.
In this tutorial, you will learn how you can automate Veesp VPS tasks in Python using requests library, alright let's get started.
First, let's install requests library:
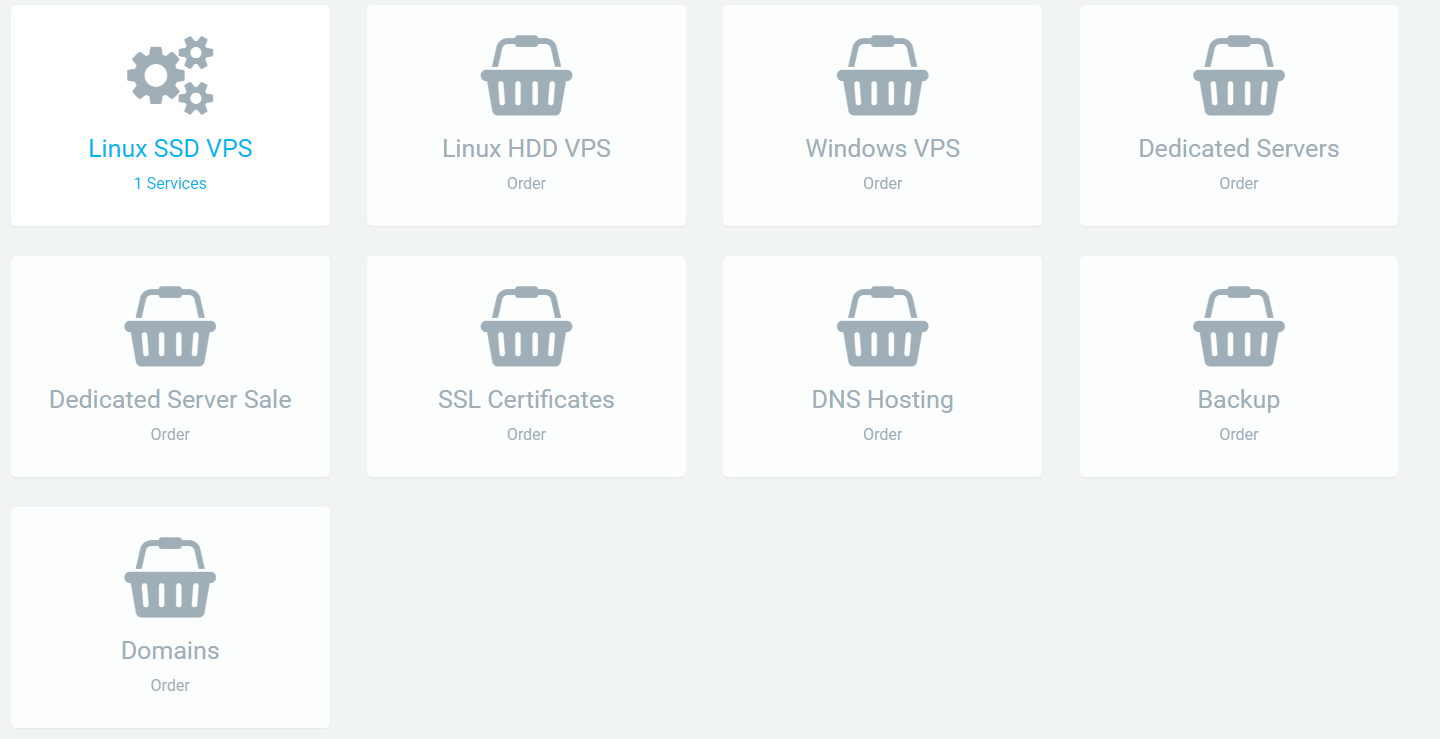
pip3 install requestsAfter you create your own account, you can order some cheap VPS with some bucks, here is a list of available services:
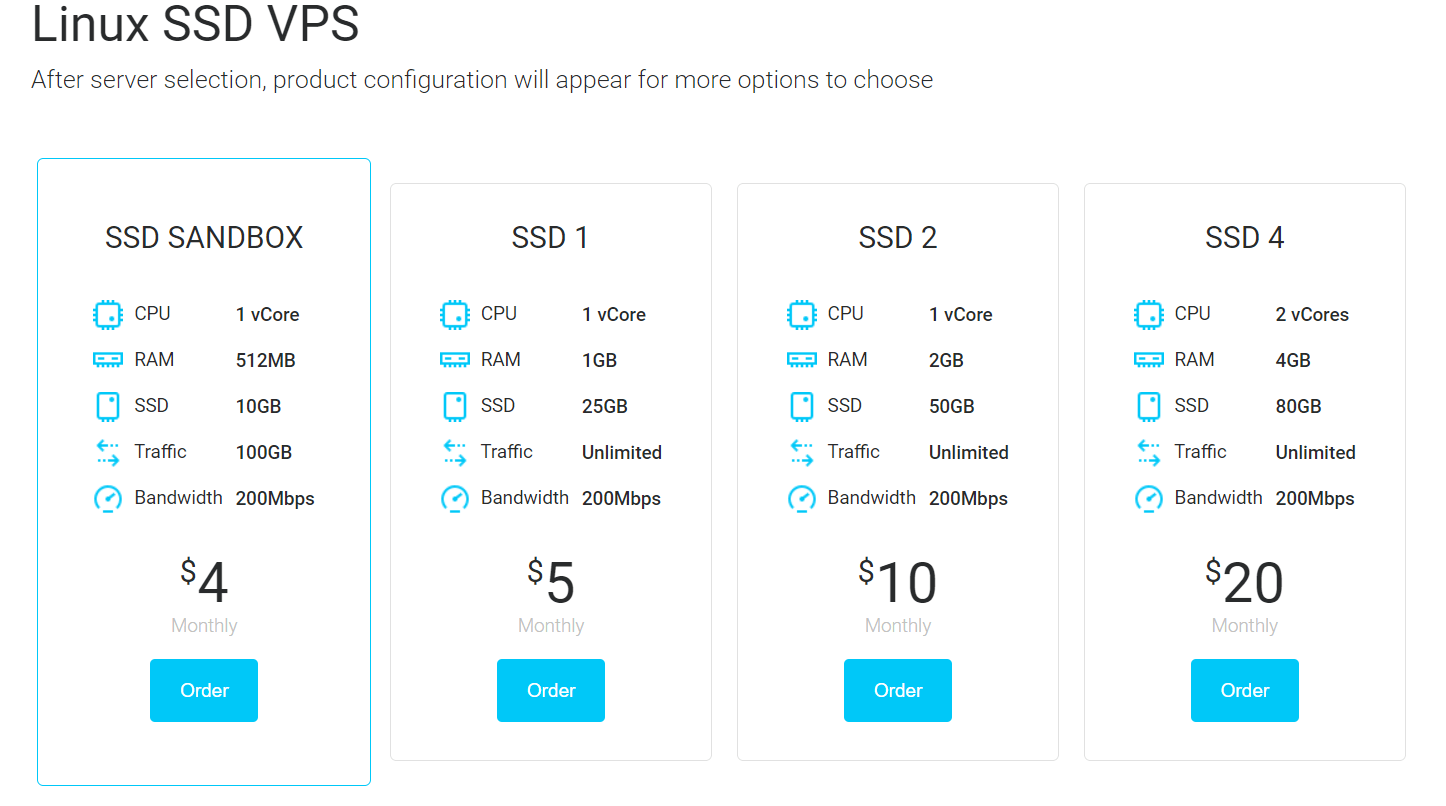
I've chose Linux SSD VPS here, feel free to choose any one you like, and I've used the sandbox option in the following list:
 Once paid and your VPS is properly activated, you can follow along now, open up a new Python file or interactive shell (prefered) and follow along:
import requests
from pprint import pprint
I'm using pprint just for printing API results nicely.
Define a tuple that contains your real authentication credentials on your Veesp account:
# email and password
auth = ("email@example.com", "ffffffff")
You will need to pass this auth tuple to every API call you make.
Let's start off by getting account details:
# get the HTTP Response
res = requests.get("https://secure.veesp.com/api/details", auth=auth)

# get the account details
account_details = res.json()

pprint(account_details)
requests.get() function sends a HTTP GET request to that URL with your authentication, here is my result (with hidden sensitive information of course):
{'client': {'address1': '',
            'city': '',
            'companyname': '',
            'country': 'US',
            'email': 'email@example.com',
            'firstname': 'John Doe',
            'host': '0.0.0.0',
            'id': '29401',
            'ip': '0.0.0.0',
            'lastlogin': '2019-11-06 11:18:04',
            'lastname': '',
            'newsletter': [''],
            'phonenumber': '',
            'postcode': '',
            'privacypolicy': [''],
            'state': ''}}
Let's see our service we just bought:
# get the bought services
services = requests.get('https://secure.veesp.com/api/service', auth=auth).json()
pprint(services)
This will output:
{'services': [{'id': '32723',
   'domain': 'test',
   'total': '4.000',
   'status': 'Active',
   'billingcycle': 'Monthly',
   'next_due': '2019-12-06',
   'category': 'Linux SSD VPS',
   'category_url': 'vps',
   'name': 'SSD Sandbox'}]}
Awesome, so this is a monthly Linux SSD VPS with a total cost of 4$.
You can also see the VM upgrade options and make an upgrade request automatically, always refer to their official documentation for more information.
Let's list all VMs we own:
# list all bought VMs
all_vms = requests.get("https://secure.veesp.com/api/service/32723/vms", auth=auth).json()
pprint(all_vms)
32723 is my service ID as shown above, so you should edit that with your own ID.
This will output some thing like this:
{'vms': {'18867': {'bandwidth': 100,
                   'burstmem': -512,
                   'cpus': '1',
                   'disk': 10,
                   'id': '18867',
                   'ip': ['hiddenip', ' 2a00:1838:37:3bd::ae42'],
                   'ipv6subnets': ['2a00:1838:37:3bd::/64'],
                   'label': 'test',
                   'memory': 512,
                   'pae': 0,
                   'password': 'hiddenpassword',
                   'pxe': 0,
                   'state': 'online',
                   'template': 'linux-debian-10-x86_64-min-gen2-v1',
                   'template_label': 'Debian Buster 10 64 bit',
                   'usage': {'bandwidth': {'free': 100,
                                           'percent': '0',
                                           'total': 100,
                                           'used': 0},
                             'disk': {'free': 10,
                                      'percent': '0',
                                      'total': 10,
                                      'used': 0},
                             'memory': {'free': 0,
                                        'percent': '0',
                                        'total': 0,
                                        'used': 0}}}}}
I've hid the real IP address and password of my VPS, but you can see I chose a linux debian distro with 10GB SSD disk, 512GB of memory and 1CPU, etc.
Now let's stop the VPS:
# stop a VM automatically
stopped = requests.post("https://secure.veesp.com/api/service/32723/vms/18867/stop", auth=auth).json()
print(stopped)
18867 is my VM ID, you should use your own ID of course.
Note that I'm using requests.post() function here instead, this function sends HTTP POST request to that URL.
The above code outputs:
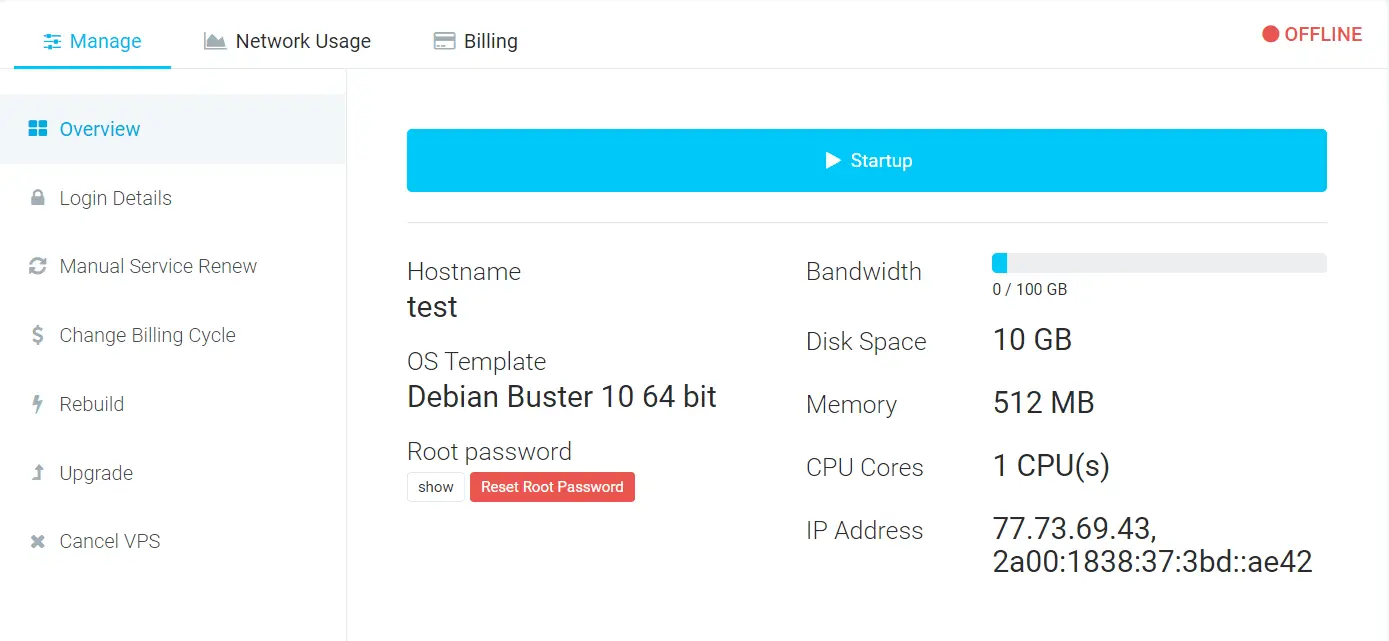
{'status': True}Great, that means it successfully stopped the VPS, let's see it in the Veesp dashboard:
Let's start it again:
# start it again
started = requests.post("https://secure.veesp.com/api/service/32723/vms/18867/start", auth=auth).json()
print(started)
Output:
{'status': True}That's cool, now you can use SSH access to it as it is online as shown in the dashboard:

To wrap up, you can make many cool things with this API, not just the ones that are seen in this tutorial, check their official website and their API documentation for more features. I hope this tutorial will make you aware of Web APIs and their benefit of automating various tasks, not just VPSs and dedicated servers.
Also, this tutorial introduces you to Web APIs, feel free to make your own scripts to automate various things of your own needs.
Happy Coding ♥
Ready for more? Dive deeper into coding with our AI-powered Code Explainer. Don't miss it!
View Full Code Switch My Framework


Got a coding query or need some guidance before you comment? Check out this Python Code Assistant for expert advice and handy tips. It's like having a coding tutor right in your fingertips!