Ready to take Python coding to a new level? Explore our Python Code Generator. The perfect tool to get your code up and running in no time. Start now!
In this article, we will aim to understand better the capabilities offered by Autoencoders and, more precisely, to explore the latent space. We will use the latter to perform feature extraction and dimensionality reduction. The implementation will be conducted using the Keras Functional API in Tensorflow 2.
The following is the command to install the required libraries for this tutorial:
$ pip3 install pandas sklearn tensorflowIf you have trouble installing TensorFlow, head to this page.
What is an Autoencoder?
Autoencoders are a type of neural network leveraged for unsupervised learning purposes that try to optimize a set of parameters to compress the input data into the latent space, spot patterns and anomalies, and improve comprehension of the behavior of the data as a whole.
Autoencoders are divided into two parts: an encoder and a decoder; they are used to perform "representation learning" which is a type of learning that enables a system to find the representations necessary for feature detection or classification from raw data using a class of machine learning techniques. Allowing a model to learn the features and apply them to a specific activity reduces the need for manual feature engineering.
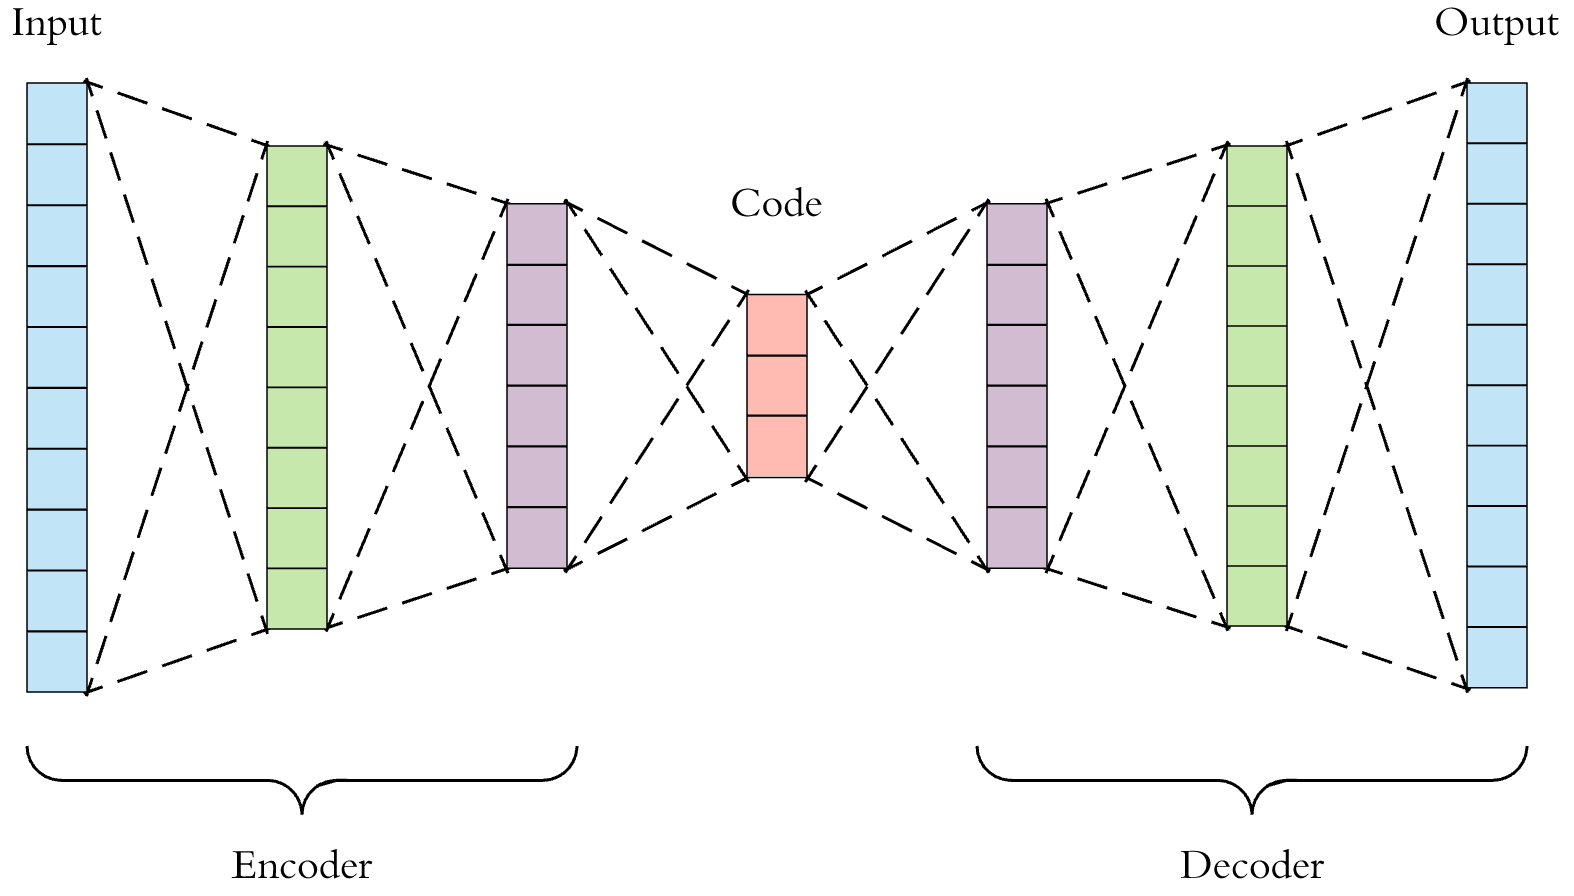
In representation learning, data is provided to the model, automatically learning the representation. The predictive model's performance is determined by how the features, distance function, and similarity function are represented in the data. Representation learning reduces high-dimensional data to low-dimensional data, which makes it simpler.
Different Use Cases of Autoencoders
In the industry, autoencoders are leveraged to solve different tasks, and some of them will be listed here:
- Denoising Autoencoders: such a model is used when we want to clean the input from some noisy patterns. It is trained by corrupting the input (using Gaussian noise, for instance) and using the original input (before noise introduction) as output.

Source: Deep AI Denoising AU
- Generation: a flavor of autoencoders called Variational Autoencoder (VAE) learns a probability distribution function to sample and generate new data.
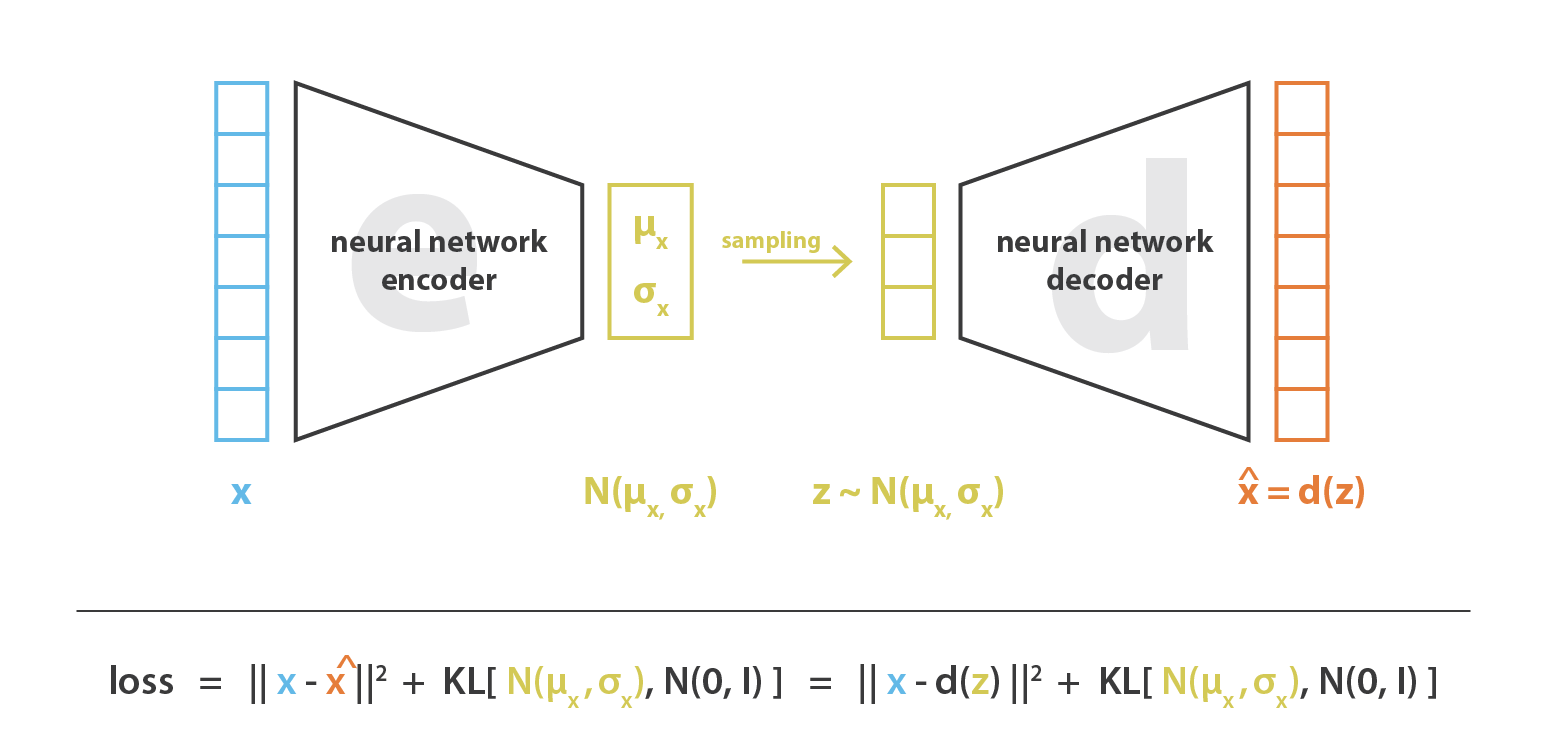
Source: Towards Data Science
- Dimensionality Reduction & Feature Selection: This article will further explore this.
What is the Latent Space?
It is the compressed feature space that contains the most relevant portions of the observed data and is located as the intermediate point between the encoder and decoder.
A latent space is formerly described as an abstract, multidimensional space that stores a valuable internal representation of events perceived from the outside. In the latent space, samples that resemble one another externally are placed next to one another.
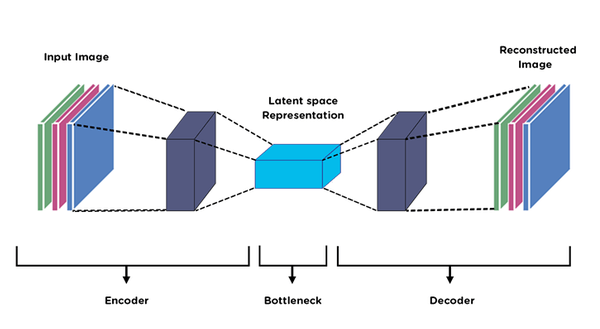
Source: Medium
Used Dataset
Within the scope of our tutorial, we will use the data from Kaggle's IOT Botnets Attack Detection Dataset, and we will more precisely be using the CSV files named gafgyt_danmini_doorbell_train.csv and gafgyt_danmini_doorbell_test.csv.
Implementation
We will need the following imports:
import pandas as pd
from sklearn.preprocessing import MinMaxScaler
from tensorflow.keras.models import Model
from tensorflow.keras.layers import Input, Dense, LeakyReLU- We will use Pandas to read the data and separate the feature columns from the label column.
- Sklearn will be used to preprocess and normalize the data.
- Keras will be used to build the autoencoder and then keep the encoder part for the feature extraction process.
For the preprocessing, we will apply MinMaxScaler normalization as presented here:
# Reading Data
df = pd.read_csv("gafgyt_danmini_doorbell_train.csv")
df_test = pd.read_csv("gafgyt_danmini_doorbell_test.csv")
# Keeping only features columns for the train set
df_features = df.loc[:, df.columns != "target"]
y_train = df.target
# Keeping only features for the test set
df_features_test = df_test.loc[:, df_test.columns != "target"]
y_test = df_test.target
# Applying the normalization on the train then test set
scaler = MinMaxScaler()
df_features = scaler.fit_transform(df_features)
df_features_test = scaler.transform(df_features_test)
Difference between Sequential and Functional API in Keras
The most straightforward way of creating models in Keras is by using the Sequential API imported from tensorflow.keras.models and it allows the user to just stack layers (from tensorflow.keras.layers) directly on each other.
Such a method is beneficial for creating fast and easy-to-use deep learning models and if we only want to have a high-level/abstract view of what's happening within the layers.
However, to have more flexibility in the interaction between layers and/or exploiting certain blocks of the model, we should leverage the functional API property of Keras.
The general format of the Functional API in Keras is the following: output_layer = type_layer(layer_hyperparameters)(input_layer)
Following this logic, the autoencoder is implemented as follows:
# Implementation of the Autoencoder Model
# input from df_features, dense64, leakyrelu, dense32, leakyrelu, dense16, tanh
input = Input(shape=df_features.shape[1:])
enc = Dense(64)(input)
enc = LeakyReLU()(enc)
enc = Dense(32)(enc)
enc = LeakyReLU()(enc)
# latent space with tanh
latent_space = Dense(16, activation="tanh")(enc)

dec = Dense(32)(latent_space)
dec = LeakyReLU()(dec)
dec = Dense(64)(dec)
dec = LeakyReLU()(dec)

dec = Dense(units=df_features.shape[1], activation="sigmoid")(dec)
# init model
autoencoder = Model(input, dec)
# compile model
autoencoder.compile(optimizer = "adam",metrics=["mse"],loss="mse")
# train model
autoencoder.fit(df_features, df_features, epochs=50, batch_size=32, validation_split=0.25)
Now, to retrieve the features learned until the latent space, we need to create a model up until the encoder part, which is done as follows:
encoder = Model(input, latent_space)Applying Feature Extraction & Dimensionality Reduction
Let us now try to apply the inference and extract features from the test set.
test_au_features = encoder.predict(df_features_test)And if we want to check the shape of it, we will notice that it has 16 features as the number of units the latent space layer has (Dense(16)).
print(test_au_features.shape)Output:
(15647, 16)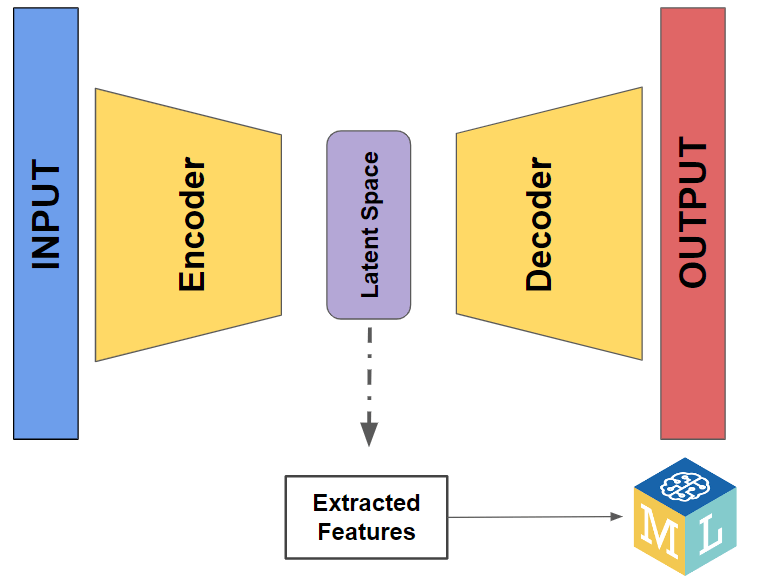
Conclusion
Throughout this article, we have learned:
- What is an Autoencoder, and its different use cases.
- Difference between Sequential API and Functional API in Keras.
- Trained an autoencoder and then used its trained encoding part to extract features.
Learn also: Feature Selection using Scikit-Learn in Python
Happy learning ♥
Let our Code Converter simplify your multi-language projects. It's like having a coding translator at your fingertips. Don't miss out!
View Full Code Generate Python Code


Got a coding query or need some guidance before you comment? Check out this Python Code Assistant for expert advice and handy tips. It's like having a coding tutor right in your fingertips!