Before we get started, have you tried our new Python Code Assistant? It's like having an expert coder at your fingertips. Check it out!
Tkinter is one of those great built-in Python libraries that has been around for a long time; it is used to create snazzy graphical user interfaces (GUIs) for desktop applications. This article will teach you to build a currency converter application using the Tkinter library and ExchangeRate API.
If you wish to use another source of data, then check this tutorial, where we used five different sources for currency conversion, including Fixer API, Yahoo Finance, and more.
The ExchangeRate API is a real-time currency API that is both free and pro, it supports currency conversion rates for 161 currencies, and for a freemium account, you are required to make 250 requests per month, so using a free account will save the day for us.
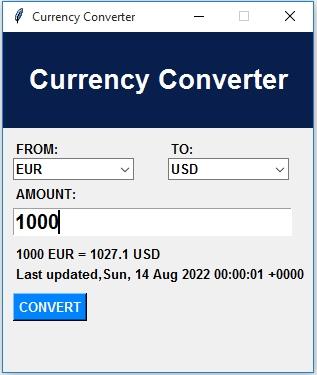
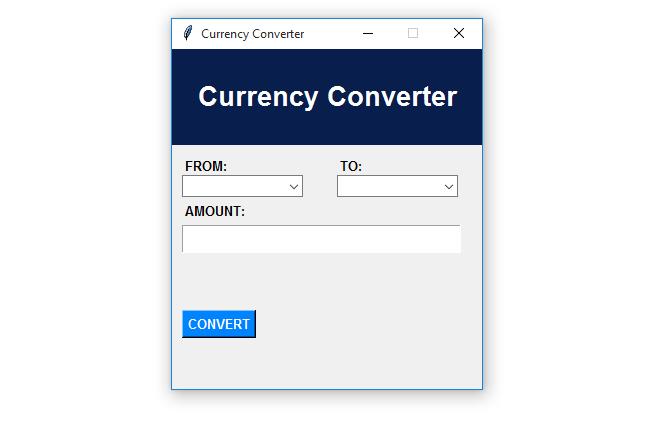
At the end of this article, we are going to build an application that looks as follows:
Here is the table of contents:
- Setting up the Project
- Design the Graphical User Interface (GUI)
- Getting the API Key for the ExchangeRate API
- Populating the Combo Boxes with Currencies
- Implementing the Currency Conversion Functionality
- Catching Exceptions
- Conclusion
Setting up the Project
First things first, let us set up the project. We will start by creating the virtual environment and then installing the Python requests library.
Create a folder named currencyconverter and cd into the folder:
$ mkdir currencyconverter
$ cd currencyconverter
We will create the virtual environment in this folder and name it env or any name of your choice:
$ python -m venv envActivate the virtual environment, on Windows:
$ .\env\Scripts\activate.batOn Linux/macOS:
$ source env/bin/activateNow that the virtual environment is activated, let's install the requests library:
$ pip install requestsDesigning the Graphical User Interface (GUI)
In this section, we will start designing the GUI for the application from the ground up. First of all, create a file named currency_converter.py this is not a convention; you can name it whatever you want:

We will start by creating the main window of the application. Open the file and paste this code:
# importing everything from tkinter
from tkinter import *
# importing ttk widgets from tkinter
from tkinter import ttk

# creating the main window
window = Tk()
# this gives the window the width(310), height(320) and the position(center)
window.geometry('310x340+500+200')
# this is the title for the window
window.title('Currency Converter')
# this will make the window not resizable, since height and width is FALSE
window.resizable(height=FALSE, width=FALSE)
# this runs the window infinitely until it is closed
window.mainloop()
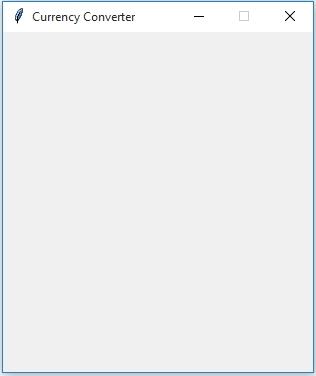
In the above code, we are creating the main window using the Tk() function that comes with Tkinter. We then define the dimensions of the window with the geometry() function. To give the window a title, we are using the title() function.
We also use the resizable() function with its attributes set to FALSE to make the window non-resizable. Finally, the mainloop() function will keep the app's window open until the user closes it.
If you run this program, you will get this output:
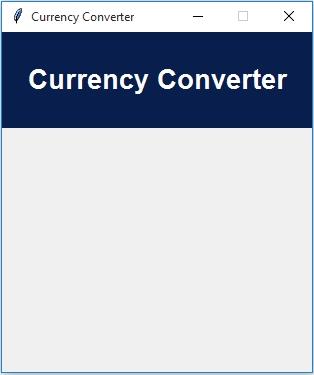
Now let us create two frames, the top frame and the button frame. The top frame will contain the text "Currency Converter" and it should look like this:

Just after this line of code:
window.resizable(height=FALSE, width=FALSE)Paste these lines of code:
# colors for the application
primary = '#081F4D'
secondary = '#0083FF'
white = '#FFFFFF'

# the top frame
top_frame = Frame(window, bg=primary, width=300, height=80)
top_frame.grid(row=0, column=0)
# label for the text Currency Converter
name_label = Label(top_frame, text='Currency Converter', bg=primary, fg=white, pady=30, padx=24, justify=CENTER, font=('Poppins 20 bold'))
name_label.grid(row=0, column=0)
We added some colors and created the top frame containing the label. The top frame must be placed inside the main window that we have just created; the frame is taking three other attributes, bg, width, and height.
The output of this code is this:
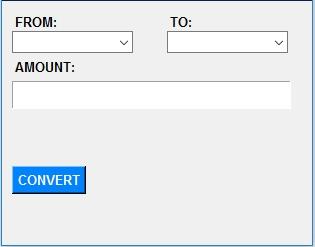
Let us now create the bottom frame; this frame will contain widgets like labels, comboboxes, entry, and a button. It will look as follows
Below the name_label paste this code:
# the top frame
top_frame = Frame(window, bg=primary, width=300, height=80)
top_frame.grid(row=0, column=0)
# label for the text Currency Converter
name_label = Label(top_frame, text='Currency Converter', bg=primary, fg=white, pady=30, padx=24, justify=CENTER, font=('Poppins 20 bold'))
name_label.grid(row=0, column=0)
# the bottom frame
bottom_frame = Frame(window, width=300, height=250)
bottom_frame.grid(row=1, column=0)
# widgets inside the bottom frame
from_currency_label = Label(bottom_frame, text='FROM:', font=('Poppins 10 bold'), justify=LEFT)
from_currency_label.place(x=5, y=10)
to_currency_label = Label(bottom_frame, text='TO:', font=('Poppins 10 bold'), justify=RIGHT)
to_currency_label.place(x=160, y=10)
# this is the combobox for holding from_currencies
from_currency_combo = ttk.Combobox(bottom_frame, width=14, font=('Poppins 10 bold'))
from_currency_combo.place(x=5, y=30)
# this is the combobox for holding to_currencies
to_currency_combo = ttk.Combobox(bottom_frame, width=14, font=('Poppins 10 bold'))
to_currency_combo.place(x=160, y=30)
# the label for AMOUNT
amount_label = Label(bottom_frame, text='AMOUNT:', font=('Poppins 10 bold'))
amount_label.place(x=5, y=55)
# entry for amount
amount_entry = Entry(bottom_frame, width=25, font=('Poppins 15 bold'))
amount_entry.place(x=5, y=80)
# an empty label for displaying the result
result_label = Label(bottom_frame, text='', font=('Poppins 10 bold'))
result_label.place(x=5, y=115)
# an empty label for displaying the time
time_label = Label(bottom_frame, text='', font=('Poppins 10 bold'))
time_label.place(x=5, y=135)
# the clickable button for converting the currency
convert_button = Button(bottom_frame, text="CONVERT", bg=secondary, fg=white, font=('Poppins 10 bold'))
convert_button.place(x=5, y=165)
We are creating a bottom frame; just like the top frame, we will place the bottom frame inside the main window. Inside this frame, we will place the remaining widgets, the two labels, the two combo boxes, the entry, and the button.
Running the code, you will get this output:
Congratulations on successfully designing the graphical user interface of the application!
Getting the API Key for the ExchangeRate API
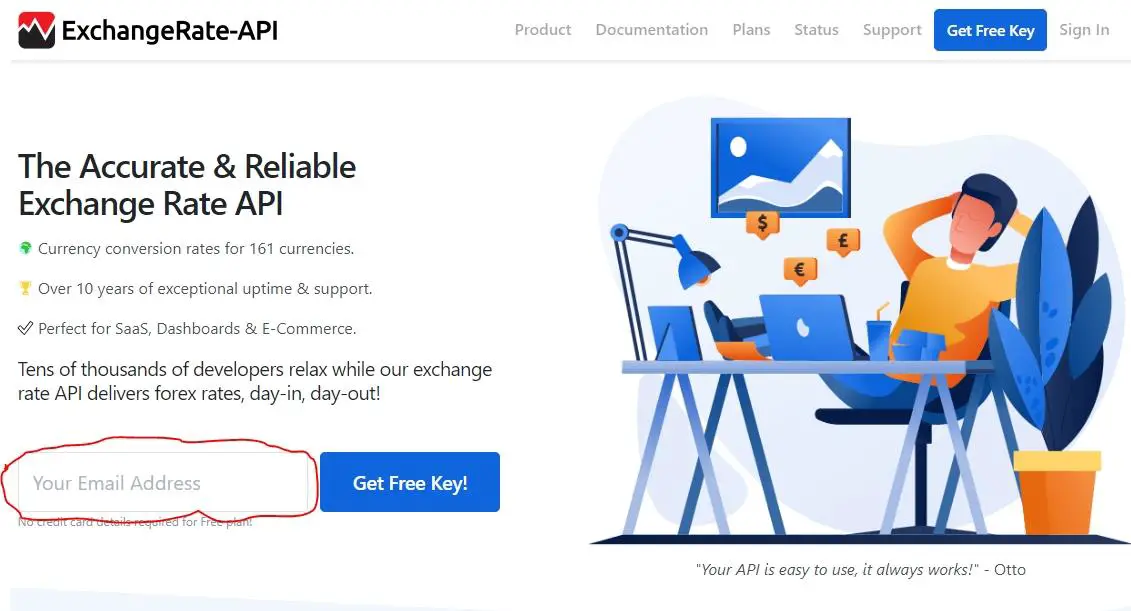
The ExchangeRate API requires us to have an API key that will enable us to make successful requests to it. To get the API Key, go to this URL and enter your email in the email field:
Click the Get Free Key button, and you will be prompted to create an account. After providing your credentials, it will take you to this window:
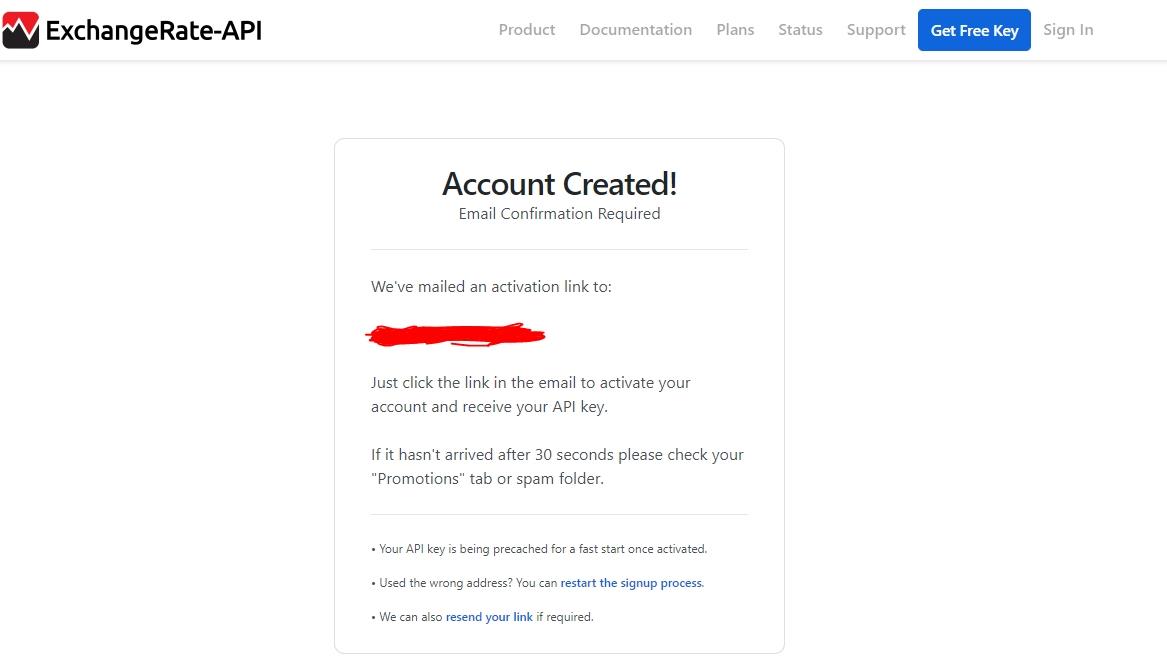
Sign in to your email account and confirm your email address to activate your ExchangeRate API account. You will find the email in the promotions folder; if not, check the primary or spam folder.
If you have confirmed successfully, you will be taken to the ExchangeRate API dashboard, and in your dashboard, you will also find your personal secret API Key. For security reasons, this key is not to be shared.
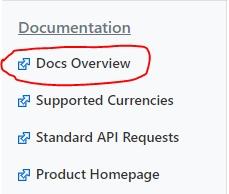
In the dashboard, on the side navigation bar under Documentation, click the Docs Overview link:
Or visit this URL. Here we will focus on two requests, standard and pair conversion:
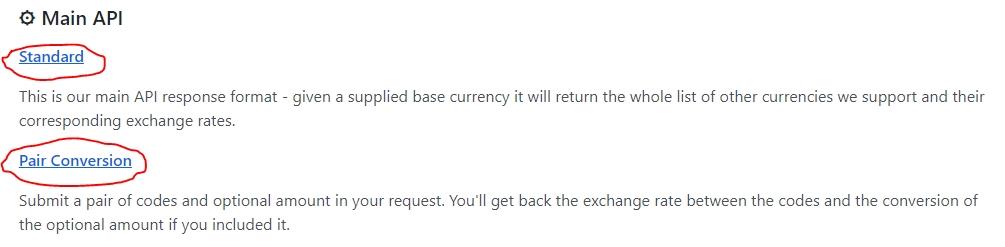
The Standard request will return the whole list of currencies that the API provides, and it takes this format:
https://v6.exchangerate-api.com/v6/YOUR-API-KEY/latest/USDOn the other hand, the Pair Conversion request will convert two given currencies, and it takes this format:
https://v6.exchangerate-api.com/v6/YOUR-API-KEY/pair/EUR/GBPPopulating the Combo Boxes with Currencies
We have created the combo boxes, but they hold no values, so let's populate them with the currencies so that the user will select currencies from them. For this, we will use the Standard request to give us the list of currencies. Below your imports, paste these lines of code:
import requests
import json

API_KEY = "put your API key here"
# the Standard request url
url = f'https://v6.exchangerate-api.com/v6/{API_KEY}/latest/USD'
# making the Standard request to the API and converting the request to json
response = requests.get(f'{url}').json()
# converting the currencies to dictionaries
currencies = dict(response['conversion_rates'])
Make sure to replace the API_KEY with your real API Key.
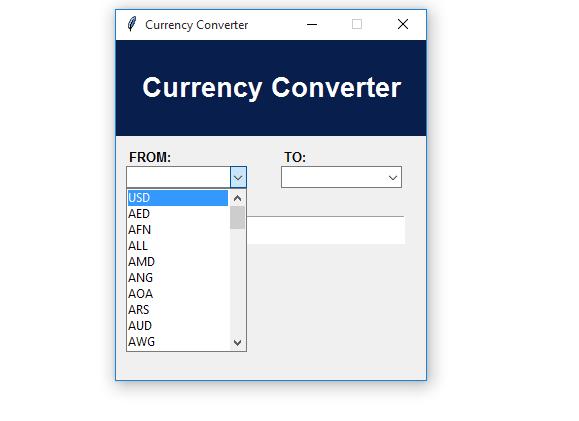
Scroll down to where you have defined the two combo boxes. The combo box takes an argument called values and its data type must be a list. Now make the first combo box look like this:
from_currency_combo = ttk.Combobox(bottom_frame, values=list(currencies.keys()), width=14, font=('Poppins 10 bold'))As you can notice, we have added the values argument to the combo box, and it is taking all the keys of the currencies dictionary in the form of a list.
Testing this:
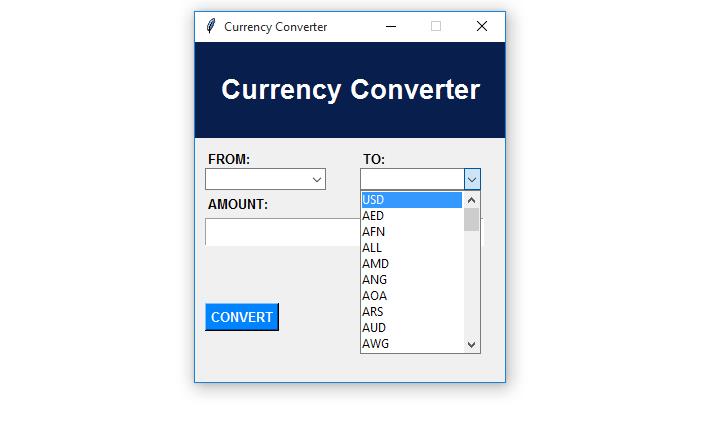
Let us also populate the second combo box:
to_currency_combo = ttk.Combobox(bottom_frame, values=list(currencies.keys()), width=14, font=('Poppins 10 bold'))Result:
Implementing the Currency Conversion Functionality
Now that all the combo boxes are working, it is time we implement the convert currency functionality. All this will be done inside a function. Remember to do a Pair Conversion; we use this URL:
https://v6.exchangerate-api.com/v6/YOUR-API-KEY/pair/EUR/GBPCreating the function for converting the two pairs of currencies just above the:
window = Tk()Paste the following code:
def convert_currency():
    # getting currency from first combobox
    source = from_currency_combo.get()
    # getting currency from second combobox
    destination = to_currency_combo.get()
    # getting amound from amount_entry
    amount = amount_entry.get()
    # sending a request to the Pair Conversion url and converting it to json
    result = requests.get(f'https://v6.exchangerate-api.com/v6/{API_KEY}/pair/{source}/{destination}/{amount}').json()
    # getting the conversion result from response result
    converted_result = result['conversion_result']
    # formatting the results
    formatted_result = f'{amount} {source} = {converted_result} {destination}'
    # adding text to the empty result label
    result_label.config(text=formatted_result)
    # adding text to the empty time label
    time_label.config(text='Last updated,' + result['time_last_update_utc'])
The convert_currency() function is getting currencies from the two combo boxes and the amount from the entry using the get() function. These values and the API key are passed to the API request. The result of the request is converted to JSON using the json() function.
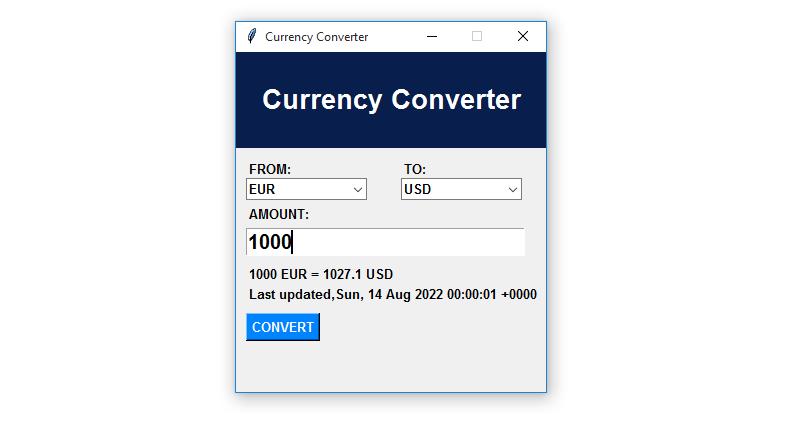
This function will be triggered when we click the Convert button, so we need to tell the button to trigger this function. In Tkinter, buttons take a command argument with a function as a value, so we will make the button look like this:
convert_button = Button(bottom_frame, text="CONVERT", bg=secondary, fg=white, font=('Poppins 10 bold'), command=Convert_Currency)Now the button knows what function to trigger after it is clicked, let us test this, run the program and fill the combo boxes with data (from EUR to USD) and enter an amount of 1000, click the button, and make sure you get the below output:
Catching Exceptions
The application runs successfully, but what if the user clicks the Convert button without filling the required fields? The answer is obvious, the application will throw an error, but the user will not see this error since it will occur in the backend.
So next, we need to improve the application's user experience; we will make it possible for the user to know what errors have occurred. In the file, under the imports section, paste this code:
# tkinter message box for displaying errors
from tkinter.messagebox import showerror
The code inside the convert_currency() function will be inside a try/except block. The code wrapped inside the try statement will run if there are no exceptions. Otherwise, the code inside the except statement will get executed:
def convert_currency():
    # will execute the code when everything is ok
    try:
        # getting currency from first combobox
        source = from_currency_combo.get()
        # getting currency from second combobox
        destination = to_currency_combo.get()
        # getting amound from amount_entry
        amount = amount_entry.get()
        # sending a request to the Pair Conversion url and converting it to json
        result = requests.get(f'https://v6.exchangerate-api.com/v6/{API_KEY}/pair/{source}/{destination}/{amount}').json()
        # getting the conversion result from response result
        converted_result = result['conversion_result']
        # formatting the results
        formatted_result = f'{amount} {source} = {converted_result} {destination}'
        # adding text to the empty result label
        result_label.config(text=formatted_result)
        # adding text to the empty time label
        time_label.config(text='Last updated,' + result['time_last_update_utc'])
    # will catch all the errors that might occur
    # ConnectionTimeOut, JSONDecodeError etc
    except:
        showerror(title='Error', message='An error occurred!!')
Rerun the application, but this time around, do not fill the required fields and click the Convert button. We will get this output:
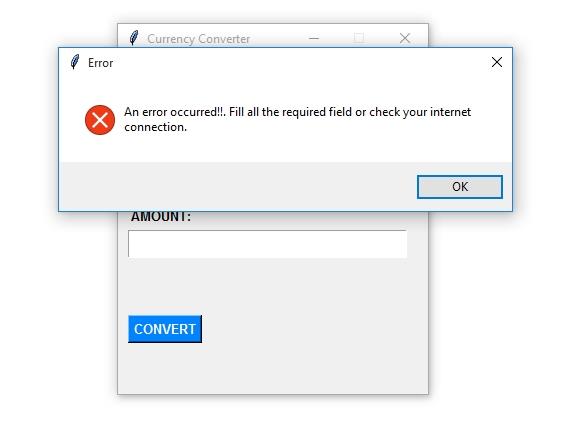
Now the application can catch all the errors and display them to the user.
Conclusion
Congratulations on successfully building a currency converter GUI app. You can get the complete code for this application here.
That's it for this tutorial! We hope you enjoyed this article on how to build a currency converter application using Python, Tkinter, and ExchangeRate API. We hope it helps you with your future Python projects.
In this tutorial, we have built five different currency converters using ExchangeRate API, Fixer API, Yahoo Finance, Xe, and X-RATES. Make sure to check it out and merge it with this GUI.
Learn also: How to Make a Calculator with Tkinter in Python.
Happy coding ♥
Save time and energy with our Python Code Generator. Why start from scratch when you can generate? Give it a try!
View Full Code Switch My Framework


Got a coding query or need some guidance before you comment? Check out this Python Code Assistant for expert advice and handy tips. It's like having a coding tutor right in your fingertips!