Welcome! Meet our Python Code Assistant, your new coding buddy. Why wait? Start exploring now!
A QR code, short for Quick Response code, is a machine-readable barcode used to store different data types and is designed in a 2D pixelated form.
With technology advancing every second, QR codes have proven to be of the essence in our day-to-day lives; they now have a wide range of applications in different fields. For example, QR codes are used for making online payments, sharing Wi-Fi passwords, used on event posters, checking different products’ information, etc.
This article will discuss building a GUI QR code generator and detector using Python. We will start by discussing the different Python libraries we will use in this project. We will also provide a walk-through of the code so that you can understand how everything works. By the end of this article, you will have a fully functional QR code generator and detector with a graphical user interface that you can use on your own.
Please note that if you want only the QR code generation and reading functionality, we have a tutorial for that. This tutorial aims to build a fully functional GUI app for QR code generation and detection.
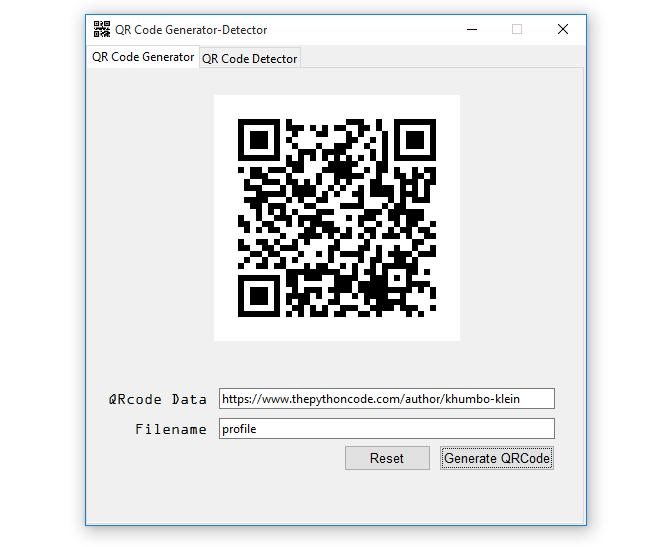
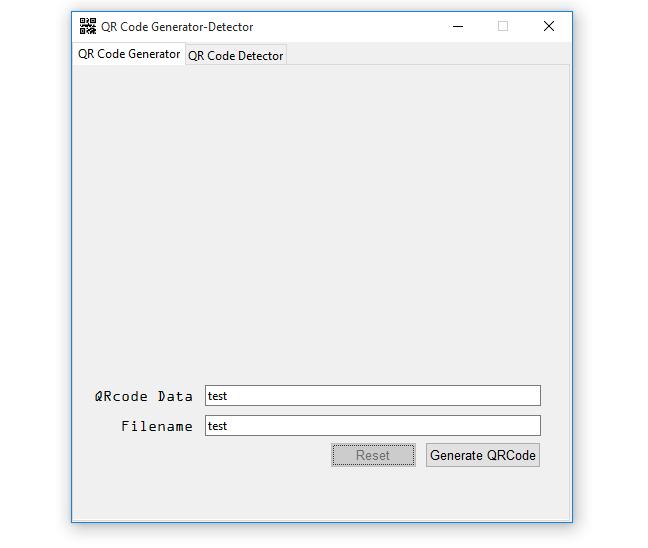
At the end of this clear-cut article, this is the application that we are going to build:
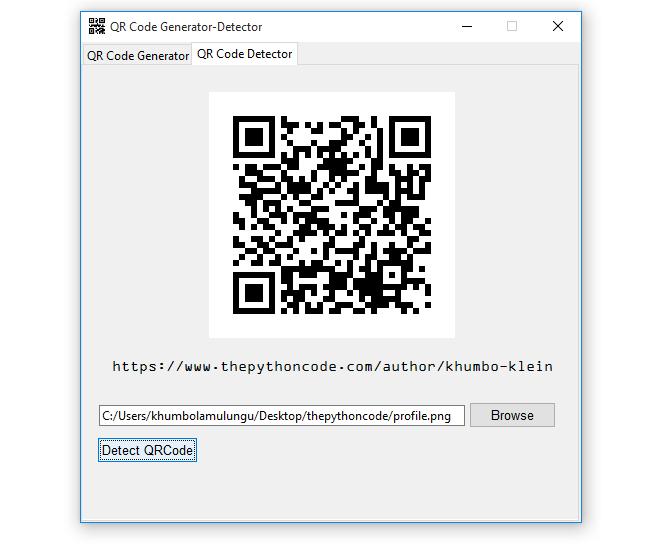
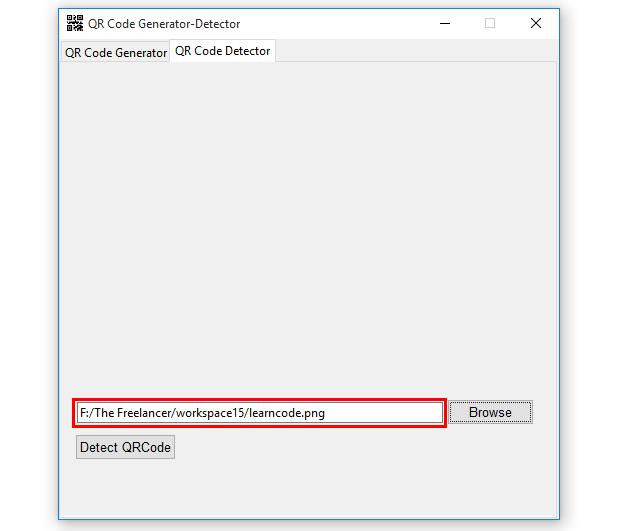
And:
We will build every piece of this cool application from the ground up, so if you are ready and excited, let's dive in!
Table of contents:
- Setting up the Environment
- Importing all the Required Modules
- Designing the Graphical User Interface
- Creating the Main Window and Adding the Main Window’s Icon
- Defining all the Widgets Styles to be Used
- Creating the Notebook and the Two Tabs
- Adding a Canvas to Each Tab
- Adding Widgets to the QR Code Generator Tab
- Adding Widgets to the QR Code Detector Tab
- Implementing the Close Application Functionality
- Implementing the Application’s Functionalities
- Conclusion
Setting up the Environment
The first thing we will start with is setting up the environment; this will involve installing all the required modules. So in your terminal, run the command:
$ pip install qrcode opencv-pythonImporting all the Required Modules
Now that we are done setting up the project's environment, let us start working on the actual code.
First, let us create a new Python file and name it qrcode_generator_detector.py; you are free to name it whatever you want; make sure the name itself makes sense. Open the file and do the following imports:
# this imports everything from the tkinter module
from tkinter import *
# importing the ttk module from tkinter that's for styling widgets
from tkinter import ttk
# importing message boxes like showinfo, showerror, askyesno from tkinter.messagebox
from tkinter.messagebox import showinfo, showerror, askyesno
# importing filedialog from tkinter
from tkinter import filedialog as fd
# this imports the qrcode module
import qrcode
# this imports the cv2 module
import cv2
Let us break down the imports in the above code snippet from the first line to the last. We're first of all importing everything from tkinter, this is done using the asterisk(*) symbol, then we import the ttk module, which is for styling the widgets (labels, entries, buttons, etc) for the application.
We are also importing message boxes like showerror, showinfo, and askyesno, these are for displaying certain helpful messages to the user when a certain action has happened in the application, and the filedialog will help us in browsing and specifying the file paths.
Our last two imports are the qrcode and the cv2 modules, the qrcode module is for generating the QR codes and the cv2 module is for detecting these QR codes respectively.
Designing the Graphical User Interface
In this section, we will start designing the app's GUI. The designing process will be in-depth so that you understand what is going on and how powerful is the Tkinter module when it comes to designing snazzy graphical user interfaces.
Creating the Main Window and Adding the Main Window’s Icon
So our first task in the GUI design process is creating the main window and adding an icon. Just below the imports, paste these lines of code:
# creating the window using the Tk() class
window = Tk()
# creates title for the window
window.title('QR Code Generator-Detector')
# adding the window's icon
window.iconbitmap(window, 'icon.ico')
# dimensions and position of the window
window.geometry('500x480+440+180')
# makes the window non-resizable
window.resizable(height=FALSE, width=FALSE)
# run the main window infinitely
window.mainloop()
Here, in the snippet of code above, we are creating the main window using the Tkinter built-in Tk() class, we are then giving a title to the main window using the title() function.
To add an icon to the main window, we are using the iconbitmap() function which takes window and the actual icon as arguments, here, make sure that the icon file is in the same folder as the Python file:
![]()
The icon file can also be located anywhere; you only need to specify its path properly in the iconbitmap() function to use it.
The geometry() function is for giving dimensions and position to the main window, 500x480 is for width and height, respectively and 440+180 is for positioning the main window horizontally and vertically. To make the main window non-resizable, we use the resizable() function whose height and width are set to FALSE, this will disable the minimize or maximize button of the main window.
Finally, we are calling the mainloop() function, this enables the main window to run in an infinite mode until the window is closed.
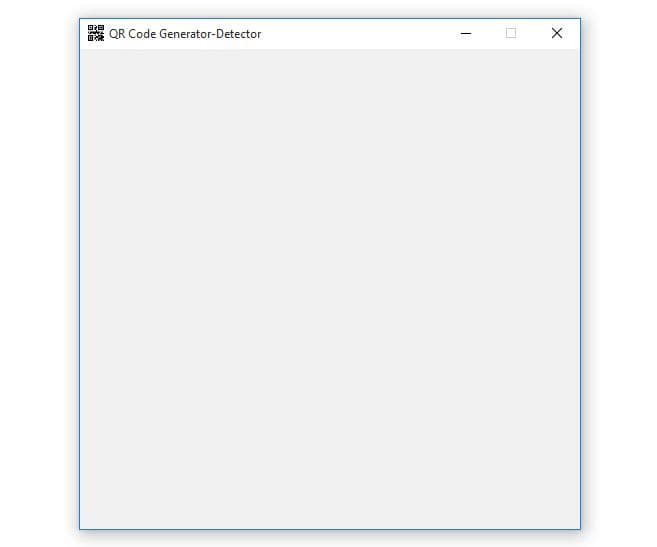
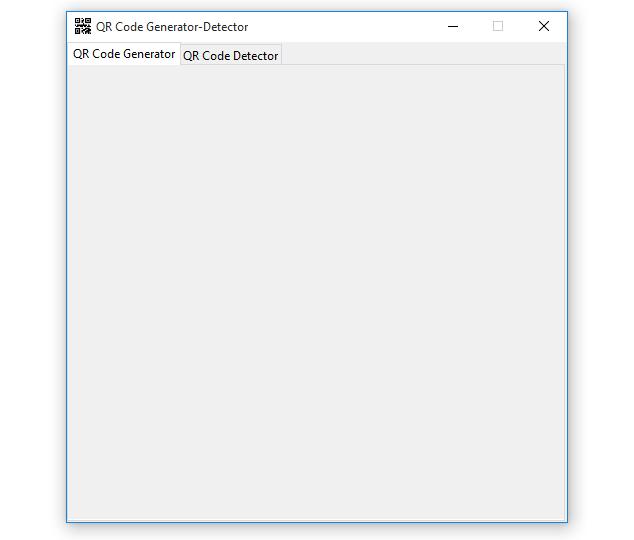
To run the program, use this command:
$ python qrcode_generator_detector.pyAnd this is the output you will get:
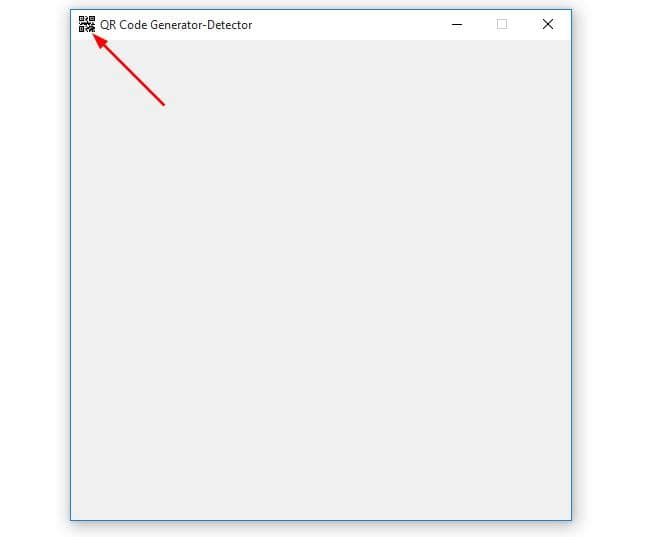
And on the top left corner, we have the new icon added:
Defining all the Widgets Styles to be Used
Now that we have taken care of the main window, let us define all the widget styles that we will use. We will define styles for the following widgets, labels, entries, and buttons.
So below this line of code:
window.resizable(height=FALSE, width=FALSE)Add this code:
"""Styles for the widgets, labels, entries, and buttons"""
# style for the labels
label_style = ttk.Style()
label_style.configure('TLabel', foreground='#000000', font=('OCR A Extended', 11))
# style for the entries
entry_style = ttk.Style()
entry_style.configure('TEntry', font=('Dotum', 15))
# style for the buttons
button_style = ttk.Style()
button_style.configure('TButton', foreground='#000000', font=('DotumChe', 10))
For the sake of being on the same page, let us break down the code above. To create the style object, we are using the ttk.Style() built-in class for the ttk module, in our case we are creating three style objects, for all the labels, entries, and buttons.
To configure these styles, we are using the configure() function, for the label style the configure() function takes three arguments, TLabel as the style name, foreground, and font. For the entry style, it takes the style name TEntry and font, and finally, for the button style, the function takes TButton, foreground, and font.
Creating the Notebook and the Two Tabs
We will now create the Notebook widget and the two tabs; the Notebook is just the tab container or tab control. Below the styles’ definition code, paste this code:
# creating the Notebook widget
tab_control = ttk.Notebook(window)
# creating the two tabs with the ttk.Frame()
first_tab = ttk.Frame(tab_control)
second_tab = ttk.Frame(tab_control)
# adding the two tabs to the Notebook
tab_control.add(first_tab, text='QR Code Generator')
tab_control.add(second_tab, text='QR Code Detector')
# this makes the Notebook fill the entire main window so that its visible
tab_control.pack(expand=1, fill="both")
We are creating a notebook using the ttk.Notebook() function and adding it to the main window. Then we create the two tabs using the ttk.Frame() function; these two are added to the notebook.
To add the two tabs to the notebook, we use the add() function, which takes the tab and text as arguments. We have named the tabs QR Code Generator and QR Code Detector, the first tab is for generating the QR codes, and the second is for detecting the QR codes.
And finally, we are packing the notebook using the pack() function, and to make the two tabs visible, we pass the expand and fill arguments with 1 and both as values respectively to the pack() function.
With the above code added, this is the output that we get when we run the program:
If you switch between the two tabs, you will notice that they are both empty, we will add their respective widgets just in a moment.
Adding a Canvas to Each Tab
Before we add widgets to the tabs, we should create two canvases and add them to each. These canvases will be containers for the widgets for each tab, and they will help us flexibly align the widgets. Below this line of code:
tab_control.pack(expand=1, fill="both")Add this code:
# creates the canvas for containing all the widgets in the first tab
first_canvas = Canvas(first_tab, width=500, height=480)
# packing the canvas to the first tab
first_canvas.pack()
# creates the canvas for containing all the widgets in the second tab
second_canvas = Canvas(second_tab, width=500, height=480)
# packing the canvas to the second tab
second_canvas.pack()
Here, we are creating two canvas widgets using the Canvas() function, the first canvas is placed in the first tab while the second canvas is placed in the second tab, and both of them have a width of 500 and a height of 480.
If you run the program you will not see anything new, but know that the canvas fits as below according to the dimensions we have given it:
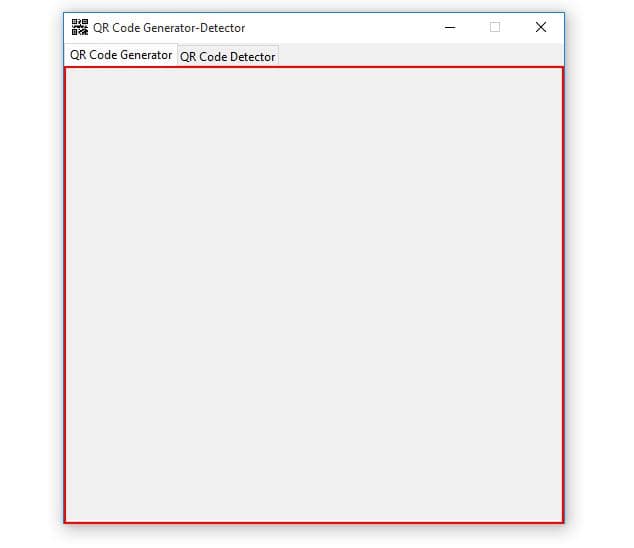
If you are more eager to see how the canvas fits, pass the background argument with a color value to the Canvas() function.
Adding Widgets to the QR Code Generator Tab
After taking care of the canvases, it is now time we turn our attention to adding widgets to the QR Code Generator tab. Just a reminder, this tab will handle the QR code generation.
The Image Label
The first widget that we will add is the image label for displaying the QR code image after its generation. Below the canvases, paste this code:
"""Widgets for the first tab"""

# creating an empty label
image_label1 = Label(window)
# adding the label to the canvas
first_canvas.create_window(250, 150, window=image_label1)
In the code above, we are creating an empty label using the Label() function and adding it to the canvas using the create_window() function. The function takes 250, and 150, and the widget, 250 and 150, is for positioning the label inside the canvas.
Two Labels and Two Entries
Let us move on to adding the two labels and entries; we will start with the first row with a label and an entry. So below the image label, add these lines of code:
# creating a ttk label
qrdata_label = ttk.Label(window, text='QRcode Data', style='TLabel')
# creating a ttk entry
data_entry = ttk.Entry(window, width=55, style='TEntry')
# adding the label to the canvas
first_canvas.create_window(70, 330, window=qrdata_label)
# adding the entry to the canvas
first_canvas.create_window(300, 330, window=data_entry)
Here we are creating two widgets, the label for displaying text and the entry for receiving data from the user using ttk.Label() and ttk.Entry() respectively.
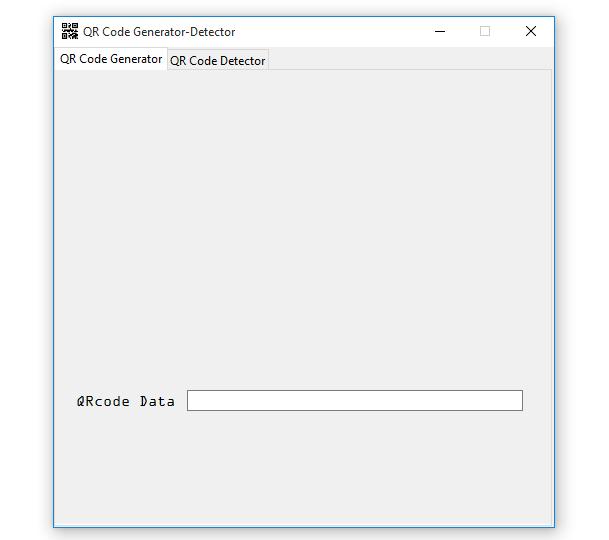
The ttk.Label() takes three arguments, the window, text, and style, while the ttk.Entry() is taking the window, width, and style also. Finally, we add these widgets to the canvas via the create_window() function, which takes 300 and 330 to position the widget.
The output for the above-added code is this:
Let's now add the label and the entry in the second row. Below the label and the entry in the first row, paste the following code:
# creating a ttk label
filename_label = ttk.Label(window, text='Filename', style='TLabel')
# creating a ttk entry
filename_entry = ttk.Entry(width=55, style='TEntry')
# adding the label to the canvas
first_canvas.create_window(84, 360, window=filename_label)
# adding the entry to the canvas
first_canvas.create_window(300, 360, window=filename_entry)
In this snippet of code, we are again creating the label and entry using the two functions, the ttk.Label() and ttk.Entry(). The window, text, and style are arguments for ttk.Label() and for ttk.Entry(), width, and style are arguments. To add these two widgets to the canvas, we are using the create_window() function.
Running the program, we get the output:
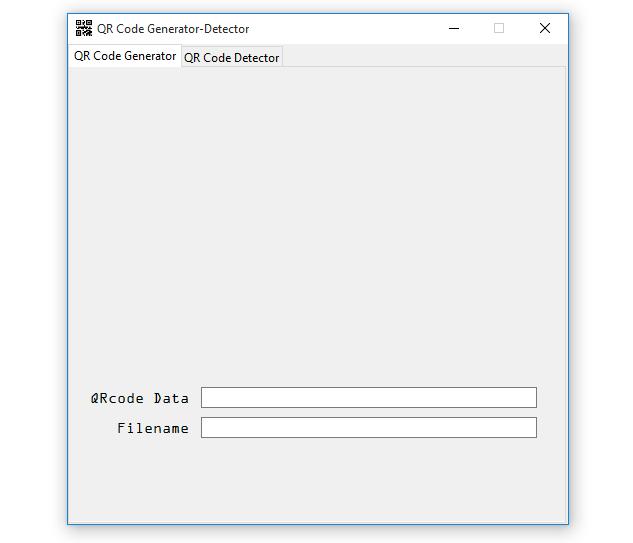
So far, so good; the application is taking its expected shape!
Two Buttons
Let us finish adding widgets to the QR code generator tab by creating the final two buttons. The first button is for resetting or clearing the image label, and the second is for generating the QR code itself. Below the second row of widgets, add this code:
# creating the reset button in a disabled mode
reset_button = ttk.Button(window, text='Reset', style='TButton', state=DISABLED)
# creating the generate button
generate_button = ttk.Button(window, text='Generate QRCode', style='TButton')
# adding the reset button to the canvas
first_canvas.create_window(300, 390, window=reset_button)
# adding the generate button to the canvas
first_canvas.create_window(410, 390, window=generate_button)
With this code snippet, we are creating two buttons using the ttk.Button() function, all the arguments are the same for both buttons, window, text, and style except state for the Reset button. Here we want to have the Reset button enabled only when the QR code has been generated otherwise DISABLED will be its first state after running the application.
The result we get after adding the above code is this:
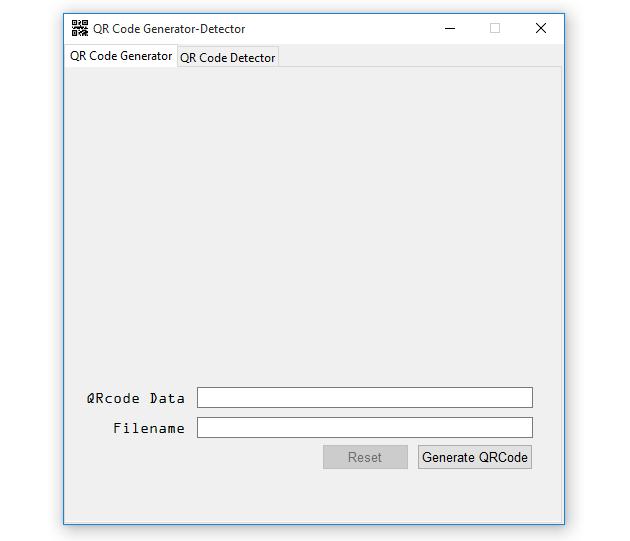
We are now done adding widgets to the first tab.
Adding Widgets to the QR Code Detector Tab
In this part of the article, we will start adding widgets to the QR Code Detector tab, and these are the widgets that are supposed to be taken care of, image label, data label, entry, Browse button, and the Detect button.
Image and the Data Labels
The first widgets are the image label, which displays the QR code image just like in the first tab, and the data label for displaying the QR code data after detection. In the file, just below this line of code:
first_canvas.create_window(410, 390, window=generate_button)Paste this:
"""Below are the widgets for the second tab"""
# creating the second image label
image_label2 = Label(window)
# creating the data label
data_label = ttk.Label(window)
# adding the second image label to the second_canvas
second_canvas.create_window(250, 150, window=image_label2)
# adding the data label to the canvas
second_canvas.create_window(250, 300, window=data_label)
Here, we are creating two empty labels using Label() and ttk.Label() functions, one for displaying the QR code image and the other for displaying the QR code data. The argument for both functions is window then these two labels are added to the canvas inside the second tab via the create_window() function.
The File Entry and the Browse Button
Let us now create the entry for the file and the button for browsing the files. Below the labels, add this code:
# creating the file_entry
file_entry = ttk.Entry(window, width=60, style='TEntry')
# creating the browse button
browse_button = ttk.Button(window, text='Browse', style='TButton')

# adding the entry to the second canvas in the second tab
second_canvas.create_window(200, 350, window=file_entry)
# adding the generate button to the second canvas in the second tab
second_canvas.create_window(430, 350, window=browse_button)
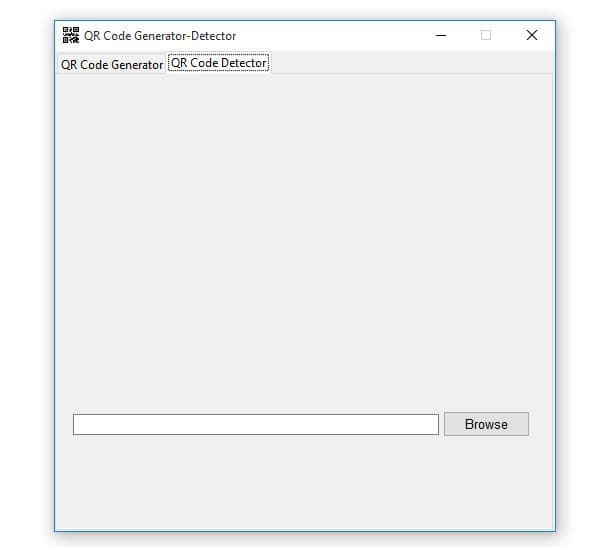
In the code snippet, we are creating the file entry and the browse button using the ttk.Entry() and the ttk.Button() functions. As with the other ttk entries, the ttk.Entry() function is taking window, width, and style as arguments, and the same applies to the ttk.Button() function which takes window, text, and style as arguments. Finally, both these widgets are added to the second tab’s canvas via the create_window() function.
Running the program, we get the following output:
 The Detect Button
Let's now add the last widget, which is the Detect button, below the file entry and browse button code, add this code:
# creating the detect button
detect_button = ttk.Button(window, text='Detect QRCode', style='TButton')
# adding the detect button to the canvas
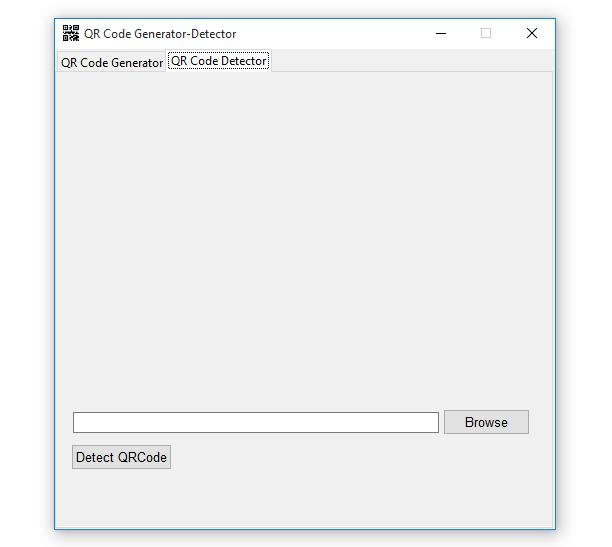
second_canvas.create_window(65, 385, window=detect_button)
With the above code added, this is what we get after running the program:
Implementing the Close Application Functionality
We are almost done designing the application’s GUI. Still, as it is right now, the application closes promptly when the user clicks the close button, so we want to make it possible for the application to ask the user whether to close it or not. For this, we will create a function, so below the imports, paste this code:
# the function to close the window
def close_window():
    # this will ask the user whether to close or not
    # if the value is yes/True the window will close
    if askyesno(title='Close QR Code Generator-Detector', message='Are you sure you want to close the application?'):
        # this destroys the window
        window.destroy()
In the code above, we are creating a function called close_window(), and inside this function, we have the askyesno message box, this message box evaluates to two boolean values True or False. If the user provides a yes which evaluates to True, the destroy() function will be executed, and the main window will be closed. If the askyesno value is False the window will still be running.
The function for closing the window has been taken care of, but this is not enough to close the window for us. We need to let the main window listen for the close window event, so to do that, below this line of code:
window.resizable(height=FALSE, width=FALSE)Add this line of code:
# this is for closing the window via the close_window() function
window.protocol('WM_DELETE_WINDOW', close_window)
The protocol() function takes two arguments, WM_DELETE_WINDOW, and the close_window function. With the help of WM_DELETE_WINDOW the function will listen for the close main window event, which is emitted whenever the user clicks the close button of the main window.
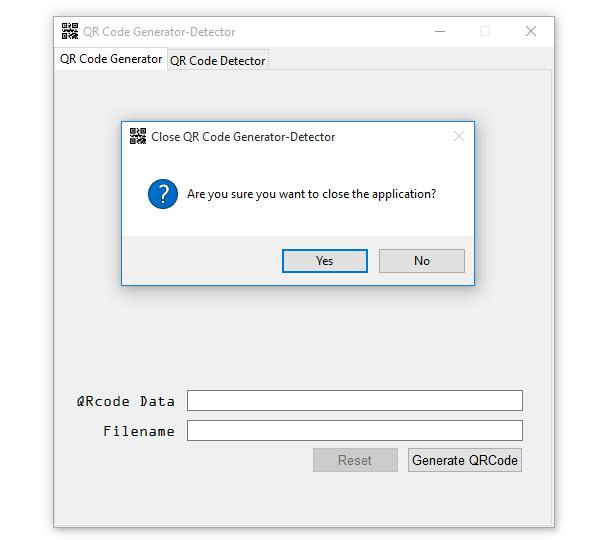
If the event is detected, the close_window() function is executed, and the askyesno message box appears, if the user clicks yes the window closes, and if no the window still runs.
If you run the program and click the close button, this is what you will get:
Implementing the Application’s Functionalities
After finishing the GUI designing process, we now remain with the most exciting task, to make this good-looking application functional. We will be implementing every functionality from scratch.
Generate the QR Code
The first functionality to be implemented is generating the QR codes, which will be done in the QR Code Generator tab. So below the close_window() function, paste this code:
# the function for generating the QR Code
def generate_qrcode():
# getting qrcode data from data_entry via get() function
qrcode_data = str(data_entry.get())
# getting the qrcode name from the filename_entry via get() function
qrcode_name = str(filename_entry.get())
# checking if the qrcode_name/filename_entry is empty
if qrcode_name == '':
# if its empty display an error message to the user
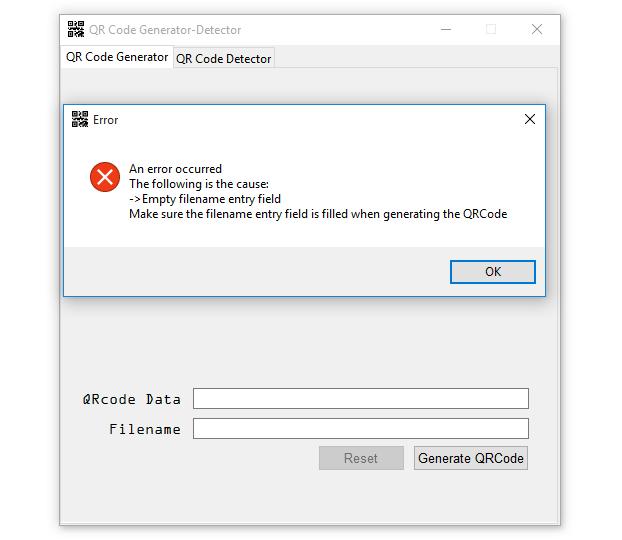
showerror(title='Error', message='An error occurred' \
'\nThe following is ' \
'the cause:\n->Empty filename entry field\n' \
'Make sure the filename entry field is filled when generating the QRCode')
# the else statement will execute when the qrcode_name/filename_entry is filled
else:
# confirm from the user whether to generate QR code or not
if askyesno(title='Confirmation', message=f'Do you want to create a QRCode with the provided information?'):
# the try block for generating the QR Code
try:
# Creating an instance of QRCode class
qr = qrcode.QRCode(version = 1, box_size = 6, border = 4)
# Adding data to the instance 'qr'
qr.add_data(qrcode_data)
# this helps with the dimensions of the QR code
qr.make(fit = True)
# the name for the QRCode
name = qrcode_name + '.png'
# making the QR code
qrcode_image = qr.make_image(fill_color = 'black', back_color = 'white')
# saving the QR code
qrcode_image.save(name)
# making the Image variable global
global Image
# opening the qrcode image file
Image = PhotoImage(file=f'{name}')
# displaying the image on the canvas via the image label
image_label1.config(image=Image)
# the button for resetting or clearing the QR code image on the canvas
reset_button.config(state=NORMAL)
# this will catch all the errors that might occur
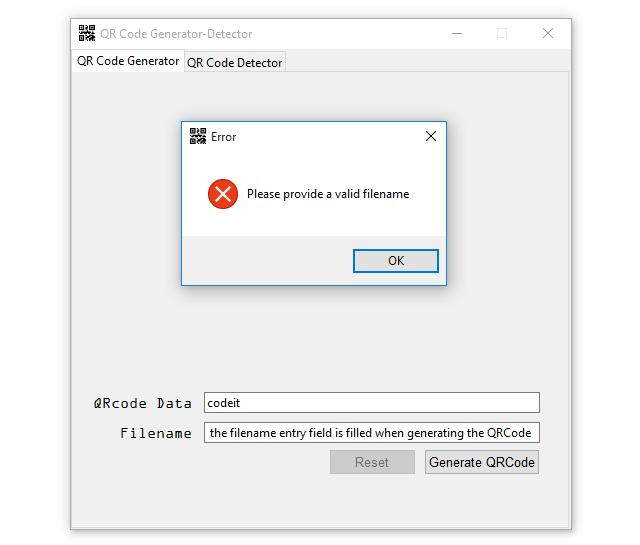
except:
showerror(title='Error', message='Please provide a valid filename')
We are creating a function called generate_qrcode(); this is what is happening inside the function:
- We are getting the QR code data and name from the two entry fields via the
get()function. - Then we check if the name entry field is empty. If so, we display an error message, something worth noticing here, you can generate a QR code with or without data, but it must be given a name.
- Otherwise, we confirm whether the user wants to generate the QR code with the provided information (name and data).
- We then have a
try/exceptblock. Inside thetrystatement, we are creating the instance of the QR code using theQRCode()function; it takes theversion,box_size, andborderas arguments, and theversionstarts from 1 up to 40. Then we add data retrieved from the entry field to the QR code using theadd_data()function. Themake()function whose fit value is set toTrue, helps with the dimensions of the QR code and ensures that they are utilized properly. - To make the QR code, we are using the
make_image()function which takes thefill_colorand theback_coloras arguments. Thefill_coloris for the foreground, and theback_coloris for the background of the QR code. Thesave()function is for saving the QR code, and it takes the name of the QR code as an argument. - To display the generated QR code, we create a
global Imagevariable then we open the actual QR code image using thePhotoImage()function. Now to display the QR code on the image label, we are passing the image to theconfig()function. - After generating the QR code, we enable the Reset button; we will talk about this button just in a moment. The
exceptstatement will catch any errors and thereafter display a message to the user.
Now let's bind the generate_qrcode() function with the Generate QRCode button, and edit the button’s code so that it looks like this:
generate_button = ttk.Button(window, text='Generate QRCode', style='TButton', command=generate_qrcode)The command argument points to the function triggered when the button is clicked.
Let's try generating our first QR code, so run the program, fill in the two entry fields, and click enter; this is what you get:
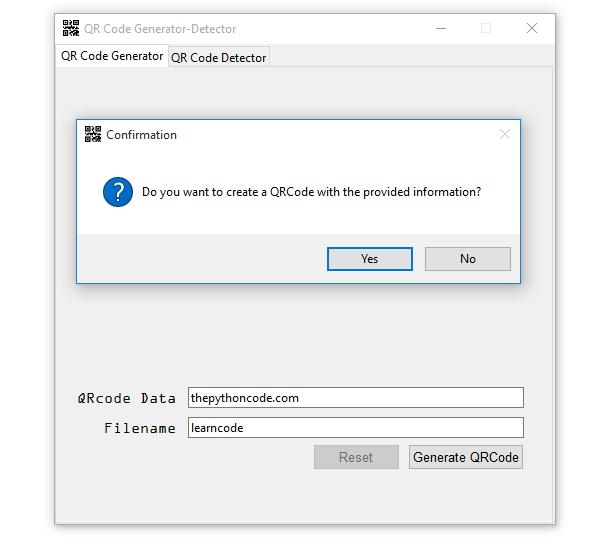
And if you click the Yes button, you will get this output:
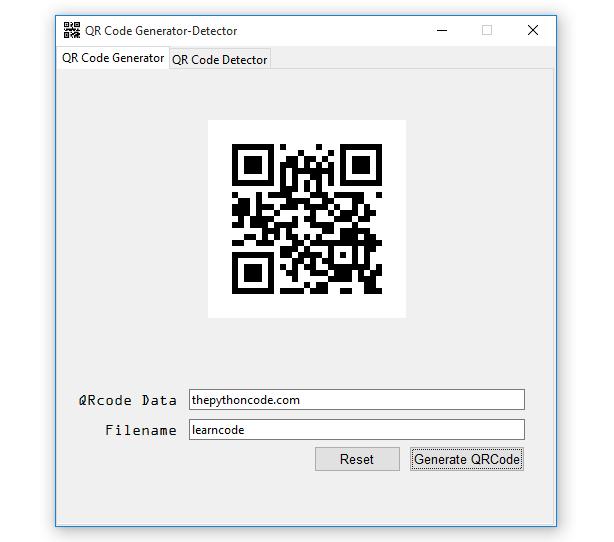
And one thing to note here, the Reset button has been enabled after we successfully generated our first QR code. To verify if the QR code was indeed generated and saved, check your project’s folder:

Reset or Clear the QR Code Image Label
We will now make it possible for the user to be able to reset or clear the QR code image. Below the generate_qrcode() function, paste the code:
# the function for resetting or clearing the image label
def reset():
    # confirming if the user wants to reset or not
    if askyesno(title='Reset', message='Are you sure you want to reset?'):
        # if yes reset the label
        image_label1.config(image='')
        # and disable the button again
        reset_button.config(state=DISABLED)
With this snippet of code, we are creating a reset() function that checks if the value of the askyesno message box is True or False. If it's True, we are resetting or clearing the image label and disabling the Reset button.
The reset() function must again be bound with the Reset button, so inside the generate_qrcode() function, find this line of code:
reset_button.config(state=NORMAL)And edit it to look as follows:
reset_button.config(state=NORMAL, command=reset)Here with the help of the config() function, we are changing the state of the button to NORMAL and binding it with the reset() function.
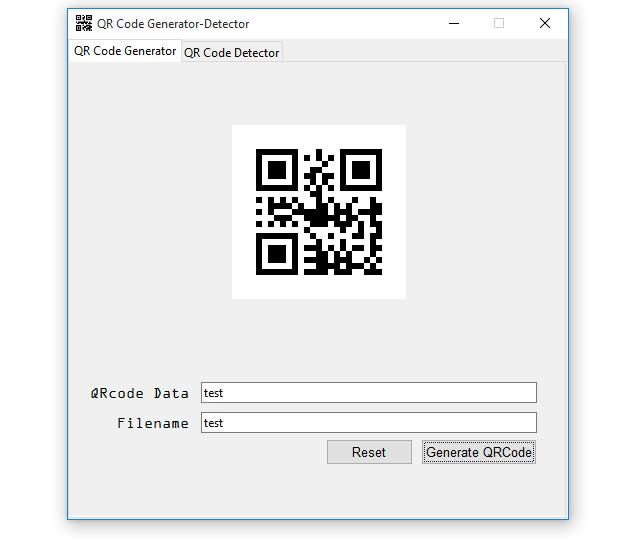
Let us try generating another QR code:
Since the Reset button is enabled, clicking it will produce the following output:
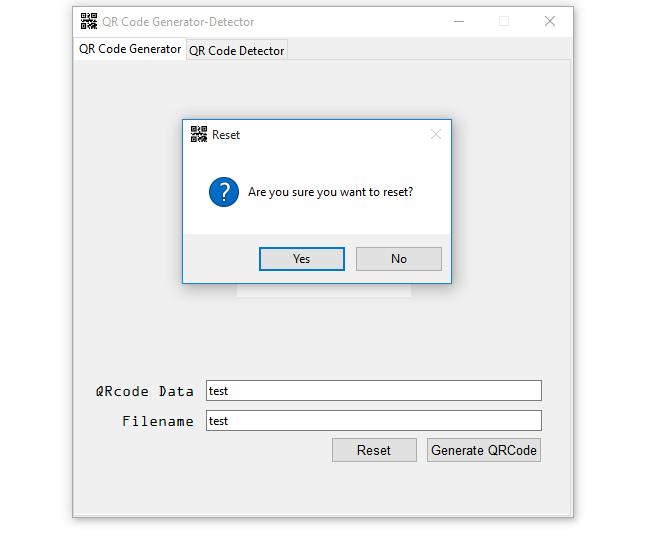
If you click yes, the output is as follows:
Now the image is cleared, and the button is disabled again, the application is working as expected.
Specify the QR Code File Path
Having taken care of the QR code-generating functionality, we will now start working on implementing the QR code reading functionality. But before that, we need to be able to browse the files and select the file to detect. Below the reset() function, paste this code:
# the function to open file dialogs
def open_dialog():
    # getting the file name via the askopenfilename() function
    name = fd.askopenfilename()
    # deleting every data from the file_entry
    file_entry.delete(0, END)
    # inserting the file in the file_entry
    file_entry.insert(0, name)
We are creating a function called open_dialog() in which we get the file and its complete path; we are then deleting everything from the file entry using the delete() function. This will help us not to have two file paths in the file entry appended at once. And finally, we insert the file together with its path in the file entry.
Now bind this function with the Browse button; the code should look like this:
browse_button = ttk.Button(window, text='Browse', style='TButton', command=open_dialog)Let us test this functionality, run the program, and you will get this output:
Just after selecting the file, it will be inserted in the entry field, if you browse and select another file, the previous entry data will be deleted, and the new file will be inserted in the entry. Great! This functionality seems to be working.
Detecting the QR Code
Now let us implement the final functionality of the application, which is detecting QR codes. Below the open_dialog() function paste this code:
# the function to detect the QR codes
def detect_qrcode():
    # getting the image file from the file entry via get() function
    image_file = file_entry.get()
    # checking if the image_file is empty
    if image_file == '':
        # show error when the image_file entry is empty
        showerror(title='Error', message='Please provide a QR Code image file to detect')
    # executes when the image_file is not empty
    else:
        # code inside the try will detect the QR codes
        try:
            # reading the image file with cv2
            qr_img = cv2.imread(f'{image_file}')
            # using the QRCodeDetector() function
            qr_detector = cv2.QRCodeDetector()
            # making the qrcodde_image global
            global qrcode_image
            # opening the qrcode_image using the PhotoImage
            qrcode_image = PhotoImage(file=f'{image_file}')
            # displaying the image via the image label
            image_label2.config(image=qrcode_image)
            # using the detectAndDecode() function detect and decode the QR code
            data, pts, st_code = qr_detector.detectAndDecode(qr_img)
            # displaying data on the data_label
            data_label.config(text=data)
        # this catches any errors that might occur
        except:
            # displaying an error message
            showerror(title='Error', message='An error occurred while detecting data from the provided file' \
                   '\nThe following could be ' \
                    'the cause:\n->Wrong image file\n' \
                    'Make sure the image file is a valid QRCode')
In the above function, we first get the QR code image file from the file entry via the get() function. After that, we check if the image file is empty. If so, we display an error message. Otherwise, execute the code inside the else statement.
Inside the else statement, we have the code for detecting the QR code. we use the cv2.imread() function to read the image.
To create the QR code detector object, we are using the cv2.QRCodeDetector() function, then we create a global variable called qrcode_image. After that, we create an image object via the PhotoImage() function, which takes the image file as input.
To display the QR code image on the label, we use the config() function, and provide the image as the input. Finally, to detect and decode the QR code, we are using this line of code:
data, pts, st_code = qr_detector.detectAndDecode(qr_img)The above detectAndDecode() function takes the QR code image as the input and returns the QR code data, points or coordinates of the box corners, and a binarized QR code.
Let us bind the detect_qrcode() function with the Detect QRCode button, and edit the button code to look like this:
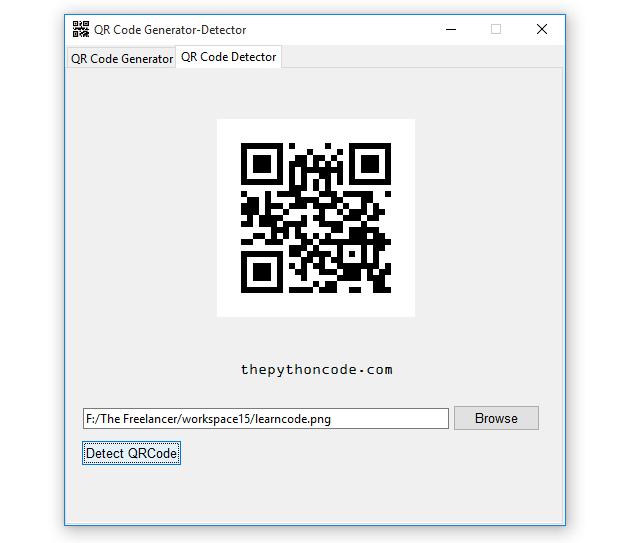
detect_button = ttk.Button(window, text='Detect QRCode', style='TButton', command=detect_qrcode)Let's detect some QR codes here, we will detect the ones we have generated so far, or you can generate new ones. Pick any QR code of your choice, detect it, and you'll get the output like this:
Suppose the user selects the wrong file; the application should give this output:

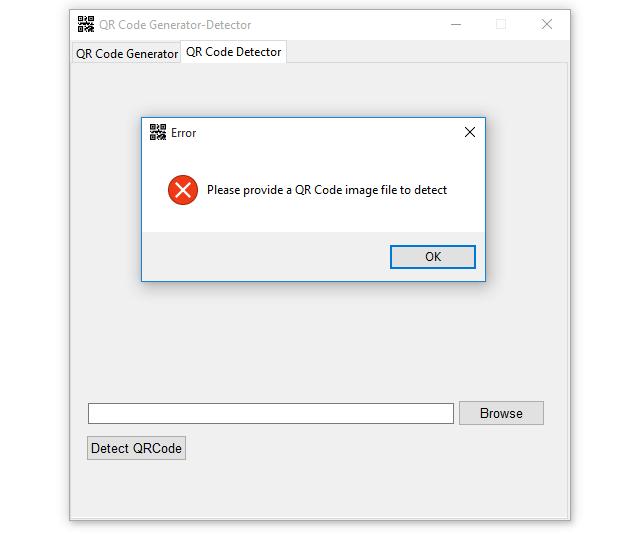
If the user forgets to select the QR code to detect and clicks the Detect QRCode button, this is the output:
And if you try to generate a QR code with the filename entry field empty, this is the output:
And lastly, if you provide an invalid filename, this is what you get:
Conclusion
That’s it from this article! We hope there is so much that you have learned along the journey. This article explained how to build a GUI QR code generator and detector using Python. The article covered installing the necessary libraries, designing the graphical user interface, and coding the generator and detector.
You can get the complete code here.
Learn also: How to Build a GUI Voice Recorder App in Python
Happy coding ♥
Save time and energy with our Python Code Generator. Why start from scratch when you can generate? Give it a try!
View Full Code Generate Python Code


Got a coding query or need some guidance before you comment? Check out this Python Code Assistant for expert advice and handy tips. It's like having a coding tutor right in your fingertips!