Want to code faster? Our Python Code Generator lets you create Python scripts with just a few clicks. Try it now!
In this day and age where we have businesses going digital, we have witnessed the rapid adoption of online language translator applications. These applications have come in handy where for example you want to view and read content online in your local language, or maybe you are learning a new language so you need a translator. So before we build our language translator, let us understand what it is. A language translator application is an application that translates one language into another language, for example, translating French into English.
To successfully build this application, we will use ttkbootstrap, googletrans, pyttsx3, tkinter, and pyperclip libraries.
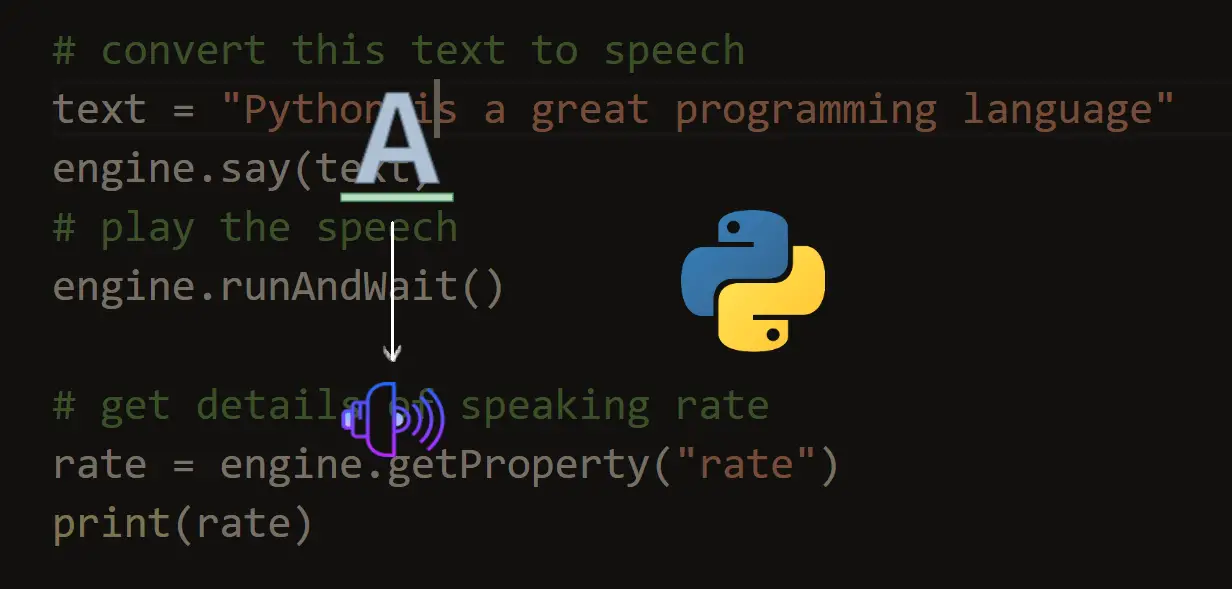
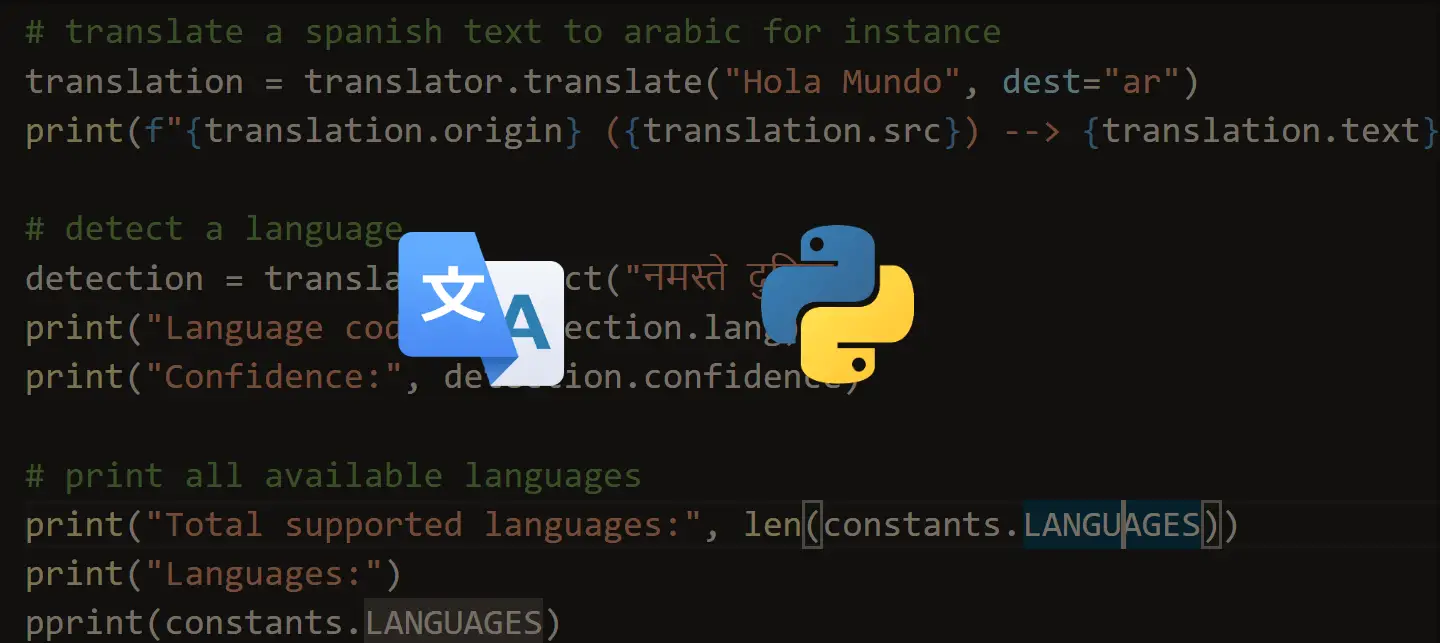
In this article, you will learn to build a GUI language translator app from the ground up using Python. If you want to get started with text-to-speech, read this article, and if you want to learn more about the use of googletrans library, check these tutorials:
- How to Make a Language Detector in Python
- How to Translate Languages in Python
- How to Convert Speech to Text in Python
Here is a glimpse of what we will build in this article:
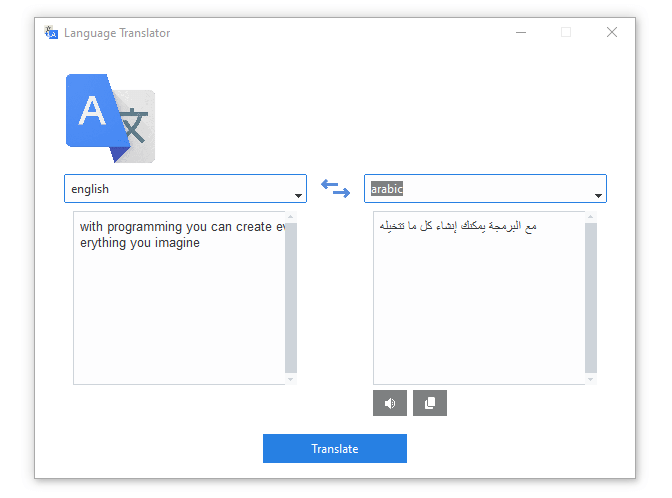
We will build this application piece by piece so that you grasp every concept that is covered.
Here is what we will cover:
- Setting up the Environment
- Importing the Required Libraries
- Creating a Class for the Application
- Designing the Graphical User Interface
- Implementing the Application’s Functionalities
- Conclusion
Setting up the Environment
We will start by setting up the environment, now let us install the required libraries. Pull up your terminal and enter the following command:
$ pip install ttkbootstrap googletrans==3.1.0a0 pyttsx3 pyperclipImporting the Required Libraries
Now that we have installed the libraries, create a new Python file and name it gui-language-translator.py and do the following imports:
from tkinter.messagebox import showerror
import googletrans
from googletrans import Translator
import pyttsx3
import pyperclip
In the code snippet, we are importing several libraries:
ttkbootstrap: This library provides a set of Bootstrap-themed widgets for Tkinter, including buttons, labels, frames, and more.ScrolledText: This is a custom widget fromttkbootstrapthat provides a scrolling text area.ToastNotification: This is another custom widget fromttkbootstrapthat provides a pop-up notification.showerror: This function is from thetkinter.messageboxmodule and is used to display an error message box.googletrans: This is a library for Python that allows you to use Google Translate in your Python programs.Translator: This class is from thegoogletranslibrary and is used to create a translator object.pyttsx3: This is a Python library for text-to-speech conversion.pyperclip: This is a library that allows you to access the clipboard of your operating system from within Python.
Creating a Class for the Application
We will use an object-oriented programming approach, so just below the imports paste this code:
class LanguageTranslator:
    def __init__(self, master):
        self.master = master
The LanguageTranslator class is a Python class that defines a constructor method __init__() with one parameter master. The master parameter is assigned to an instance variable with the same name self.master.
And at the bottom of the class, add these three lines of code:
root = ttk.Window(themename="cosmo")
application = LanguageTranslator(root)
root.mainloop()
The code snippet creates an instance of the ttk.Window class with a themename parameter of "cosmo", and assigns it to the variable root.
Then, an instance of the LanguageTranslator class is created with root as the argument to its constructor, and assigned to the variable application.
Finally, the mainloop() method of root is called, which is a method that starts the Tkinter event loop, allowing the window to be displayed and interacted with by the user.
Designing the Graphical User Interface
Now that the imports have been taken care of, let us switch our attention to designing the graphical user interface (GUI). We will get started with the main window.
Creating the Main Window
The next task will be to create the main window, inside this window we will have a Canvas that will contain all the widgets. For the main window, we will create a MainWindow method that will contain all the window’s properties. Below the __init__() method, add this code:
def MainWindow(self):
    self.master.geometry('600x430+300+150')
    self.master.title('Language Translator')
    self.master.resizable(width = 0, height = 0)

    icon = ttk.PhotoImage(file='icon.png')
    self.master.iconphoto(False, icon)
Here's what the code does:
self.master.geometry('600x430+300+150'): Sets the size and position of the window on the screen. The dimensions are 600 pixels wide by 430 pixels high, and the window is positioned 300 pixels to the right and 150 pixels down from the top left corner of the screen.self.master.title('Language Translator'): Sets the title of the window to "Language Translator".self.master.resizable(width=0, height=0): Disallows the window to be resized by the user, since 0 is passed as the argument for both the width and height parameters.icon = ttk.PhotoImage(file='icon.png'): Loads an image file named"icon.png"and creates aPhotoImageobject called icon that can be used as an icon for the window.self.master.iconphoto(False, icon): Sets the window icon to the icon PhotoImage object created earlier. False is passed as the first argument, which means the icon will be used for both the window icon and the taskbar.
To use the MainWindow method we will have to call it in the constructor, so below the line:
self.master = masterPaste this line:
# calling the UI method in the constructor
self.MainWindow()
If you run the program, this is the output that you will get:
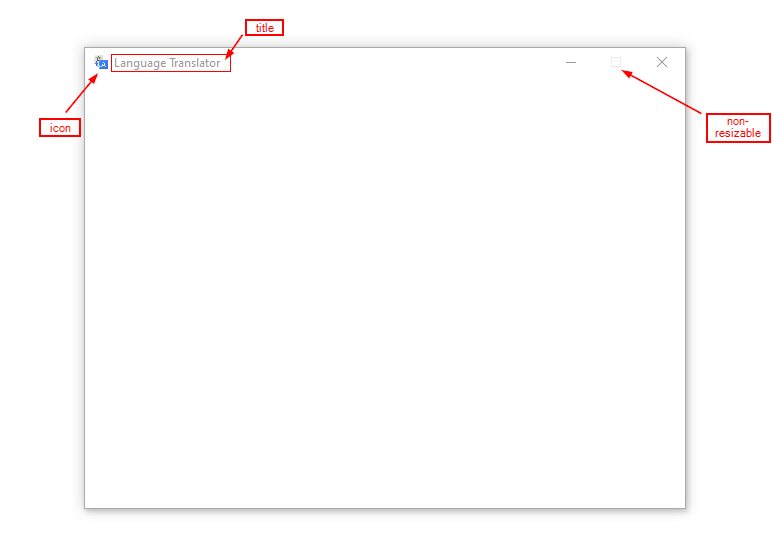
Note: All the icons must be in the project’s folder.
Adding Widgets to the Main Window
Now that we have successfully created the main window for the application, let us start adding the widgets. To make the code neater, we will create another method specifically for the widgets, we will call it Widgets. This method will be below the MainWindow method.
Canvas
The first widget to add is the Canvas, below the MainWindow method add the following code:
def Widgets(self):
     # the canvas for containing the other widgets
     self.canvas = ttk.Canvas(self.master, width = 600, height = 400)
     self.canvas.pack()
The Widgets method creates and adds widgets to the application window. Here's what the code does:
self.canvas = ttk.Canvas(self.master, width=600, height=400): Creates aCanvaswidget with awidthof 600 pixels and aheightof 400 pixels, and assigns it to an instance variable calledself.canvas.self.canvas.pack(): Adds theCanvaswidget to the application window using thepackgeometry manager. This will cause the widget to fill the entire space of its parent container, which in this case is the main window.
To use this method, let us call it in the constructor just like we did with the MainWindow method, below this line:
# calling the MainWindow method in the constructor
self.MainWindow()
Add:
# calling the Widgets method in the constructor
self.Widgets()
Icon
Below the Canvas add this code:
# the logo for the application
self.logo = ttk.PhotoImage(file='logo.png').subsample(5, 5)
self.canvas.create_image(75, 70, image = self.logo)
To be on the same page, let us break down the code snippet:
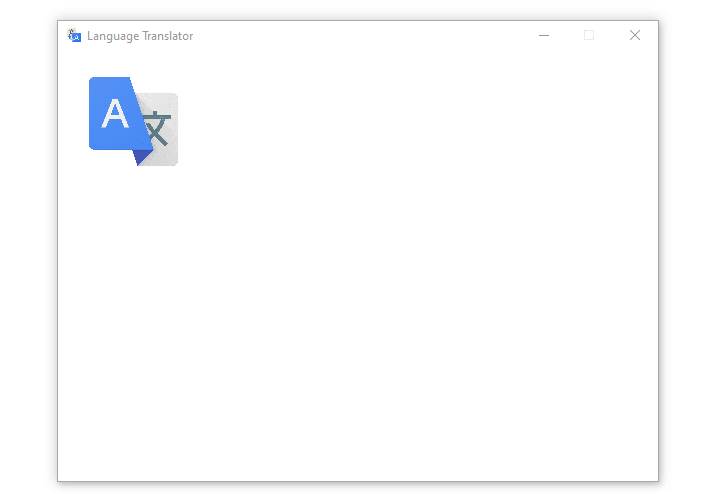
self.logo = ttk.PhotoImage(file='logo.png').subsample(5, 5): Loads an image file named"logo.png"and creates aPhotoImageobject calledself.logo. Thesubsamplemethod is then called on thePhotoImageobject, which resizes the image by a factor of 5 in both the x and y dimensions. This can help reduce the memory consumption of the application by decreasing the size of the image.self.canvas.create_image(75, 70, image=self.logo): Creates an image item on theCanvaswidget at the position (75, 70), and sets its image to theself.logo PhotoImageobject. This will display the logo image at the specified position on theCanvaswidget.
Running the program you will get:
Combobox Fields and Image Label
Let us move on to adding Combobox fields and the label for the arrow icon. Below the code for the logo, paste this code:
# getting all the languages
language_data = googletrans.LANGUAGES
# getting all the language values using the values() function
language_values = language_data.values()
# converting the languages to a list
languages = list(language_values)
# first combobox for the source language
self.from_language = ttk.Combobox(self.canvas, width = 36, bootstyle = 'primary', values = languages)
self.from_language.current(0)
self.canvas.create_window(150, 140, window = self.from_language)
# loading the arrow icon
self.arrow_icon = ttk.PhotoImage(file='arrows.png')
self.resized_icon = self.arrow_icon.subsample(15, 15)
self.image_label = ttk.Label(self.master, image = self.resized_icon)
self.canvas.create_window(300, 140, window = self.image_label)
# the second combobox for the destination language
self.to_language = ttk.Combobox(self.canvas, width = 36, bootstyle = 'primary', values = languages)
self.to_language.current(21)
self.canvas.create_window(450, 140, window = self.to_language)
This code block sets up two Combobox widgets for selecting the source and destination languages, along with an arrow icon. Here is the code breakdown:
language_data = googletrans.LANGUAGES: Gets a dictionary of all the supported languages and their corresponding language codes using thegoogletrans.LANGUAGESattribute.language_values = language_data.values(): Extracts the language names from the dictionary by calling thevalues()method onlanguage_data.languages = list(language_values): Converts the language names into a list.self.from_language = ttk.Combobox(self.canvas, width=36, bootstyle='primary', values=languages): Creates aComboboxwidget for selecting the source language with awidthof 36 characters, and sets the available values to thelanguageslist.bootstyle='primary'sets the color of theComboboxto the primary theme color of the widget set.self.from_language.current(0): Sets the default selected value of theComboboxto the first item in thelanguageslist.self.canvas.create_window(150, 140, window=self.from_language): Adds theComboboxwidget to theCanvaswidget at the specified position.self.arrow_icon = ttk.PhotoImage(file='arrows.png'): Loads an image file named "arrows.png" and creates a PhotoImage object calledself.arrow_icon.self.resized_icon = self.arrow_icon.subsample(15, 15): Resizes theself.arrow_icon PhotoImageobject by a factor of 15 in both the x and y dimensions.self.image_label = ttk.Label(self.master, image=self.resized_icon): Creates aLabelwidget with theresized_icon PhotoImageobject as its image.self.canvas.create_window(300, 140, window=self.image_label): Adds theLabelwidget to theCanvaswidget at the specified position.self.to_language = ttk.Combobox(self.canvas, width=36, bootstyle='primary', values=languages): Creates aComboboxwidget for selecting the destination language with a width of 36 characters, and sets the available values to thelanguageslist.self.to_language.current(21): Sets the default selected value of theComboboxto the 22nd item in thelanguageslist.self.canvas.create_window(450, 140, window=self.to_language): Adds theComboboxwidget to theCanvaswidget at the specified position.
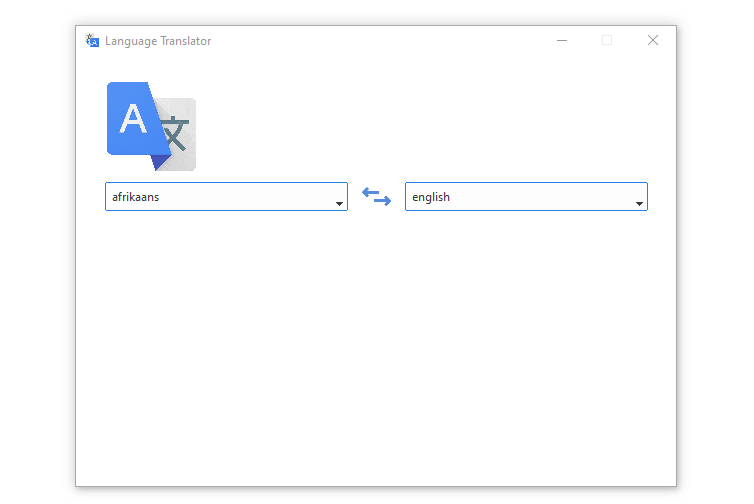
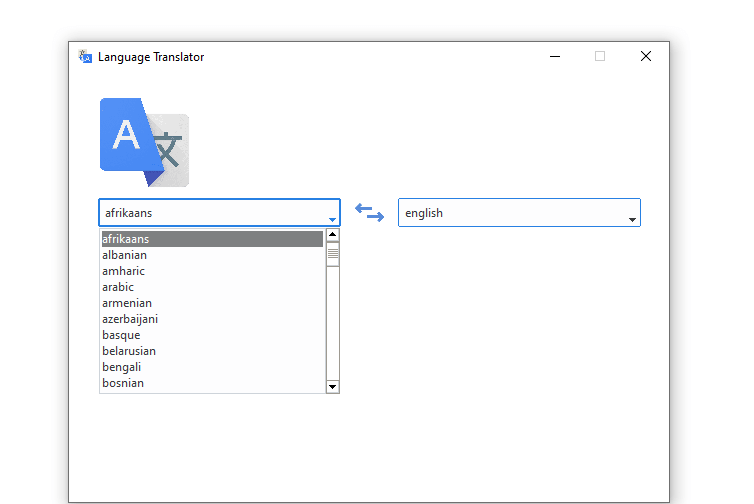
The output we get after adding the above code will look as follows:
If you select the first Combobox you get this output:
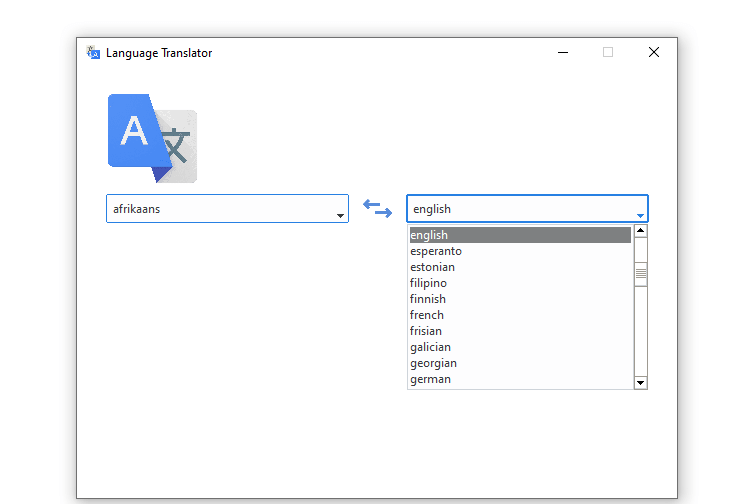
And if you select the second Combobox, you will get this output:
ScrollableText Fields
We will now add two ScrollableText fields for inserting the input and the output. So below the above code block paste this code:
# scrollable text for entering input
self.from_text = ScrolledText(self.master, font=("Dotum", 10), width = 30, height = 10)
self.canvas.create_window(150, 250, window = self.from_text)
# scrollable text for output
self.to_text = ScrolledText(self.master, font=("Dotum", 10), width = 30, height = 10)
self.canvas.create_window(450, 250, window = self.to_text)
In this code snippet, we are creating two ScrolleText fields, the first one is for entering input and the second is for displaying output after translation is successful. To create these two widgets we are using the ScrolledText function which takes the following arguments: self.master, font, width, and height. Finally, we are adding the widgets to the canvas using the function create_window().
Buttons
Let us wrap up the GUI design by adding the three buttons. Below the ScrolledText fields add this code:
# loading icons
Self.speaker_icon = ttk.PhotoImage(file = 'speaker.png').subsample(5, 4)
self.copy_icon = ttk.PhotoImage(file = 'copy.png').subsample(5, 4)

self.speak_button = ttk.Button(self.master, image = self.speaker_icon, bootstyle='secondary', state=ttk.DISABLED)
self.canvas.create_window(355, 355)

self.copy_button = ttk.Button(self.master, image = self.copy_icon, bootstyle='secondary', state=ttk.DISABLED)
self.canvas.create_window(395, 355, window = self.copy_button)

self.translate_button = ttk.Button(self.master, text = 'Translate', width = 20, bootstyle = 'primary')
self.canvas.create_window(300, 400, window = self.translate_button)
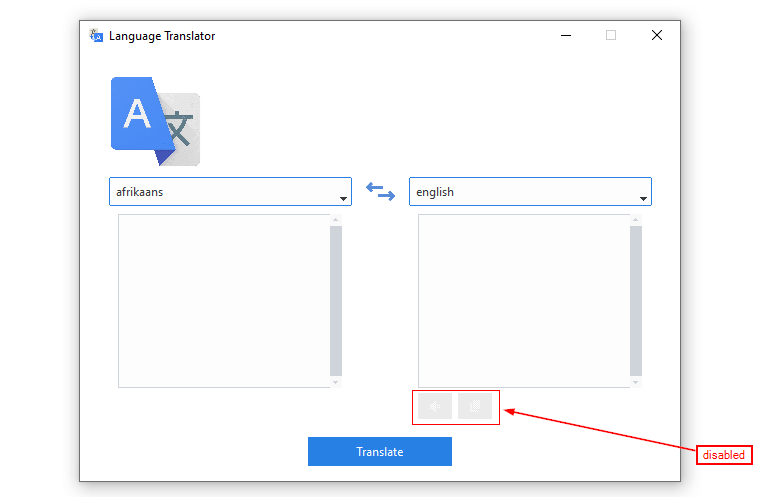
In this block of code, we are loading two icons and resizing them using the subsample() function, then we are creating the speak_button, and copy_button, these buttons will be disabled at the start of the application. Finally, we create a translate_button, all these buttons are styled using the bootstyle argument.
Great! We are done with the GUI design, if you run the program this is what you will get:
Implementing the Application’s Functionalities
A good app has functionalities that reflect its user interface. In this section, we will implement all the application’s functionalities.
Language Translation
The first functionality to implement will be language translation. After the imports, paste this block of code:
translator = Translator()

engine = pyttsx3.init()
This code block initializes two objects, translator and engine, which will be used for translation and text-to-speech functionality, respectively.
Now let us create a translation method, we will call it translate(). Below the Widgets method, paste this code:
def translate(self):
        try:
            # getting source language from first combobox via get()
            self.source_language = self.from_language.get()
            # getting destination language from first combobox via get()
            self.destination_language = self.to_language.get()
            # getting every content fronm the first scrolledtext
            self.text = self.from_text.get(1.0, ttk.END)
            # translating the language
            self.translation = translator.translate(self.text, src=self.source_language, dest=self.destination_language)
            # clearing the second scrolledtext
            self.to_text.delete(1.0, ttk.END)
            # inserting translation output in the second scroledtext
            self.to_text.insert(ttk.END, self.translation.text)
            # activating the speak_button
            self.speak_button.configure(state = ttk.ACTIVE)
            # activating the copy_button
            self.copy_button.configure(state = ttk.ACTIVE)
        # handle TypeError using except
        except TypeError as e:
            showerror(title='Invalid Input', message='Make sure you have entered valid input!')
        # handle connection errors
        except Exception as e:
            showerror(title='Connection Error', message='Make sure you have internet connection!')
In the code block, we are creating a translate() method that will be called when the user clicks on the Translate button in the GUI.
It first retrieves the selected source language, destination language, and text to be translated from the corresponding GUI elements. It then uses the googletrans module's Translator() object to translate the text from the source language to the destination language.
The translated text is then inserted into the second scrolled text box in the GUI. Finally, the Speak and Copy buttons are activated, allowing the user to hear the translation or copy it to the clipboard. If any errors occur during this process, two except statements will handle them, and the appropriate error messages are displayed.
We now need to link the Translate button and the translate() method, to do that edit the code:
self.translate_button = ttk.Button(self.master, text = 'Translate', width = 20, bootstyle = 'primary')And make it look like this:
self.translate_button = ttk.Button(self.master, text = 'Translate', width = 20, bootstyle = 'primary', command = self.translate)Great! Let's test our first translation, run the program and choose the source and destination language of your choice and provide a sentence you like to translate, hitting the Translate button you will get an output similar to this:

Note: The two buttons are enabled just after the translation is successful.
Text to Speech
The second functionality to implement is text-to-speech. Here, we want to convert the translated output to speech after clicking the speak button. Paste this code:
def speak(self):
        # getting every content from the second scrolledtext
        self.text = self.to_text.get(1.0, ttk.END)
        # gets the speaking rate
        rate = engine.getProperty('rate')
        # setting the speaking rate
        engine.setProperty('rate', 125)
        # getting the available voices
        voices = engine.getProperty('voices')
        # setting the second voice, the female voice
        engine.setProperty('voice', voices[1].id)
        engine.say(self.text)
        engine.runAndWait()
This function was mainly grabbed from the text-to-speech tutorial. It uses the library pyttsx3 to convert the translated text in the second ScrolledText widget into speech.
First, it gets the text to be spoken from the second ScrolledText widget using the get() method.
Then, it retrieves the speaking rate using the getProperty() method, sets the speaking rate to 125, and sets the second voice, which is a female voice.
After that, it uses the say() method to queue the text to be spoken, and the runAndWait() method to speak the queued text.
We will also link this button to the speak method, now make the speak_button code looks like this:
self.speak_button = ttk.Button(self.master, image = self.speaker_icon, bootstyle='secondary', state=ttk.DISABLED, command = self.speak)Run the program, select the source and destination languages, enter the sentence to be translated, and click the Speak button after the translation is successful.
Copy to Clip Board
The final functionality is the copy-to-clip board. Let us create a function called copy_to_clipboard(), add this code below the speak() method:
def copy_to_clipboard(self):
        # this will create a toast notification object
        toast = ToastNotification(
            title='Clip Board',
            message='Text has been copied to clip board!',
            duration=3000,
        )
        # this will show the notification
        toast.show_toast()
        # getting all the content from the second scrolledtext
        self.text = self.to_text.get(1.0, ttk.END)
        # copy to clip board
        pyperclip.copy(self.text)
The code snippet creates a ToastNotification object to show a notification when the text is copied and then gets all the content from the second ScrolledText widget. Finally, copies the content to the clipboard using the pyperclip module.
The final task will be to link the method and the button, so make the Copy button code look as follows:
self.copy_button = ttk.Button(self.master, image = self.copy_icon, bootstyle='secondary', state=ttk.DISABLED, command = self.copy_to_clipboard)Run the program and provide the required input and click the Copy button, this is the output that you get:

A notification popup will appear in the right bottom corner of your screen. And try pasting the copied text somewhere, you will see that the magic works!
Testing the Application
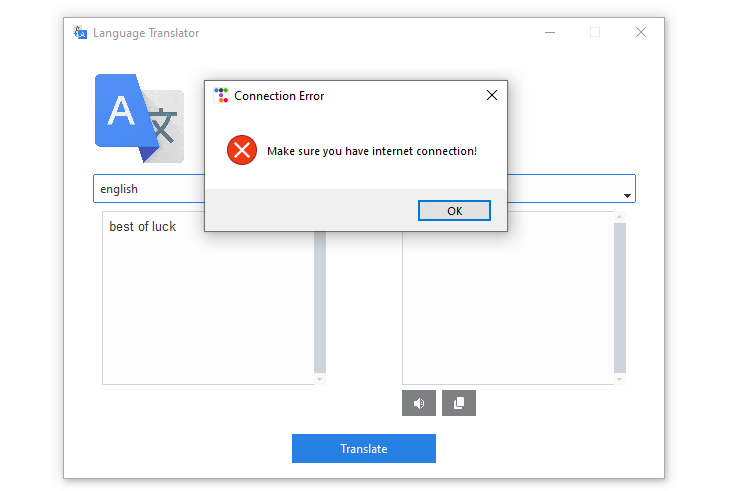
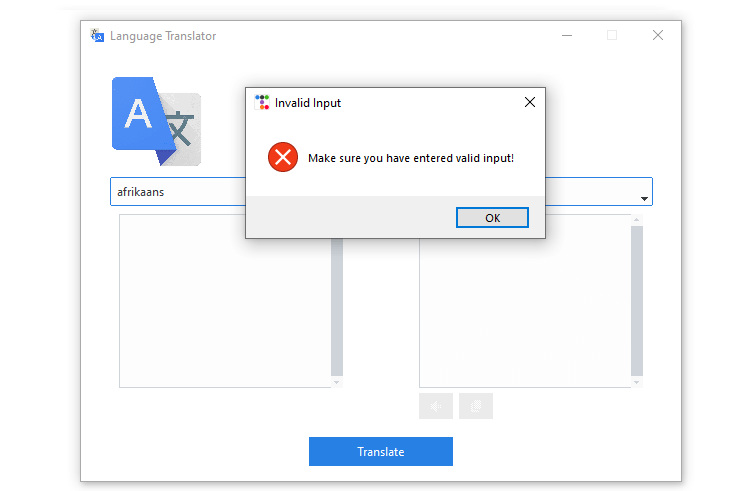
Suppose the user tries to translate whilst there is no internet connection, the app will generate this output:
And if the user leaves the source Combobox empty this is the output the application will produce:
Conclusion
That concludes this article, congratulations on creating your functional GUI language translator. This article has walked you through setting up the environment, designing the GUI, and finally implementing the application’s functionalities. We hope there is so much you have learned and that the knowledge acquired will be applied in your future projects.
Get the complete code here.
Learn also: How to Make a Language Detector in Python.
Happy coding ♥
Ready for more? Dive deeper into coding with our AI-powered Code Explainer. Don't miss it!
View Full Code Improve My Code


Got a coding query or need some guidance before you comment? Check out this Python Code Assistant for expert advice and handy tips. It's like having a coding tutor right in your fingertips!