Get a head start on your coding projects with our Python Code Generator. Perfect for those times when you need a quick solution. Don't wait, try it today!
A dictionary is an application that allows users to search for a specific word and provides the meanings of the word and its synonym and antonym in return.
In this tutorial, you will learn how to build an English dictionary with the help of the Django framework and PyDictionary API in Python. To follow along with this tutorial, one needs to have a basic understanding of HTML and bootstrap that will be used for the frontend of the app.
Before we use the Django framework and PyDictionary API, let us get to know these two, Django is a framework used for building web applications and PyDictionary is an API that is used to get word meanings, synonyms, antonyms, and translations.
The PyDictionary API does not work offline; one needs to be online to make successful requests to the API.
Below is the table of contents:
- Creating the Virtual Environment
- Installing Django and PyDictionary
- Creating the Project and the Application
- Registering the App in the Settings.py File
- Configuring the URLs of the App
- Creating Views
- Making the HTML Templates
- Implementing the Search Word Functionality
- Testing the Functionality
- Conclusion
Creating the Virtual Environment
Let us, first of all, create the virtual environment for this project, let us name it project, this is not the convention; you can name it whatever you want; use the command below:
$ python -m venv projectNow activate the virtual environment using the following command:
$ .\project\Scripts\activateInstalling Django and PyDictionary
We will then install the required libraries inside the activated virtual environment, the Django framework, and PyDictionary as shown below:
$ pip install django PyDictionaryCreating the Project and the Application
Now that Django has been installed successfully, let us create a Django project using the Django built-in command django-admin startproject, run this command in your terminal:
$ django-admin startproject djangodictionaryThe above command will create a folder called djangodictionary, we will be working inside this folder. Now cd into the djangodictionary folder and let us create a Django app. Run the below command:
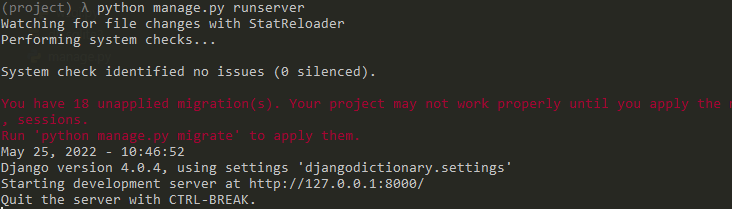
$ python manage.py startapp dictionaryAfter successfully installing Django and creating the new project, let us see if the installation was successful, run the below command:
$ python manage.py runserverThe manage.py is a script file that is used to run Django administrative commands in the terminal like the runserver, startproject, startapp, etc. The manage.py script is created after running the django-admin startproject command.
Make sure you get the following output:
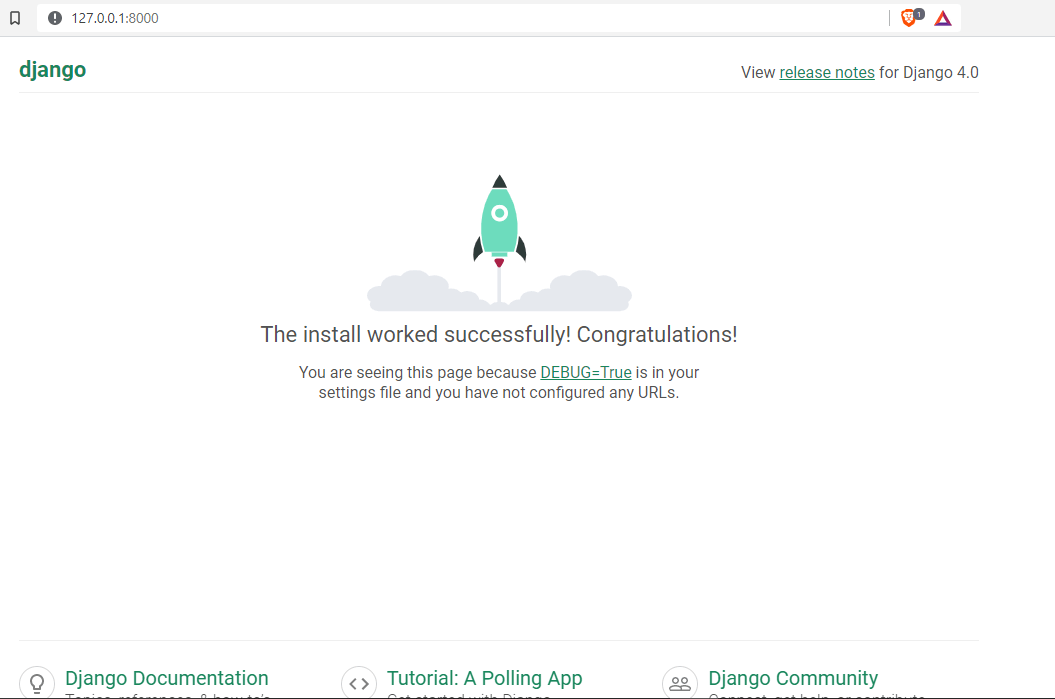
Copy http://127.0.0.1:8000/ into your browser, if you get the below output then you installed Django successfully:
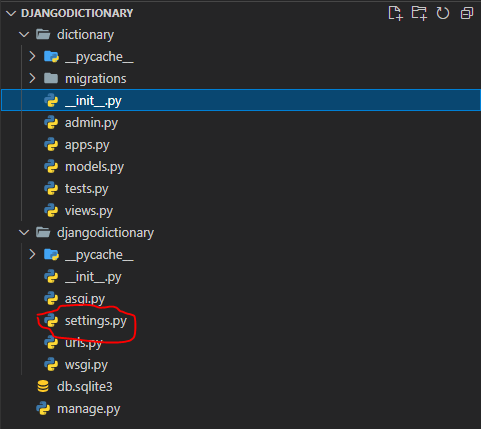
Registering the App in the Settings.py File
In Django, every app that we create has to be registered before we use it, now inside the djangodictionary folder, there is a file called settings.py, this file is used for configuring settings for the whole project:
Open the settings.py file, and scroll down to the INSTALLED_APPS list, make the list now look as follows:
INSTALLED_APPS = [
    'django.contrib.admin',
    'django.contrib.auth',
    'django.contrib.contenttypes',
    'django.contrib.sessions',
    'django.contrib.messages',
    'django.contrib.staticfiles',
    # external installed app
    # registering the dictionary app
    'dictionary',
]
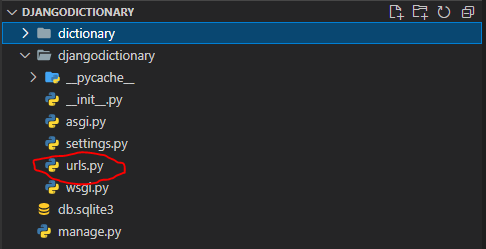
Configuring the URLs of the App
Let us now configure our URLs, in Django, we have two urls.py files, the first one comes with Django and is used for registering all the apps' URLs and it is found in the project root folder, while the second urls.py file is created inside the app’s folder by the programmer, in our case it will be created inside the dictionary folder.
First things first, let us register our app’s URLs, and open the urls.py file in the project root folder:
Open the urls.py file, and make sure it looks like below
# importing the django's in-built admin url
from django.contrib import admin
# importing path and include from django's in-built urls
from django.urls import path, include

# defining the list for urls
urlpatterns = [
    path('admin/', admin.site.urls),
    # registering dictionary app urls in project
    path('', include('dictionary.urls')),
]
Now that we have registered the dictionary app’s URLs, let us now create them, inside the dictionary folder, create a urls.py file:
Open the urls.py file inside the dictionary app and add the following:
# from current folder, we are importing the two views, HomeView & SearchView
from . import views
# importing path from django's in-built urls
from django.urls import path

# defining the list for urls
urlpatterns = [
    path('', views.homeView, name='home'),#this is the home url
    path('search', views.searchView, name='search'),#this is the search url
]
Creating Views
The homeView and searchView have not been created yet, let us now create them. Inside the dictionary folder, there is a views.py file:

Open this file and make it looks like this:
# importing the render function from django.shortcuts
# the render function renders templates
from django.shortcuts import render

# this is the view that will render the index page
def homeView(request):
    return render(request, 'dictionary/index.html')

# this is the view that will render search page
def searchView(request):
    return render(request, 'dictionary/search.html')
We will be creating index.html and search.html inside the dictionary folder in the upcoming section.
Making the HTML Templates
Now let us move away from Django a bit and build the basic frontend of the dictionary app. Obviously, we will use HTML for the content of the app and bootstrap for styling the content.
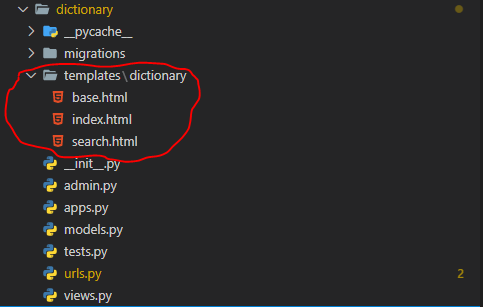
In the dictionary folder, create a folder called templates, and inside this templates folder create another folder called dictionary, this is where Django will find all the HTML files.
We will create three HTML files, namely index.html, search.html, and base.html, the two files index.html and search.html will inherit from the base.html. Template inheritance is one of the features that comes with Django, and it comes in handy because we will not be repeating ourselves.
Now let us create these three HTML files:
Open the base.html file and add the following:
<!DOCTYPE html>
<html lang="en">

<head>
    <meta charset="UTF-8">
    <meta http-equiv="X-UA-Compatible" content="IE=edge">
    <meta name="viewport" content="width=device-width, initial-scale=1.0">
    <title>Dictionary</title>
    <!-- CSS only -->
    <!-- we are getting bootstrap5 from the CDN -->
    <link href="https://cdn.jsdelivr.net/npm/bootstrap@5.2.0-beta1/dist/css/bootstrap.min.css" rel="stylesheet">
</head>

<body>
    <div class="container mt-4">
        <div class="row">

            <div class="mt-4 p-5 bg-success text-white rounded mb-3">
                <h1>ThePythonCode.com Dictionary</h1>
            </div>

            <div class="col-md-12">
                {% block content %}
                <!-- here we will inject the content of every page that
                    inherits from the base page -->
                {% endblock %}
            </div>
        </div>
    </div>
</body>

</html>
Basic HTML and Bootstrap boilerplate. The index.html will inherit from the base.html file, so add the following to index.html:
<!-- the index page is inheriting from the base page -->
<!-- the extends tags are used for inheriting from the base page -->
{% extends 'dictionary/base.html' %}

<!-- the block content tags for containing content of the page -->
{%  block content %}

<form action="search">
    <div class="input-group">
        <input type="text" required class="form-control" name="search" placeholder="Search your favorite word.......">
        <div class="input-group-append">
            <button class="btn btn-success" type="submit">
                Search
            </button>
        </div>
    </div>

</form>

{% endblock %}
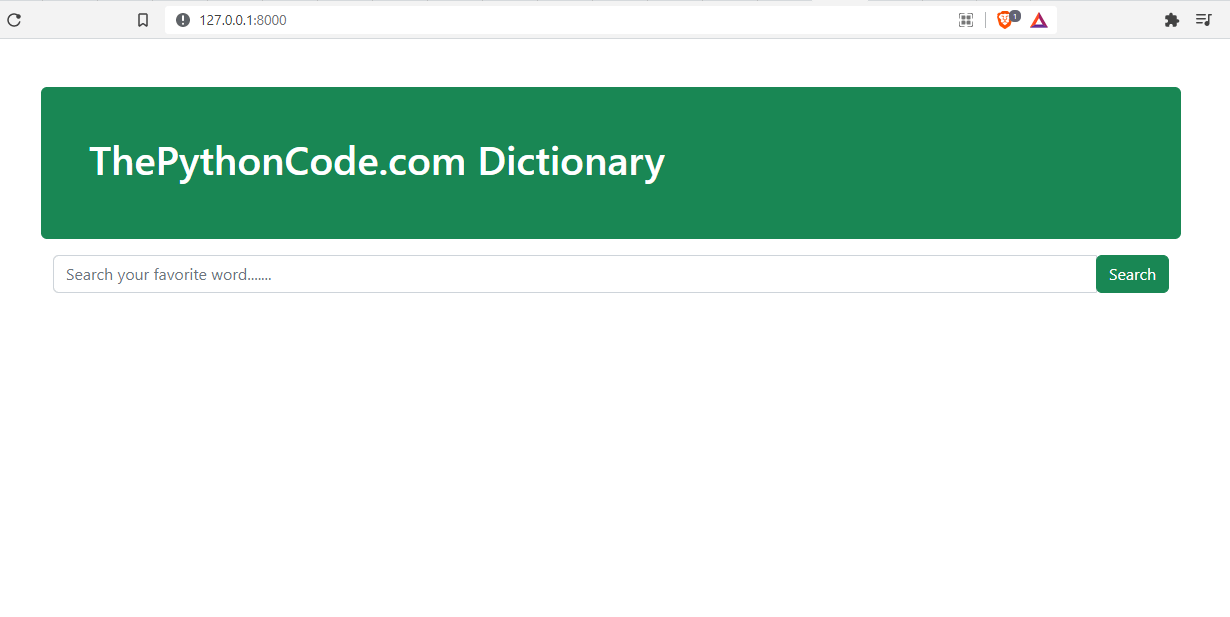
Reaching this far, we have not yet had a feel of our app, so let us test it by running the server:
$ python manage.py runserverAfter starting the server, go to the browser and refresh the http://127.0.0.1:8000/ page, you should be able to get the below page:
Implementing the Search Word Functionality
Now that the home index page is working successfully, let us now turn back to Django, this time we want to implement the search word functionality via the searchView.
Open the views.py file inside the dictionary folder, and edit searchView():
# importing the render function from django.shortcuts
# the render function renders templates
from django.shortcuts import render
# importing the PyDictionary library
from PyDictionary import PyDictionary


# this is the view that will render the index page
def homeView(request):
    return render(request, 'dictionary/index.html')


# this is the view that will render search page
def searchView(request):
    # capturing the word from the form via the name search
    word = request.GET.get('search')
    # creating a dictionary object
    dictionary = PyDictionary()
    # passing a word to the dictionary object
    meanings = dictionary.meaning(word)
    # getting a synonym and antonym
    synonyms = dictionary.synonym(word)
    antonyms = dictionary.antonym(word)
    # bundling all the variables in the context
    context = {
            'word': word,
            'meanings':meanings,
            'synonyms':synonyms,
            'antonoyms':antonyms
        }
    return render(request, 'dictionary/search.html', context)
We're using PyDictionary to get the meaning, synonym, and antonym of the given word, we then construct the context dictionary that we'll be using in the search.html.
Open the search.html and add below:
<!-- the search page inherits from the base -->
{% extends 'dictionary/base.html' %}

{% block content %}
<!-- this will display the searched word -->
<h4>{{ word }}</h4>

<!-- this will display the word meaning -->
<p>{{ meanings }}</p>

<hr>
<!-- this will display the antonym for the word if its available-->
<p><b>Antonyms</b>:{{ antonym }}</p>
<hr>
<!-- this will display the synonym for the word if its available-->
<p><b>Synonyms</b>:{{ synonym }}</p>

{% endblock %}
Testing the Functionality
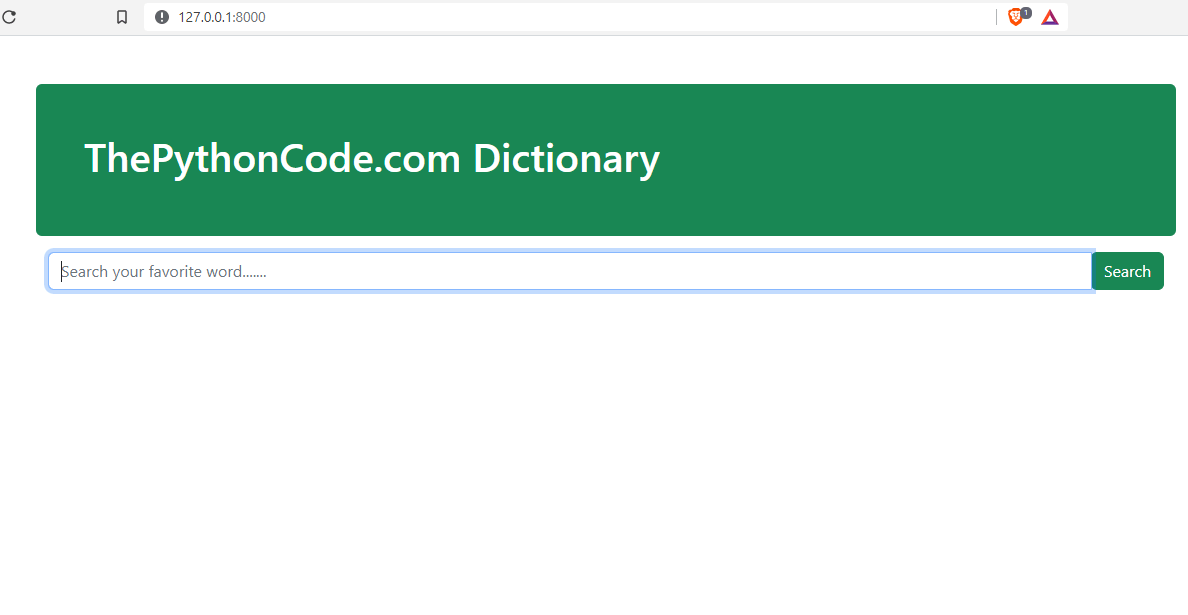
Now that we have managed to implement the search word functionality in the searchView() function, let us test our first-word search. Copy the http://127.0.0.1:8000 in the browser, to get the output below:
Make sure that the server is running, if not then re-run this command:
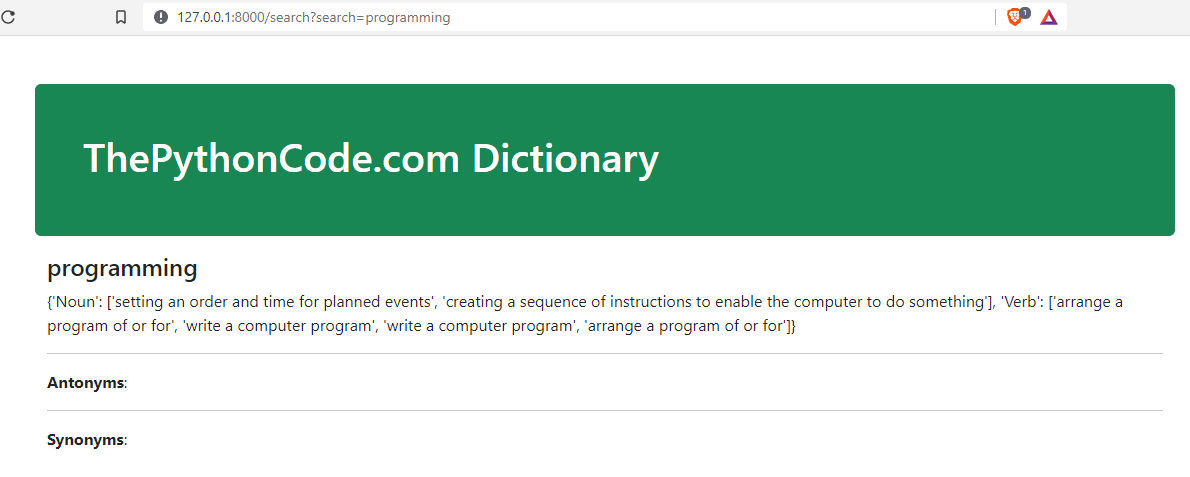
$ python manage.py runserverNow that the app is running, we will search for the word "programming", enter the word in the input field and click the search button. After the search is completed, you will be redirected to the search page where all the results are displayed, as below:
Conclusion
That’s it for this tutorial, we now hope you know how to play around with the Django framework and the PyDictionary API.
Note that in this tutorial we have just covered a few basic things considering the more advanced stuff you could build using these two, Django and PyDictionary.
Get the complete code here.
Learn also: How to Build a Complete CRUD App using Flask and Jinja2 in Python
Happy coding ♥
Loved the article? You'll love our Code Converter even more! It's your secret weapon for effortless coding. Give it a whirl!
View Full Code Generate Python Code


Got a coding query or need some guidance before you comment? Check out this Python Code Assistant for expert advice and handy tips. It's like having a coding tutor right in your fingertips!