Juggling between coding languages? Let our Code Converter help. Your one-stop solution for language conversion. Start now!
Today, we’re going on a short trip to Disneyland. We’ll be learning how to cartoonify an image. Now I'm not sure if ‘cartoonify’ is a word, but I'm using it anyway. The way the program works is that we give our program an image (the one we want to cartoonify), it does the magic, and produces an output image. The magic is what we’re going to see in this article.
We’re going to use OpenCV for this trick. OpenCV is a library you can use for computer vision applications and manipulations. Also, we’ll be making use of argparse to get our input image from the terminal instead of having to open our code editor each time we want to make use of our application.
So first off, we install OpenCV:
$ pip install opencv-pythonGive it time, while it installs. We do not need to install argparse as it comes with Python.
After installing, we need to import the necessary libraries:
import cv2, argparse, sysWe’ll be using sys for operating system processes like exiting the program. Next up, we create a function that does the magic. That is, a function that accepts an input image, cartoonfies it, and returns an output image:
# In this function, we accept an image and convert it to a cartoon form.
def cartoonizer(image_name):
    # Load the image to cartoonize.
    image_to_animate = cv2.imread(image_name)
    # Apply a bilateral filter to smoothen the image while preserving edges.
    smoothened_image = cv2.bilateralFilter(image_to_animate, d=9, sigmaColor=75, sigmaSpace=75)
    # Convert image to gray and create an edge mask using adaptive thresholding.
    gray_image = cv2.cvtColor(smoothened_image, cv2.COLOR_BGR2GRAY)
    edges = cv2.adaptiveThreshold(gray_image, 255, cv2.ADAPTIVE_THRESH_MEAN_C, cv2.THRESH_BINARY, 9, 9)
    # Combine the smoothened image and the edge mask to create a cartoon-like effect.
    to_cartoon = cv2.bitwise_and(smoothened_image, smoothened_image, mask=edges)
    # Save the cartoon image in our current directory. A new Image would be generated in your current directory.
    cartooned_image = f"cartooned_{image_name}"
    cv2.imwrite(cartooned_image, to_cartoon)
    # Display the result.
    cv2.imshow("Cartooned Image", to_cartoon)
    cv2.waitKey(0)
    cv2.destroyAllWindows()
As you can see from the comments, we first load the image we want to cartoonize, then we apply a bilateral filter to smoothen the image. Afterward, we convert the image to a gray format (for better processing) and create an edge mask using adaptive thresholding. This is basically examining our image to see the optimal value for each region. Next up we combined the smoothened image and the edge mask. This is what creates the cartoon-like effect. Then, we save our cartoon-like image and display it as output.
If you find this overwhelming, try to take it step by step. Also, feel free to check out the Python OpenCV documentation here.
Next up, we’ll create the function for augmenting parsing. This is basically getting user input from the terminal. The way I implemented it is that we pass the -i or - -image to specify or give our program an image to cartoonify:
# In this function, we accept user's argument from the terminal. -i or --image to specify the image.
def get_image_argument():
    parser = argparse.ArgumentParser(description="Please specify an image to 'cartoonify'.")
    parser.add_argument('-i', '--image', help="Please use -h or --help to see usage.", dest='image')
    argument = parser.parse_args()
    if not argument.image:
        print("[-] Please specify an image. Use --help to see usage.")
        sys.exit()  # Exit the program
    return argument
Basically what we told this program is that when the user gives the argument -i or --image, accept the specified image, and cartoonify it.
One thing to note is that when testing initially, you should pass a JPEG or PNG image. Feel free to practice with other image types.
Finally, we call the functions to initialize the processes:
# We get the user's input (image) from the terminal and pass it into cartoonizer function.
image_args = get_image_argument()
cartoonizer(image_args.image)
Here, we’re basically telling the cartoonizer/cartoonifier function to cartoonify/cartoonize the image the user specifies from the terminal.
Now, we’re all set to run our program. Open up your terminal, navigate to the directory where your Python file is, make sure the image you want to cartoonize is in the same directory, and run like this:
$ python cartoonifier.py -i hazrard2.jpg
If you're a fan of Eden Hazard like me, I’m sorry I messed his name up. That should actually be hazard. After running this, you should see the cartoonified image:
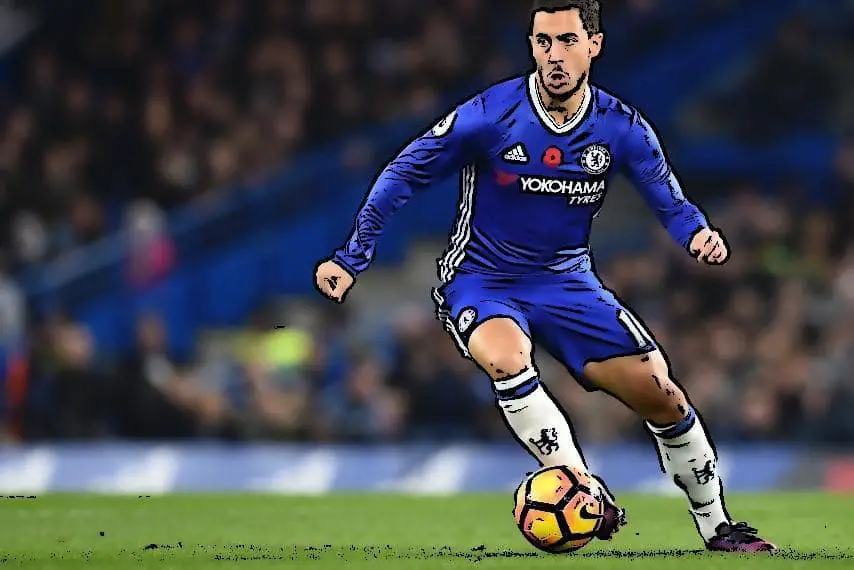
This is the generated image. One thing to note is that it’s better to test with distant images as close-range images don’t look as good. Even in cartoons, the distance of the image plays a very large role in the quality of the image.
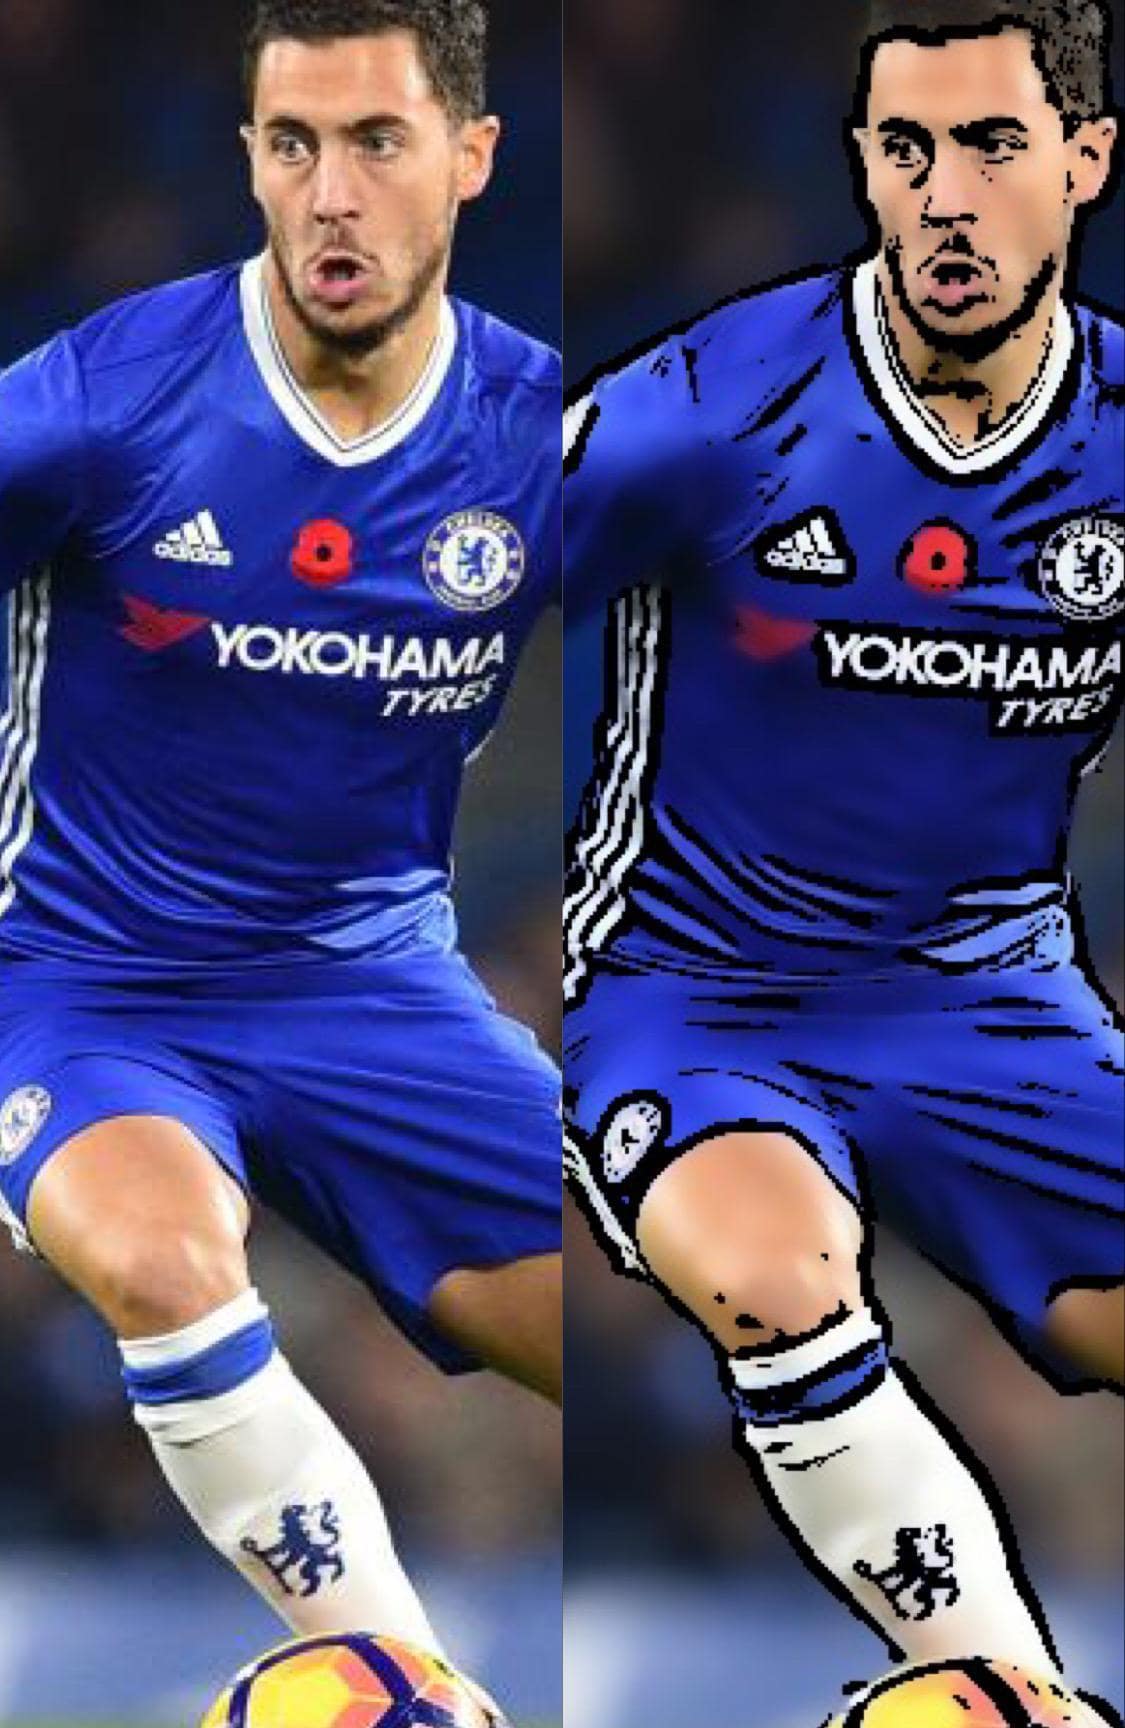
This is a comparison between the original image and the cartoonified image.
There you have it. You can now cartoonify any image of your choice using Python. Also, feel free to experiment with the various parameters and as always, check out the documentation!
Check the complete code here.
Learn also: How to Upscale Images using Stable Diffusion in Python.
Happy coding ♥
Just finished the article? Why not take your Python skills a notch higher with our Python Code Assistant? Check it out!
View Full Code Switch My Framework


Got a coding query or need some guidance before you comment? Check out this Python Code Assistant for expert advice and handy tips. It's like having a coding tutor right in your fingertips!