Struggling with multiple programming languages? No worries. Our Code Converter has got you covered. Give it a go!
In this article, we will take you through the process of building a weather update app using Django, Bootstrap, and OpenWeatherMap API. Before we dive deep, let us understand what a weather update app is.
A weather update app is an app that enables users to search for weather information for cities and returns the necessary weather information for those cities. If you want to build a weather update app using Django, then this article is for you; we will build the app from the ground up.
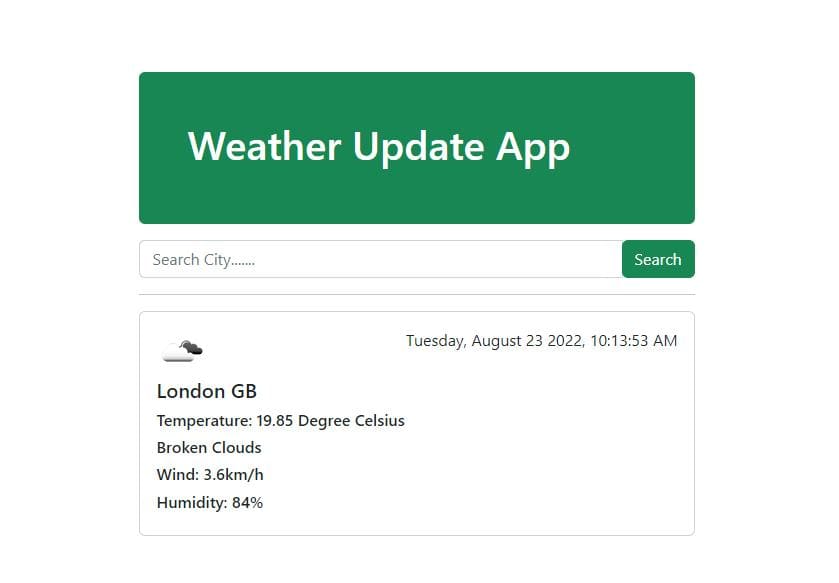
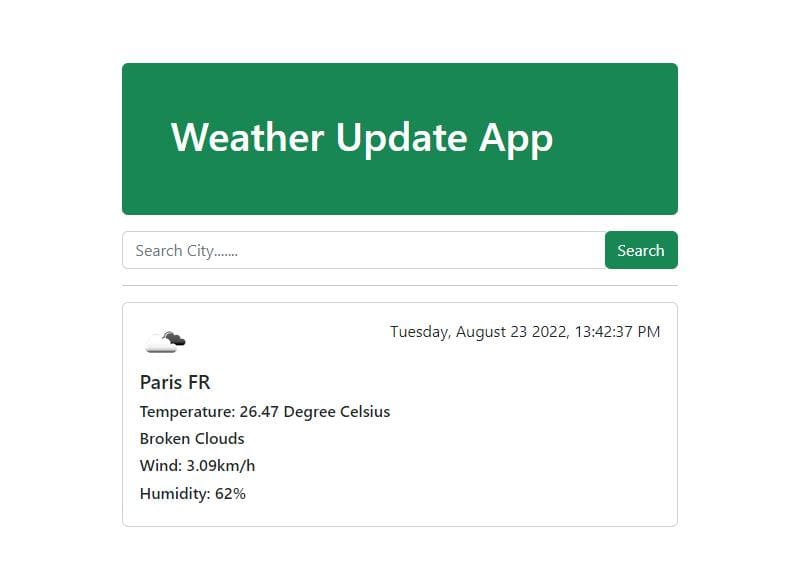
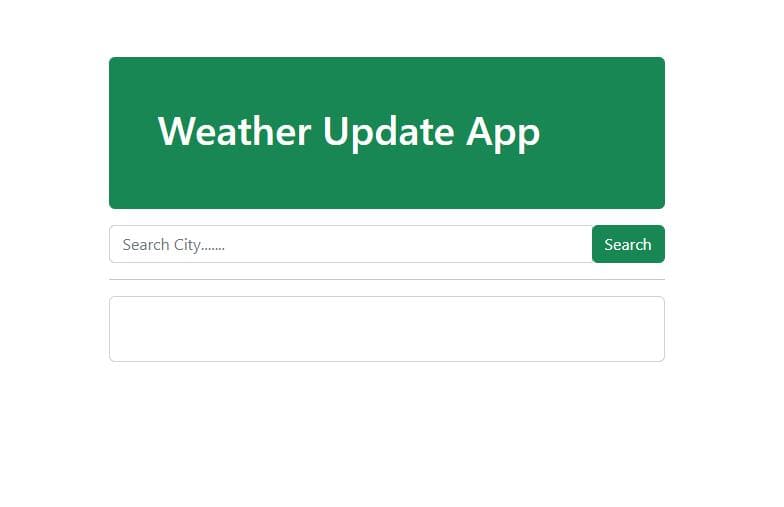
At the end of this article, we are going to build a fully-fledged application that looks like this:
Here is the table of contents:
- Creating the Virtual Environment
- Installing all the Necessary Dependencies
- Creating the Main Project and the App
- Registering the App in the
settings.pyFile - Creating the App’s View
- Configuring the URLs of the App
- Creating the App’s Templates
- Rendering the Templates
- Getting the API Key for the OpenWeatherMap API
- Implementing the App’s Search Functionality
- Conclusion
Creating the Virtual Environment
Our first main task is to create a virtual environment for the project, this virtual environment will help us manage the project’s dependencies very easily:
$ python -m venv projectSince we will install all our dependencies in the virtual environment, let us activate it. On Windows:
$ .\project\Scripts\activateLinux/macOS:
$ source project/bin/activateInstalling all the Necessary Dependencies
Now that the virtual environment is up and running, let us install all the required dependencies for the project:
$ pip install django requestsWe will use Django for the backend functionality and requests for sending requests to the OpenWeatherMap API.
We have successfully installed all the required packages. But something to note here, both Django and requests packages come with some supporting packages.
Creating the Main Project and the App
Now that we are done with the installations, let's create the project:
$ django-admin startproject weatherapplication
$ cd weatherapplication
After you cd into weatherapplication project, create the application:
$ python manage.py startapp weatherupdatesThe application is named weatherupdates, feel free to name it whatever you want, but just make sure the name does not conflict with the project’s name.
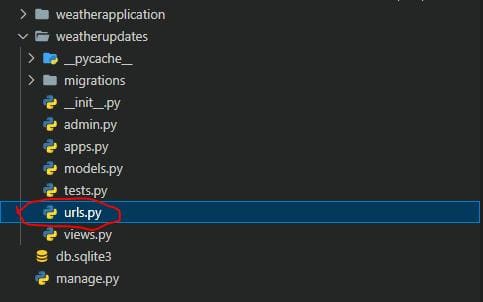
After everything, make sure you have this folder structure:

manage.py is a Python script used for executing administrative commands e.g. startapp, runserver, makemigrations, migrate, etc.
Having installed Django, it is time we run it locally:
$ python manage.py runserverBy default, Django runs on port 8000, and you can find it on http://127.0.0.1:8000/. You will get this output:
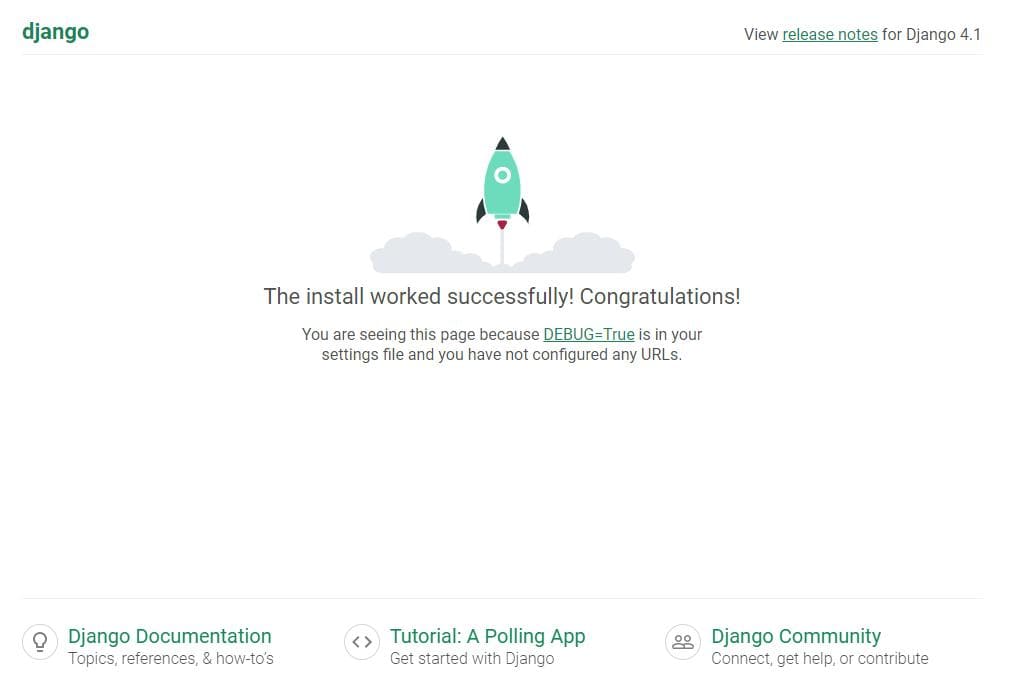
Congratulations on successfully installing Django!
Registering the App in the settings.py File
Now it is time we let the project know about the application that has been created inside it. Inside the weatherapplication folder, there is a settings.py file:
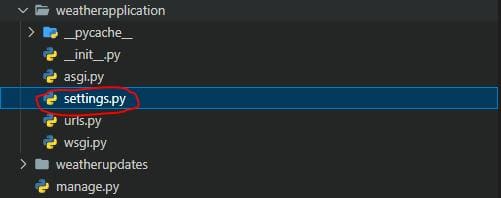
This file is responsible for all the configurations of the project. Open it and scroll down to the INSTALLED_APPS list, make it look like this:
INSTALLED_APPS = [
    'django.contrib.admin',
    'django.contrib.auth',
    'django.contrib.contenttypes',
    'django.contrib.sessions',
    'django.contrib.messages',
    'django.contrib.staticfiles',
    # this is the new created app
    'weatherupdates',
]
Creating the App’s View
Our task for this section is to create a view for the app, which will have a single view. Let us name it index(). Inside the weatherupdates folder, there is a views.py file:
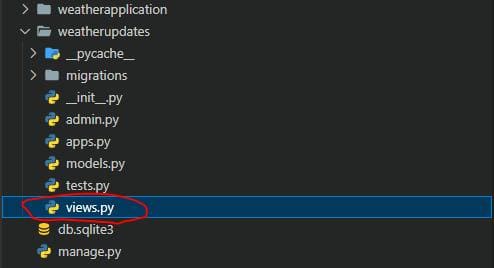
This file will contain all the application's logic e.g., capturing data from the form, sending a request to the API, etc.
Open it and add the following code:
from django.http import HttpResponse
def index(request):
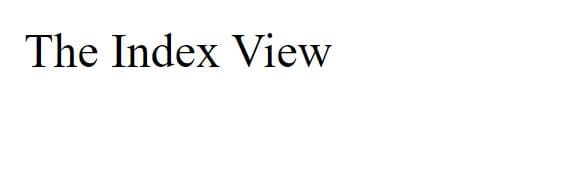
return HttpResponse('The Index View')
The HttpResponse will return a certain response to the user. In this case, it will return the text that has been passed to it.
Configuring the URLs of the App
Now that we have created the view, we need to register it. Create a file named urls.py inside the weatherupdates folder, do not name it otherwise because this is Django’s way of doing things:
This file is used for registering the views. Open it and paste this code:
# here we are import path from in-built django-urls
from django.urls import path

# here we are importing all the Views from the views.py file
from . import views

urlpatterns = [
    path('', views.index, name='home'),
]
The urlpattherns is just a list of URL paths, and these paths are created by Django’s path() function. The path() function takes three arguments, the actual path, the view, and the view’s name.
Now that everything is set in the weatherupdates/urls.py file, let us register these URLs in the project’s urls.py file. Do not be confused here; it must be noted that we have two urls.py files in our project but serving different purposes:
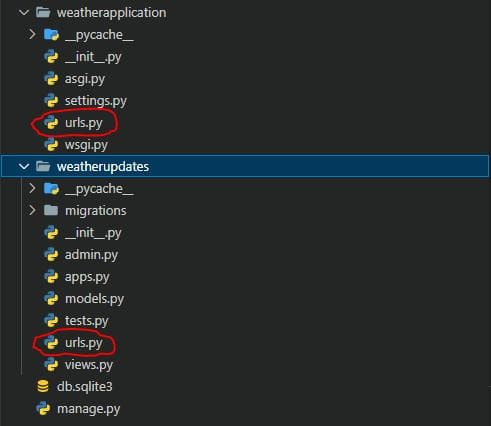
These two files are as follows:
weatherapplication/urls.py– this is inside the project’s folder and is used for registering all the application URLs.weatherupdates/urls.py– this is simply for registering an app’s views and is inside an app’s folder.
Open the weatherapplication/urls.py, and edit it to look as follows:
from django.contrib import admin
from django.urls import path, include

urlpatterns = [
    # the default path for the admin site
    path('admin/', admin.site.urls),
    # this points django to the weatherupdates app urls
    path('', include('weatherupdates.urls')),
]
The include() function points Django to the app’s URLs. In this case, it is pointing Django to the weatherupdates/urls.py.
So far, so good; we now need to test if the configurations work perfectly. Check if the server is still running, and then open the browser and refresh the Django success installation page; this is the output that you'll get:
Creating the App’s Templates
Let us create the templates for the app. The app will have three templates:
base.htmlhome.html404.html
Inside the weatherupdates, create a folder named templates, and inside this templates folder, create another folder named weatherupdates, this is Django’s convention, and do not do it otherwise. Now inside this newly created weatherupdates folder, create the three templates:

Open the base.html and paste this code:
<!DOCTYPE html>
<html lang="en">
<head>
    <meta charset="UTF-8">
    <meta http-equiv="X-UA-Compatible" content="IE=edge">
    <meta name="viewport" content="width=device-width, initial-scale=1.0">
    <title>Weather Updates App</title>
    <!-- getting bootstrap5 from CDN -->
    <link href="https://cdn.jsdelivr.net/npm/bootstrap@5.2.0/dist/css/bootstrap.min.css" rel="stylesheet">
</head>
<body>
    {% block content %}

    {% endblock %}
</body>
</html>
This is an HTML boilerplate file with Bootstrap5 added to it, and the other templates will inherit from it. This will prevent us from having repeated code.
Let's also add code to the other templates. Open home.html and make it look like this:
<!-- extends is for inheriting from the base.html -->
{% extends 'weatherupdates/base.html' %}
{% block content %}
<div class="row justify-content-center my-5">
    <div class="col-md-5">
        <div class="mt-4 p-5 bg-success text-white rounded mb-3">
            <h1>Weather Update App</h1>
        </div>
        <form action="." method="POST">
          {% csrf_token %}
          <div class="input-group">
            <input type="text" required class="form-control" name="city" placeholder="Search City.......">
            <div class="input-group-append">
              <button class="btn btn-success" type="submit">
                Search
              </button>
            </div>
          </div>
        </form>
        <hr>
    </div>
</div>
{% endblock %}
This file will display the form and the weather information. The form has a POST method and points to the current URL as the action. Inside the form, we have a csrf_token, which secures the form from any malicious attacks during submission.
Again open the 404.html template and paste this code:
<!-- extends is for inheriting from the base.html -->
{% extends 'weatherupdates/base.html' %}
{% block content %}
<div class="row justify-content-center my-5">
    <div class="col-md-5">
        <h1>Page Not Found</h1>
        <p>Make sure you are connected to the internet or you are entering a valid city name</p>
        <a href="{% url 'home' %}" class="btn btn-secondary">Go Home</a>
    </div>
</div>
{% endblock %}
This template is for displaying a Page Not Found error; it has a Go Home button; this button will take the user back to the home.
Rendering the Templates
Now that the templates are all set, let us render them in the browser. To do this, we need to modify the views.py file, and make it look as follows:
from django.shortcuts import render

def index(request):
    # the render function is for rendering templates
    return render(request, 'weatherupdates/home.html')
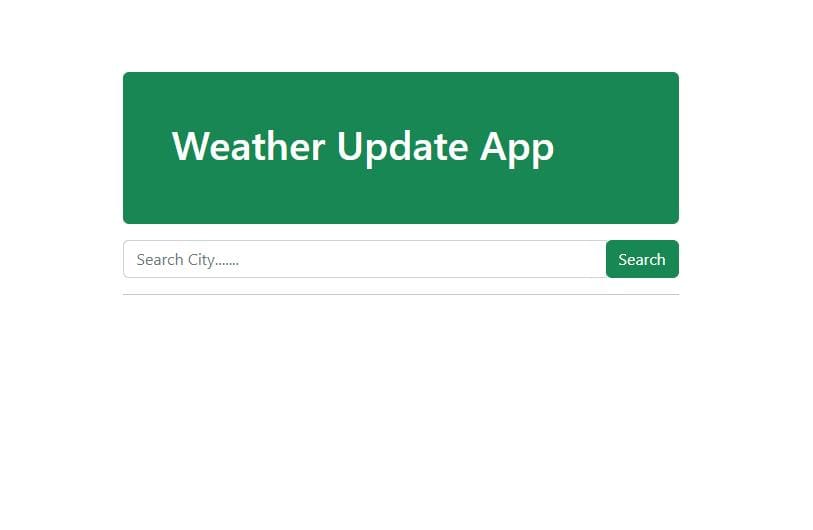
With this modification, you will get this output in the browser:
Getting the API Key for the OpenWeatherMap API
To make requests to the OpenWeatherMap API, we need an API key. So to get this key, we need to sign up.
First of all, go to the signup page, provide your credentials and create your account. This account can be verified via the email address you provided when creating this account, so sign in to your mailbox, and in the primary folder, you will find the confirmation email message. If you already have an account, you can just sign in, and you will be taken to the home page:
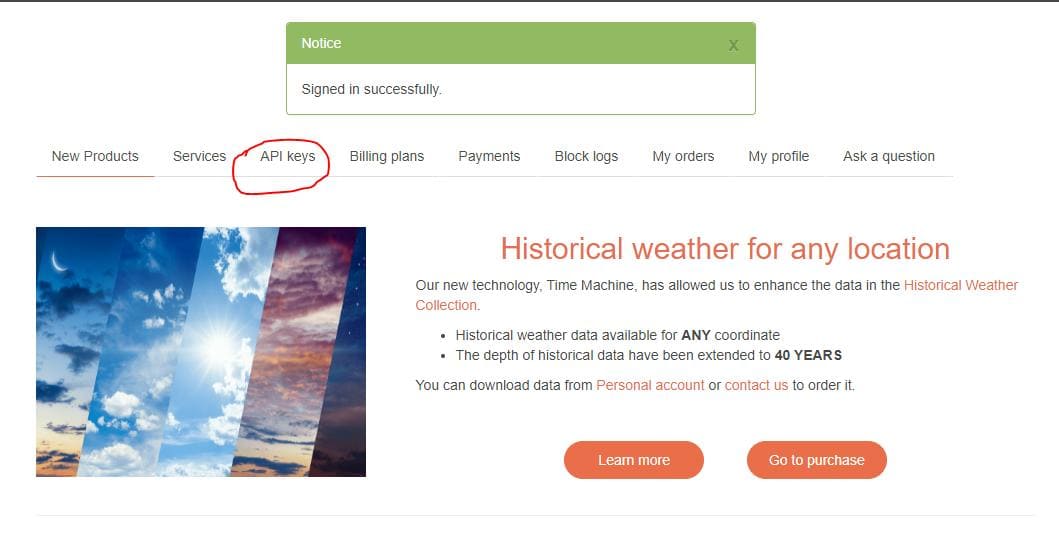
Click the API keys tab, and you will be taken to this page:
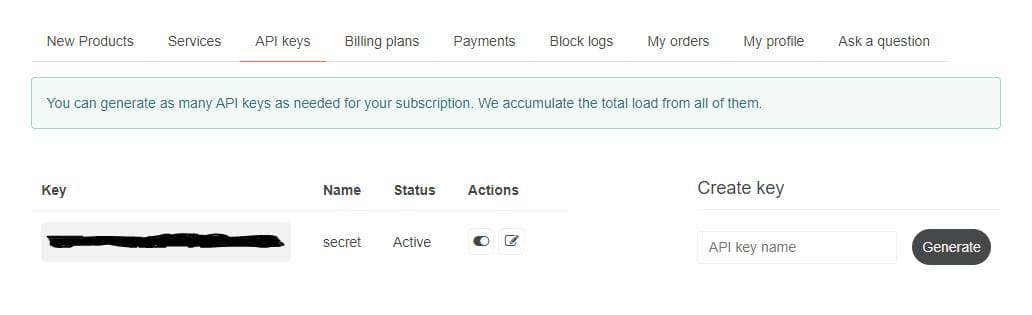
Here you can generate your API key or use the default key that OpenWeatherMap provides.
Now we need to pick the URL that we will send requests to. Since we are more interested in finding the current weather of a particular city, we will use this URL:
https://api.openweathermap.org/data/2.5/weather?q={city_name}&appid={API_KEY}&units=metricOpenWeatherMap provides you with lots of URL options with different parameters, and you can explore them here.
Implementing the App’s Search Functionality
It is now time we implement the search functionality of our app, open the views.py file, on top, add the following:
import requests
import json
from datetime import datetime
And make the index() view like this:
# the index() will handle all the app's logic
def index(request):
    # if there are no errors the code inside try will execute
    try:
    # checking if the method is POST
        if request.method == 'POST':
            API_KEY = 'put your API key here'
            # getting the city name from the form input
            city_name = request.POST.get('city')
            # the url for current weather, takes city_name and API_KEY
            url = f'https://api.openweathermap.org/data/2.5/weather?q={city_name}&appid={API_KEY}&units=metric'
            # converting the request response to json
            response = requests.get(url).json()
            # getting the current time
            current_time = datetime.now()
            # formatting the time using directives, it will take this format Day, Month Date Year, Current Time
            formatted_time = current_time.strftime("%A, %B %d %Y, %H:%M:%S %p")
            # bundling the weather information in one dictionary
            city_weather_update = {
                'city': city_name,
                'description': response['weather'][0]['description'],
                'icon': response['weather'][0]['icon'],
                'temperature': 'Temperature: ' + str(response['main']['temp']) + ' °C',
                'country_code': response['sys']['country'],
                'wind': 'Wind: ' + str(response['wind']['speed']) + 'km/h',
                'humidity': 'Humidity: ' + str(response['main']['humidity']) + '%',
                'time': formatted_time
            }
        # if the request method is GET empty the dictionary
        else:
            city_weather_update = {}
        context = {'city_weather_update': city_weather_update}
        return render(request, 'weatherupdates/home.html', context)
    # if there is an error the 404 page will be rendered
    # the except will catch all the errors
    except:
        return render(request, 'weatherupdates/404.html')
Replace the API_KEY variable with the real API key that you generated in your OpenWeatherMap dashboard.
In the index() view where all the app’s logic is handled, the view checks if the form sent a POST or GET request. If the request was POST, the city name is captured and passed to the URL together with the API key. A get request is sent to the URL, and its response is converted to JSON, now from this jsonified response, we are getting the necessary weather information like:
- description -
response['weather'][0]['description'] - icon -
response['weather'][0]['icon'] - temperature -
response['main']['temp'] - country_code -
response['sys']['country'] - wind -
response['wind']['speed'] - humidity -
response['main']['humidity']
We are using keys to access this weather information from the jsonified response. All this information will be dynamically rendered to the home.html template with some additional information like city and time.
To dynamically render this in the home.html template, add these lines of code just below the <hr> tag:
        <div class="card">
            <div class="card-body">
                <img src="http://openweathermap.org/img/w/{{ city_weather_update.icon }}.png" alt="">
                <div class="card-text float-end">{{ city_weather_update.time }}</div>
                <div class="card-text"><h5>{{ city_weather_update.city }} {{ city_weather_update.country_code }}</h5></div>
                <div class="card-text"><h6>{{ city_weather_update.temperature }}</h6></div>
                <div class="card-text"><h6>{{ city_weather_update.description | title }}</h6></div>
                <div class="card-text"><h6>{{ city_weather_update.wind }}</h6></div>
                <div class="card-text"><h6>{{ city_weather_update.humidity }}</h6></div>
            </div>
        </div>
The above code snippet is just a card for displaying the weather information; this information is coming from the city_weather_update dictionary that is passed to the context.
Now let us test if the search functionality is working. Let's get the current weather update for Paris. Enter the city name and click the Search button; this is the output:
The code in the index() view inside the try block will only run when there are no errors while the code inside the except block will run when errors have been caught. Let us test if the app can catch the errors; we will once more enter an invalid city name, you can just enter some random characters, and for that, you will get this output:
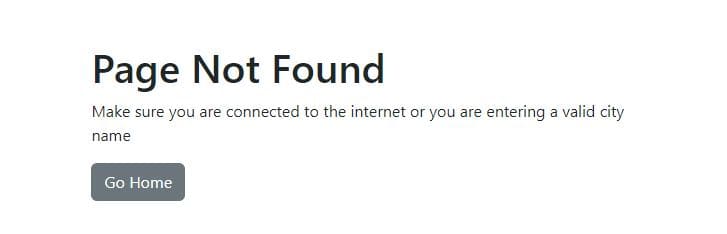
Click the Go Home button, and you will be taken to the home page:
Congratulations on successfully creating a weather update app!
Conclusion
We have created a weather update app using Django and OpenWeatherMap API. This app can fetch weather data from OpenWeatherMap and display it user-friendly to the user interface. We now hope you will use the knowledge you have acquired in your future Django projects.
You can always get the complete code here.
Learn also: How to Build a CRUD Application using Django in Python.
Happy coding ♥
Save time and energy with our Python Code Generator. Why start from scratch when you can generate? Give it a try!
View Full Code Assist My Coding


Got a coding query or need some guidance before you comment? Check out this Python Code Assistant for expert advice and handy tips. It's like having a coding tutor right in your fingertips!