Kickstart your coding journey with our Python Code Assistant. An AI-powered assistant that's always ready to help. Don't miss out!
We are in an era where online presence matters a lot. One way to achieve that is by having a blog site where you share your articles and thoughts with the world. In this tutorial, we will build a simple blog site using the Django framework in Python.
The Django web framework is a high-level Python framework that promotes rapid development and a clean, pragmatic design style. It adheres closely to the MVC (Model-View-Controller) pattern despite using slightly different terminology. At its most basic level, Django is an MTV framework (Model-Template-View) with Views as Templates and Controllers as Views. Large companies such as Pinterest and Instagram use Django.
Table of content:
- Advantages of using Django
- Setting up a Django Development Environment
- Starting the Django Project
- The Project Structure
- Running Migrations
- Running the Server
- Creating the Django App
- Configuring the Blog App
- Defining the Models
- Django Admin Interface
- Creating Views
- Setting up the URLs
- Making the Templates
- Adding New Posts
- Adding Comments
- Deleting Posts
- Conclusion
Advantages of using Django
- Fast: Django was created to speed up the process by which programmers created applications from conception to completion.
- Secure: Django takes security seriously and helps developers avoid several common security problems.
- Scalable: Some of the high-traffic websites are developed using Django. Django can swiftly and adaptably scale the website to handle even the highest traffic demands.
Setting up a Django Development Environment
The Django development environment includes installing and configuring Python, Django, and a database system. We need to set up a virtual environment first.
A virtual environment is a Python environment where the Python interpreter, libraries, and scripts are segregated from those installed in other virtual environments. This means our application does not interfere with system-installed Python or other virtual environments.
Let’s create a new directory where our app will be stored:
$ mkdir blog_site
$ cd blog_site
While in the blog_site directory, install virtualenv using pip, the Python installer. Virtualenv is a tool for creating isolated virtual python environments.
$ pip install virtualenvThe next step is to create a virtual environment, let’s call it venv:
$ virtualenv venvTo activate it:
$ source venv/bin/activateYou should now see (venv) in your terminal.
Python comes pre-installed in the Linux distribution. To confirm, simply type python or python3 for newer versions of Linux. If you're on Windows, then make sure to install it before doing the above steps.
Starting the Django Project
We should first install Django:
$ pip install djangoLet's start a new Django project:
$ django-admin startproject blogsiteWe’ve called our project blogsite. You name it whatever you want.
The Project Structure
When a Django project is created, it includes some basic files by default, such as manage.py. Here is what blogsite looks like:
.
├── manage.py
└── blogsite
    ├── asgi.py
    ├── __init__.py
    ├── settings.py
    ├── urls.py
    └── wsgi.py
The above files are:
manage.py- a command-line utility that gives various options for interacting with this Django project.init.py- an empty file that tells Python to treat this directory like a Python package.settings.py- This file contains all the website settings. Here, you can register applications you create, configure databases, etc.urls.py- This file stores all links to the project. Simply said, this file instructs Django that if a user enters this URL, they should be directed to the specified website or picture.asgi.pyandwsgi.pyare advanced at this point. They are useful when hosting projects. Here is a basic definition.asgi.py- An entry-point for ASGI-compatible web servers to serve your project.wsgi.py- This file is required for the WSGI deployment of the project. It facilitates communication between your Django application and the web server.
Now that we have created our project, the next step is to run migrations.
Running Migrations
Migrations are Django’s way of propagating model changes (adding a field, deleting a model, etc.) into your database schema. First, navigate to the project’s directory. Make sure it contains a manage.py file:
$ cd blogsiteThe makemigrations command examines all of your available models and generates migrations for any tables that do not yet exist. The migrate command runs all unapplied migrations against your database, essentially synchronizing the changes you made to your models with the database schema. To run migrations:
$ python manage.py makemigrations
$ python manage.py migrate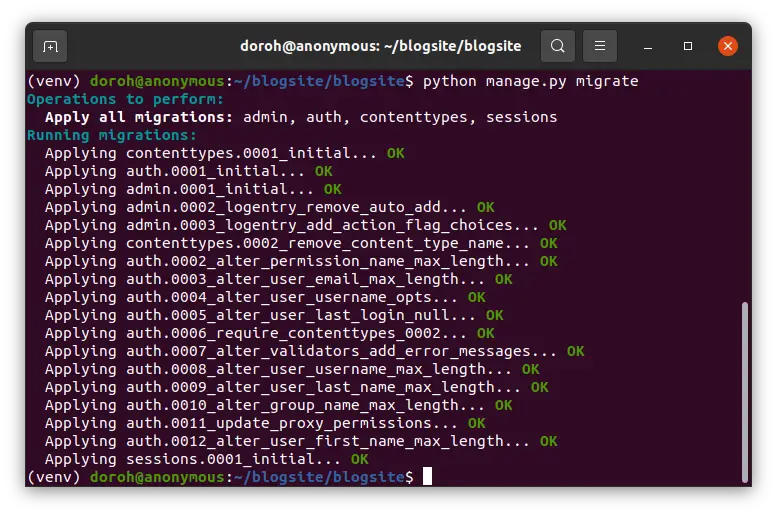 Running the Server
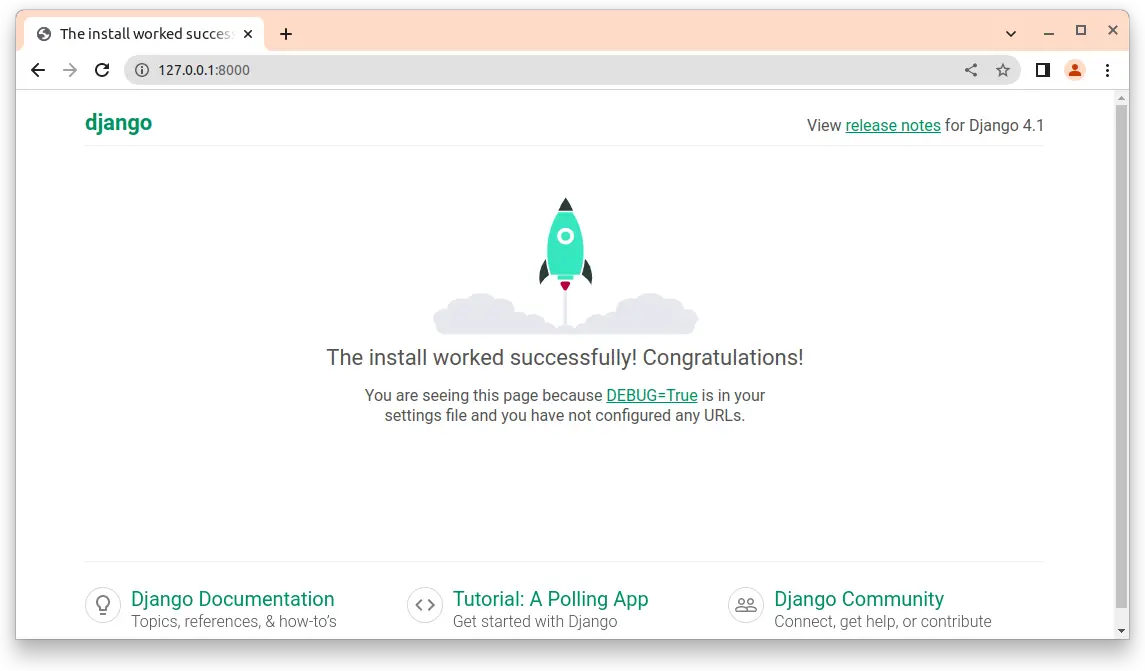
Django has a built-in web server for quick development. To run the server:
$ python manage.py runserver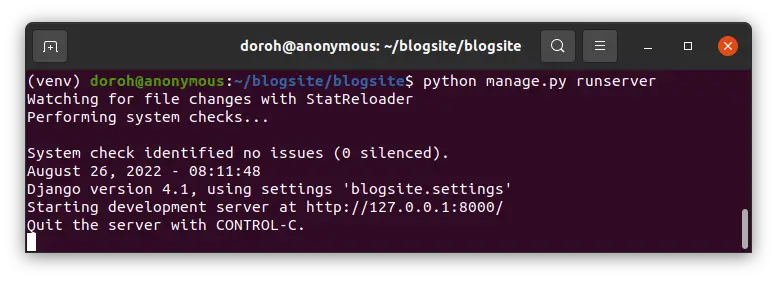 You should see a link to the development server. Open the link http://127.0.0.1:8000/ in your web browser. Congratulations! You have successfully created a Django project.
 Creating the Django App
A Django application is a Python package designed specifically for use in Django projects. A Django project can have more than one app. We’ll create a simple blog site app. You can download the code used here.
$ python manage.py startapp blogTo understand the app structure:
├── db.sqlite3
├── manage.py
├── blogsite
└── blog
    ├── admin.py
    ├── apps.py
    ├── __init__.py
    ├── migrations
    │   └── __init__.py
    ├── models.py
    ├── tests.py
    └── views.py
models.pyfile contains the most important fields and behaviors of the data you’re storing.admin.pyis where you register the models in your app with the Django admin application.views.pyfile contains Python functions that take HTTP requests and return HTTP responses, like HTML documents.
Configuring the Blog App
Our project should be informed that we have created a new app. Open settings.py, and add the name of our app in the INSTALLED_APPS list:
INSTALLED_APPS = [
    'django.contrib.admin',
    'django.contrib.auth',
    'django.contrib.contenttypes',
    'django.contrib.sessions',
    'django.contrib.messages',
    'django.contrib.staticfiles',
    'blog' # our new app
]
Defining the Models
A model is the single, definitive source of data information. It contains the data’s essential fields and behaviors. Each model corresponds to a single database table. Django comes with SQLite configured out of the box as its database. Other databases, such as Postgres, can be used. Designing a good data model is a make or break for any app. In our blog app, we should be able to:
- Create a new post.
- Comment on an existing post.
- Delete post.
Open models.py in the code editor:
from django.db import models
from django.contrib.auth.models import User
from django.template.defaultfilters import slugify
# Create your models here.


class Post(models.Model):
    title = models.CharField(max_length=150, unique=True)
    author = models.ForeignKey(User, on_delete=models.CASCADE)
    slug = models.SlugField(max_length=100, unique=True)
    body = models.TextField()
    image = models.ImageField(upload_to="images", blank=True, null=True)

    created_on = models.DateTimeField(auto_now_add=True)
    updated_on = models.DateTimeField(auto_now=True)

    class Meta:
        ordering = ['-created_on']

    def __str__(self):
        return self.title

    def save(self, *args, **kwargs):
        if not self.slug:
            self.slug = slugify(self.title)
        super(Post, self).save(*args, **kwargs)


class Comment(models.Model):
    post = models.ForeignKey(Post, on_delete=models.CASCADE)
    name = models.CharField(max_length=100)
    comment = models.TextField(max_length=1000)

    created_on = models.DateTimeField(auto_now=True)

    class Meta:
        ordering = ['-created_on']

    def __str__(self):
        return self.name
The fields we have used are:
CharFieldis a string field, for small to large-sized strings.TextFieldis used for large amounts of text.DateTimeFieldis a field for date and time.auto_now_addsets the field to the current datetime when the object is first created, whereasauto_nowsets the field to now every time the object is saved.ImageFieldis aFileFieldthat only accepts image uploads.upload_tosets where the images will be uploaded to. Requires the Pillow package, which we can install viapip install Pillow.ForeignKeyis a field used to create a many-to-one relationship.on_delete=models.CASCADEinstructs Django that if the referenced item is deleted, all objects that contain references to it are also deleted.SlugFieldis a field for storing URL slugs in a relational database.
We have two model classes, Post and Comment. The Post model contains the author of the post, the title, slug, image, body, and when it was created. We’ve ordered our posts by the time it was created.
The author has used the built-in User model. Another alternative is making an Author model with User as a foreign key field with photos and biography fields.
We’ve auto-generated the slug by using the slugify() function on the Post's title.
Our Comment model has the post, name of the one commenting, the comment, and when it was created.
To install Pillow in terminal:
$ pip install pillowAfter creating our models, we should then do the migrations. makemigrations separates your model changes into separate migration files, it is like commits, and migrate applies them to your database:
$ python manage.py makemigrations
$ python manage.py migrate
Django Admin Interface
Django provides an easy way to add data to our app. We need to create a superuser with access to the admin interface. In the terminal, run the following command:
$ python manage.py createsuperuser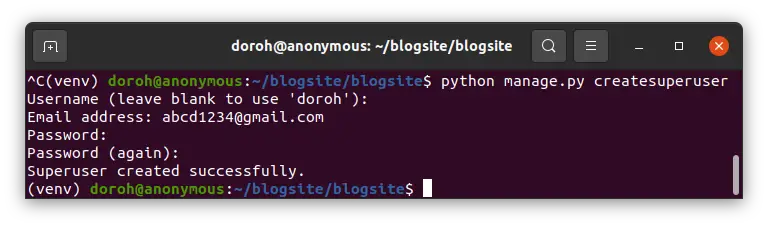 Input your password, name, and email as prompted. We then tell the admin that our app has an admin interface by registering the models in
 admin.py:
from django.contrib import admin
from .models import Post, Comment
# Register your models here.

admin.site.register(Post)
admin.site.register(Comment)
Run the server in the terminal. We then go to 127.0.0.1:8000/admin in the terminal. Fill in the username and the password you had set up, you'll see the following dashboard:
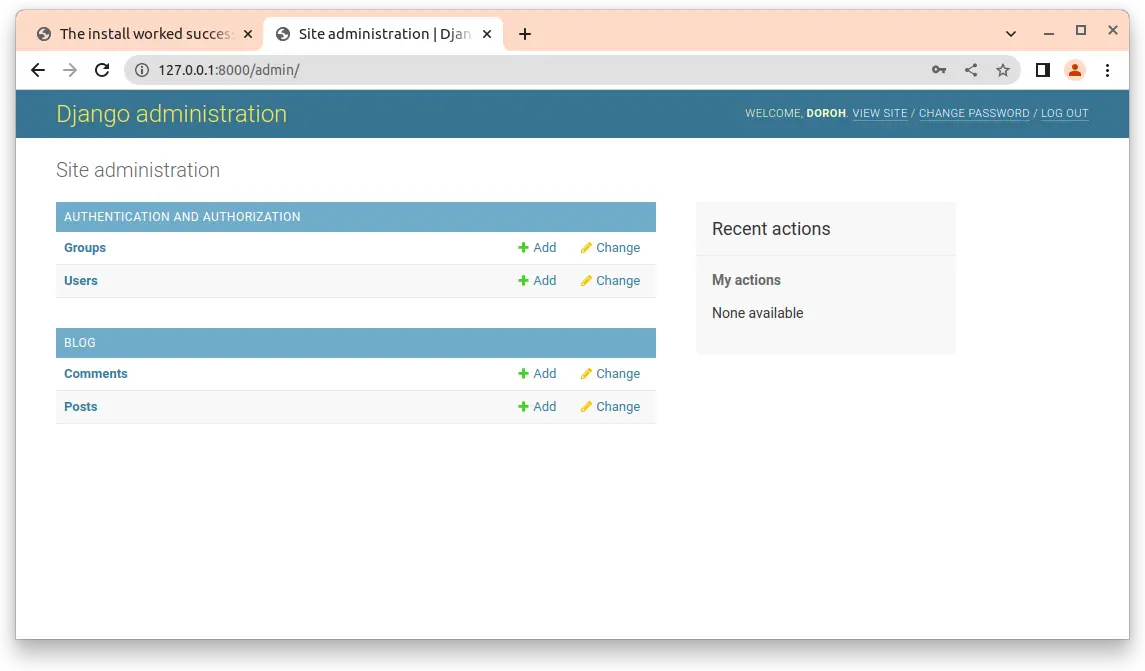 To add blog posts, click on the Add button on the Posts row:
 Creating Views
A view function in Python accepts a web request and returns an appropriate web response. This response can be anything that a web browser can display, such as the HTML of a web page, a redirect, a 404 error, an XML document, an image, and so on.
Views are implemented by the use of functions or classes. Function-based views (FBV) are created by passing an HttpRequest object as an argument to a Python function that returns a HttpResponse object:
from django.http import HttpResponse

# create a function
def home(request):
    return HttpResponse("<h1>Hello world</h1>")
Class-based views (CBV) are a different way to implement views as Python objects rather than functions. They do not replace function-based views but have some differences and advantages. Here’s an example:
class CreateView(View):
  template_name = 'home.html'
  form_class = MyForm
We will use function-based views in this tutorial. Let’s define our first view. Open views.py :
from django.shortcuts import render
from .models import *

# Create your views here.
def home(request):
    posts = Post.objects.all()
    return render(request, 'home.html', {'posts': posts})
from .models import * imports all models in models.py.
We're getting all the posts using Post.objects.all() and then using the render() function to render the home.html template and pass the posts context. We'll create the templates later in this tutorial.
Setting up the URLs
Each view in Django must be associated with a URL pattern. This is accomplished using the URLConf. Every URLConf module must include the urlpatterns variable, which is a collection of URL patterns that must be matched against the requested URL.
These patterns will be examined in order until the first match is discovered. The view associated with the first match is then triggered. Django launches an appropriate error handling view if no URL pattern matches.
Let's open urls.py file inside blogsite folder:
from django.contrib import admin
from django.urls import path
from blog import views #here

urlpatterns = [
    path('admin/', admin.site.urls),
    path('', views.home, name='home'), #here
]
We import views from blog. The admin path is auto-generated by Django. We add an empty path that returns the home() view when executed. Let's now create our templates.
Making the Templates
A template contains the desired HTML output's static and dynamic portions. A template in Django is a regular .html file written in HTML, CSS, and JavaScript, with the ability to insert special tags and context passed from the Django view.
Create a Templates folder in the root directory, the same folder where manage.py is:
.
├── db.sqlite3
├── manage.py
├── blogsite
├── Templates
└── blog
Configure the settings.py to include the templates:
TEMPLATES = [
    {
        'BACKEND': 'django.template.backends.django.DjangoTemplates',
        'DIRS': [BASE_DIR/'Templates'], #here
        'APP_DIRS': True,
        'OPTIONS': {
            'context_processors': [
                'django.template.context_processors.debug',
                'django.template.context_processors.request',
                'django.contrib.auth.context_processors.auth',
                'django.contrib.messages.context_processors.messages',
            ],
        },
    },
]
We will use Bootstrap for our frontend. Bootstrap is the most popular CSS Framework for creating responsive and mobile-first websites.
Creating the Base Template
In this section, we will create a base.html file containing code that we want to appear on each HTML page:
{% load static %}<!doctype html>

<html lang="en">
  <head>
    <!-- Required meta tags -->
    <meta charset="utf-8">
    <meta name="viewport" content="width=device-width, initial-scale=1">
    <!-- Bootstrap CSS -->
    <link href="https://cdn.jsdelivr.net/npm/bootstrap@5.0.2/dist/css/bootstrap.min.css" rel="stylesheet" integrity="sha384-EVSTQN3/azprG1Anm3QDgpJLIm9Nao0Yz1ztcQTwFspd3yD65VohhpuuCOmLASjC" crossorigin="anonymous">
  <title>{% block title %} Awesome blog {% endblock %}</title>
  </head>
  <body>
    {%block body%}
    <header class = "header fixed-top">
      <nav class="navbar navbar-expand-lg navbar-light bg-light">
    <div class="container-fluid">
      <a class="navbar-brand" href="{% url 'home' %}">Cass blog</a>
      <button class="navbar-toggler" type="button" data-bs-toggle="collapse" data-bs-target="#navbarSupportedContent" aria-controls="navbarSupportedContent" aria-expanded="false" aria-label="Toggle navigation">
        <span class="navbar-toggler-icon"></span>
      </button>
      <div class="collapse navbar-collapse" id="navbarSupportedContent">
        <ul class="navbar-nav ms-auto mb-2 mb-lg-0">
          <li class="nav-item">
            <a class="nav-link active" aria-current="page" href="#">New Post</a>
          </li>
        </ul>
      </div>
    </div>
  </nav>
</header>
  {% block content %}
  {% endblock %}

  {% endblock body%}
  </body>
</html>
A block is used to override certain elements of a template. This means you have a content block overridden by children who inherit from this template. You can achieve this by using the extends keyword in child templates.
We have used {% load static %} because our blog site includes images. Inside the {% block body %} and {% endblock %} tags, we have created a navbar.
Creating the Home Template
Let’s create a home page template in the same folder and name it home.html:
{% extends 'base.html'%}
{% load static%}
{% block content%}

<div class="container mt-5 mb-3">
{% for post in posts %}
          <div class="row ">
        <div class="col-8 mb-4">
          <div class="card-header text-center">
            by {{post.author}}
          </div>
            <div class="card text-center shadow" >
                <img src="/media/{{post.image}}"  class="card-img-top" alt="..." height="300px" >
                <div class="card-body">
                  <h5 class="card-title">{{post.title}} </h5>
                  <p class="card-text">{{post.body| truncatechars:210}}</p>
                  <a href="{{post.slug}}" class="btn btn-primary">Read More {% if user.is_superuser %}<a href="delete_blog_post/{{post.slug}}/" class="btn btn-danger mx-4">Delete Blog</a>{% endif %}</a>
                </div>
                <div class="card-footer">
  <small class="text-muted">{{post.created_on}}</small>
</div>
              </div>
        </div>
        {% endfor %}
    </div>
</div>
{% endblock %}
The first line of the code means that you are extending base.html. Everything in base.html will be rendered in home.html excluding code between {% block content %} and {% endblock %} tags.
The for loop is bracketed inside {% for post in posts %} and {% endfor %} tags. We have added two buttons, one to read the rest of the post and the other to delete the post. The Delete button is only visible if the person accessing it is a superuser. Images will not load until we make some adjustments.
At the end of settings.py, add the following:
MEDIA_ROOT  = os.path.join(BASE_DIR, 'media')
STATIC_URL = 'static/'
MEDIA_URL = '/media/'
STATICFILES_DIRS = [
    os.path.join(BASE_DIR, 'static/'),
]
This lets Django know the location of our static and media files. We then create a new folder inside the root directory and call it media. Add another folder called images inside the media folder. This is where the post images will be stored.
In urls.py, we add media URLs entry. Our updated urls.py file will be like that:
from django.contrib import admin
from django.urls import path
from blog import views #here
from django.conf.urls.static import static
from django.conf import settings

urlpatterns = [
    path('admin/', admin.site.urls),
    path('', views.home, name='home'),
] + static(settings.MEDIA_URL, document_root=settings.MEDIA_ROOT)
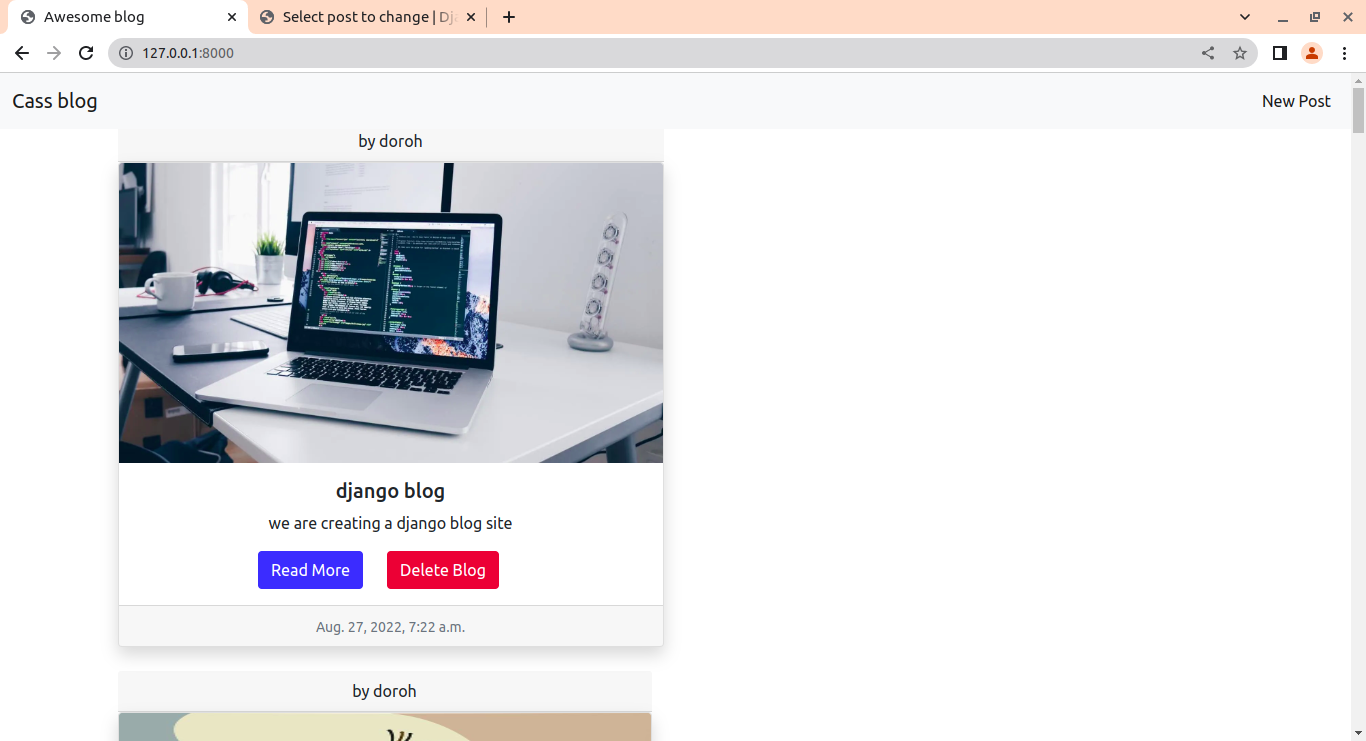
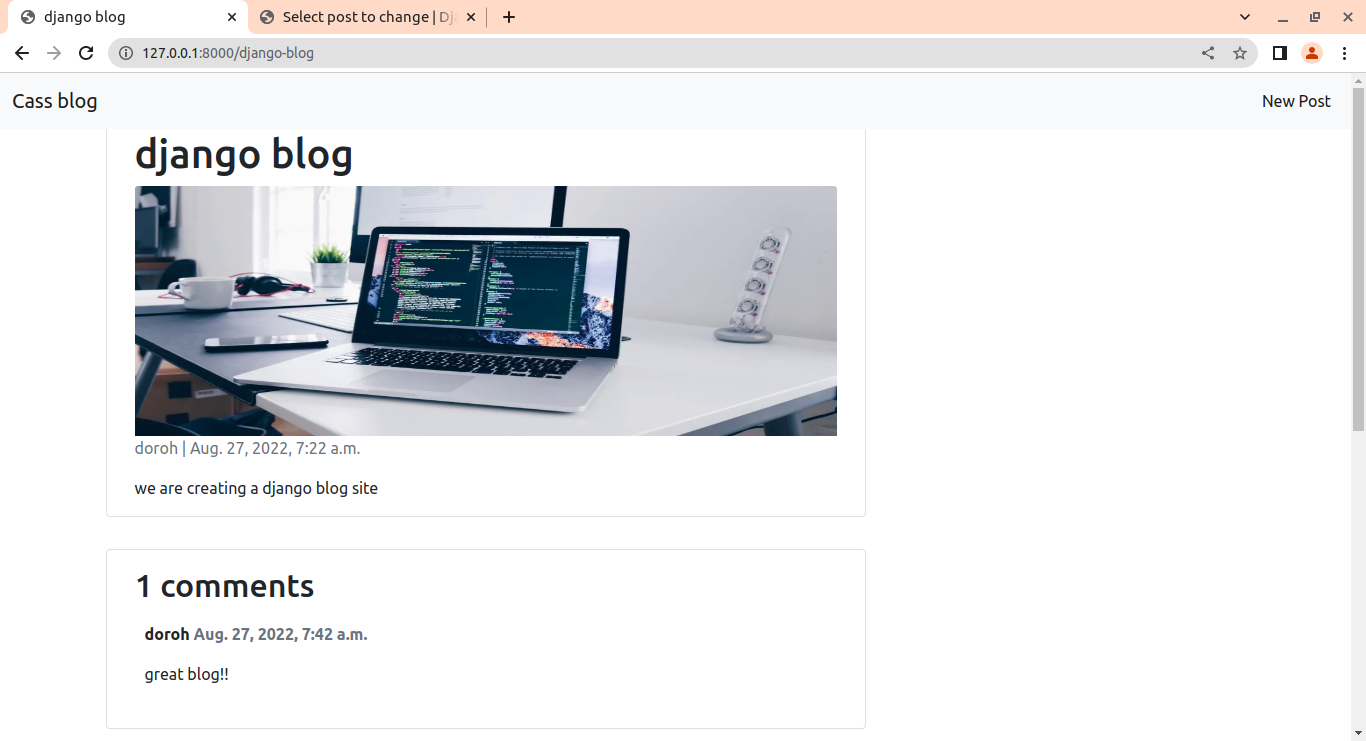
Our images will now load properly. Let’s run the server: Great! Our home page is up and running. What if we want to add new posts?
Adding New Posts
We can add posts by using the admin interface. Another option is to create views that let us add posts. To do that, we need to create a form to input data. Create a new file named forms.py under the blog folder:
from django import forms
from django.forms import ModelForm
from .models import Post, Comment

class PostForm(forms.ModelForm):
    class Meta:
        model = Post
        exclude = ['author', 'slug']
We have taken in all fields in the Post model except for the author and slug fields. In views.py, add:
from .forms import *

def new_post(request):
    if request.method == "POST":
        form = PostForm(request.POST, files=request.FILES)
        if form.is_valid():
            post = form.save(commit=False)
            post.author = request.user
            post.save()
            return redirect('home')
    else:
        form = PostForm()
    return render(request, "new_post.html", {'form': form})
request.POST is a dictionary-like object that lets you access submitted data by a key name. In urls.py, add a path to the new_post() view:
path('new_post/', views.new_post, name='new_post'),Let’s then create a new_post.html file in the templates folder:
{% extends 'base.html'%}
{% block content %}

<div class="container mt-5 border d-flex justify-content-center">
<h2>Hello {{ user }}</h2>
  <form  action="/new_post/" enctype="multipart/form-data"  method="POST"> {% csrf_token %}
  <div class="container mt-4">
  {{ form.as_p }}
<button type="submit" class="btn btn-success">Post</button>
  </div>
  </form>
  <br>#breaks line
</div>

{% endblock %}
We have created an element that, when the user submits it, will generate a POST request with the user-updated form data as part of its content. {% csrf_token %} prevents malicious attacks by generating a secure token.
In base.html, add the URL route where the new post button is:
          <li class="nav-item">
            <a class="nav-link active" aria-current="page" href="{% url 'new_post' %}">New Post</a> #here
          </li>
Clicking on the New post button should direct us to a form:
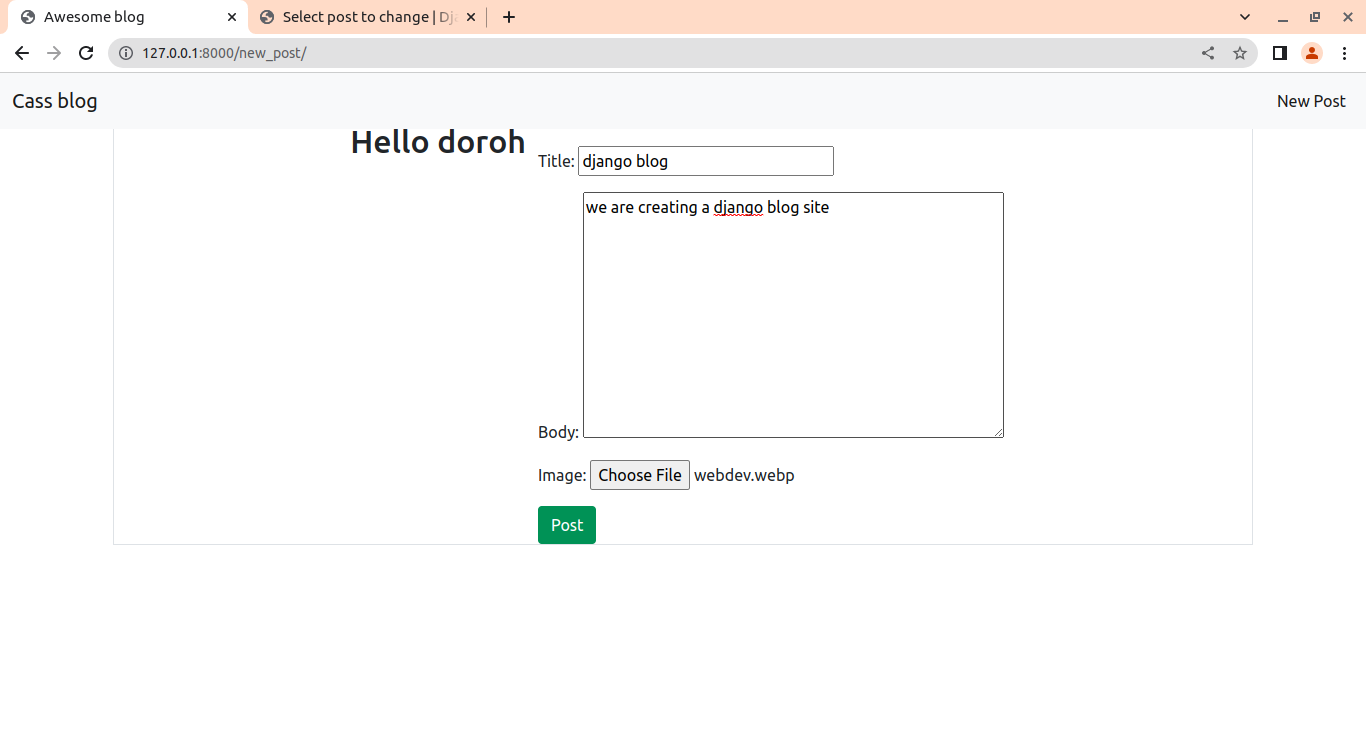 You may want to make an advanced editor in the body field, such as django-tinymce.
By clicking the Post button, our new blog post is created:
Adding Comments
Now that we have successfully created a new post, let’s comment on it. We can only comment after we have opened the article to read more. We also have to create a form to input our comments. In forms.py:
class CommentForm(forms.ModelForm):
    class Meta:
        model = Comment
        exclude = ['post']
We then import the form we have created to views.py:
def post_details(request, slug):
    post = Post.objects.get(slug=slug)
    comments = Comment.objects.order_by("-created_on")
    new_comment = None
    if request.method == "POST":
        form = CommentForm(request.POST or None)
        if form.is_valid():
            new_comment = form.save(commit=False)
            new_comment.post = post
            new_comment.save()
            return render(request, "add_comment.html")
    else:
        form = CommentForm()
    return render(request, "add_comment.html", {'form': form, 'post': post, 'comments': comments, 'new_comment': new_comment})
We have filtered posts by slug. We then create a new HTML file, add_comment.html:
{% extends 'base.html' %} {% block content %}

<div class="container  mt-3 ">
  <div class="row  mt-2">
    <div class="col-md-8 card mb-3 border  mt-4  d-flex justify-content-center">
      <div class="card-body">
        <h1>{% block title %} {{ post.title }} {% endblock title %}</h1>
        <img src="/media/{{post.image}}" class="card-img-top" alt="..." height="250px">
        <p class=" text-muted">{{ post.author }} | {{ post.created_on }}</p>
        <p class="card-text ">{{ post.body | safe }}</p>
      </div>
    </div>
    <div class="col-md-8 card mb-4  mt-3 ">
      <div class="card-body">
        <!-- comments -->
        {% if comments%}
        <h2>{{ comments.count }} comments</h2>
        {% for comment in comments %}
        <div class="comments" style="padding: 10px;">
          <p class="font-weight-bold" style="font-weight:bold;">
            {{ comment.name }}
            <span class=" text-muted font-weight-normal">
              {{ comment.created_on }}
            </span>
          </p>
          {{ comment.comment | linebreaks }}
        </div>
        {% endfor %}
      </div>
      {% endif %}
    </div>
    <div class="col-md-8 card mb-4  mt-3 ">
      <div class="card-body">
        {% if new_comment %}
        <div class="alert alert-success" role="alert">
          Your comment is awaiting moderation
        </div>
        {% else %}
        <h5>Leave a comment</h5>
        <form method="post" style="margin-top: 1.3em;">
          {% csrf_token %}
          {{ form.as_p }}
          <button type="submit" class="btn btn-primary  btn-lg">Submit</button>
        </form>
        {% endif %}
      </div>
    </div>
  </div>
</div>
{% endblock content %}
We then create its path in urls.py:
path('<slug:slug>', views.post_details, name='post_details'),Let’s then click on the read more button in one of the posts:
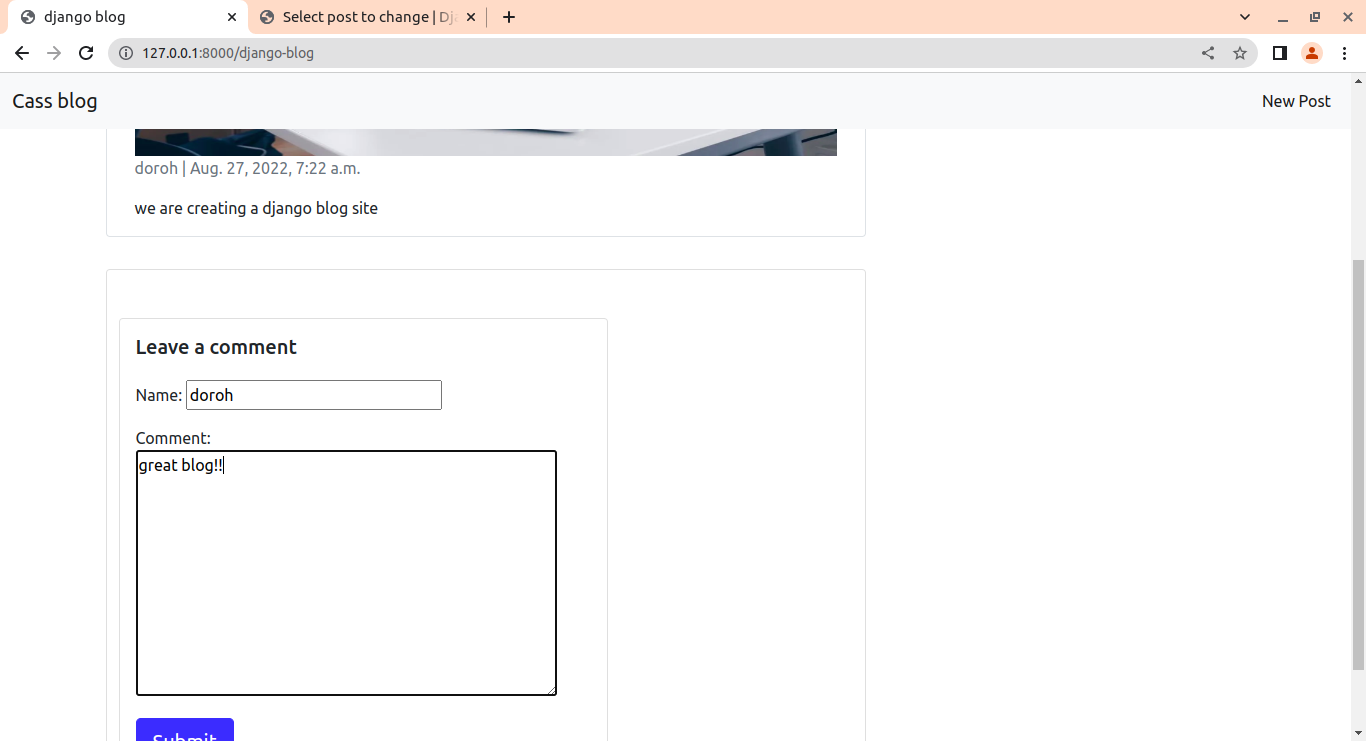
Click on the Submit button, and our comment will be added:
Deleting Posts
Suppose we want to delete a blog post. In views.py:
from django.shortcuts import render, redirect #add redirect here

def delete_post(request, slug):
    post = Post.objects.get(slug=slug)
    if request.method == "POST":
        post.delete()
        return redirect("home")
    return render(request, 'delete.html', {'post': post})
We get the specific post we want to delete by using a slug. Let’s then create its URL. In urls.py, add:
path('delete_blog_post/<slug:slug>/', views.delete_post,name='delete_blog_post'),We then create delete.html that will take care of how to delete it:
{% extends 'base.html' %}
{% block content %}
<div style="height:18vh">
</div>
<div class="container d-flex justify-content-center">
<div class="d-inline-flex justify-content-center flex-column ">
  <div style="height:30vh">
  </div>
    <form method="POST">
        <!-- Security token by Django -->
        {% csrf_token %}
          Do you want to delete this item?
        <input class="btn btn-primary" type="submit" value="Yes" />
        <a href="{% url 'home'%}" class="btn btn-secondary">No </a>
    </form>
</div>
</div>
{% endblock%}
Clicking on the delete post button should take us to confirm if we want to delete it:
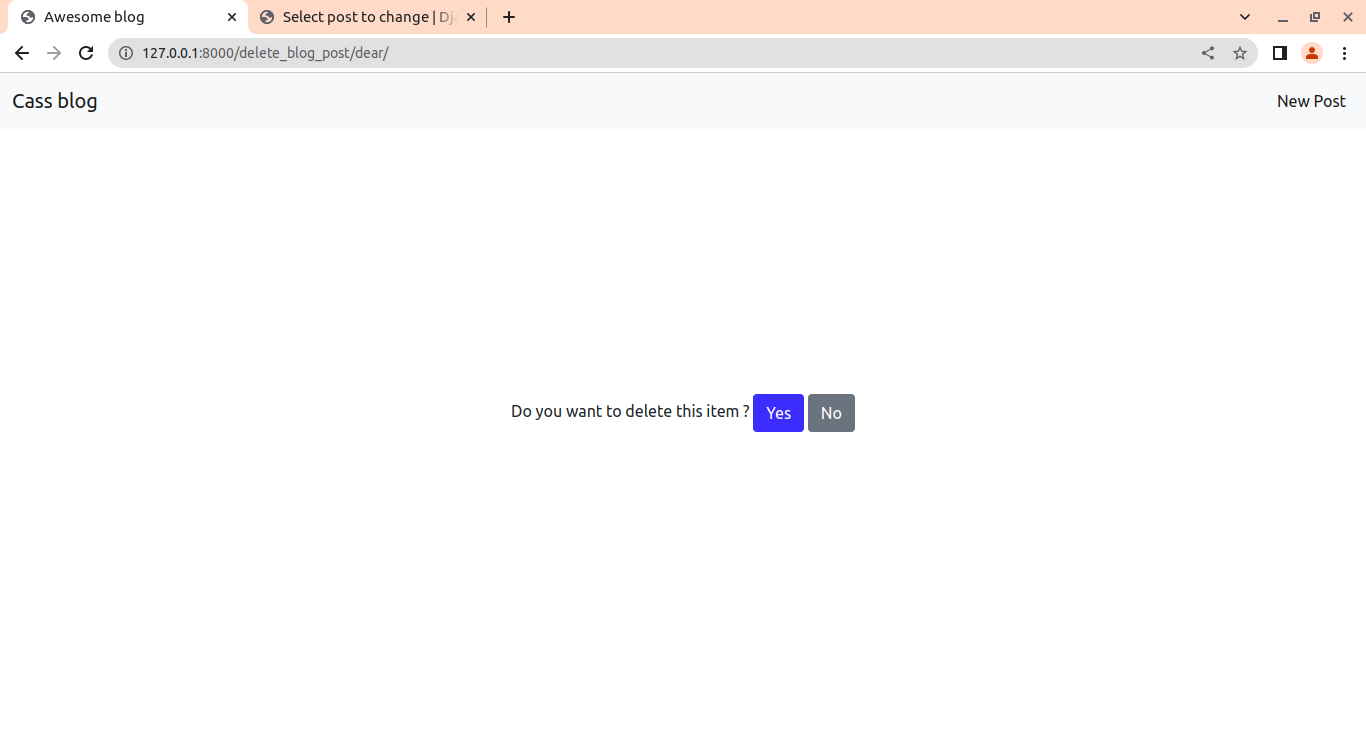
Clicking the Yes button deletes the post and redirects us to home, while the No button redirects us to home without deleting the post.
Conclusion
Congratulations! You have successfully learned the basics of Django while building a blog site. You can add extra features like pagination or user authentication.
You can always refer to the project files here.
Learn also: How to Build a CRUD Application using Django in Python.
Happy coding ♥
Finished reading? Keep the learning going with our AI-powered Code Explainer. Try it now!
View Full Code Explain My Code


Got a coding query or need some guidance before you comment? Check out this Python Code Assistant for expert advice and handy tips. It's like having a coding tutor right in your fingertips!