Unlock the secrets of your code with our AI-powered Code Explainer. Take a look!
In this tutorial, we are going to make a little planet simulation with Python and the game-making library PyGame. PyGame has a handy vector class that can help us when simulating the planets and their heading.
Imports
All of the modules we import are built-in except the pygame library, which we have to install with pip install pygame. We also need sys, but it will simply be used to stop the game when pressing on the x at the top left of the window.
After that, we get the Vector2 class from pygame.math which offers some interesting methods to use when we want to work with vectors.
The randrange() function from random will just be used when we make some planets. We also get ctypes to enable high DPI. This is often used with tkinter but we can also use it here, even though it has not as great an effect.
# Imports
import pygame
import sys

# We will work with Vector2 because it has some useful functions.
from pygame.math import Vector2

from random import randrange

import ctypes

# Enable High Dots Per Inch so the image displayed on the window is sharper.
ctypes.windll.shcore.SetProcessDpiAwareness(1)
Pygame Setup
Next, we set up pygame. To do this, we start with pygame.init() that has to be called, so all the modules work. After that, we define the game's fps, and we make a clock object which will handle the game speed in combination with the defined fps:
# Configuration
pygame.init()
fps = 60
fpsClock = pygame.time.Clock()
We continue by defining the window size and making the window with these sizes.
# Window Size
windowdim = Vector2(800, 800)
screen = pygame.display.set_mode((int(windowdim.x), int(windowdim.y)))
Planet Class
Let us get into the planet class, this is the main part of this program's code because it allows us to make an infinite amount of planets that will react to each other.
Outside of the class, we need to define a list that holds all of the planets. Then in the main loop, we loop over this list and call a method on all of these objects.
# all the Planets are stored here
# They will append themselves.
planets = []
Constructor Function
Let us first talk about the constructor of the class. We provide each planet with a starting position, and we have the following optional arguments; delta, which is the velocity, the radius of the planet, and if the planet is immovable. We set all of these inputs as attributes of the objects.
# The Planet Class which will handle drawing and calculating planets.
class Planet():
    def __init__(self, position, delta=Vector2(0, 0), radius=10, imovable=False):

        # Where the planet is at the moment
        self.position = position

        # The Radius determines how much this planet affects others
        self.radius = radius

        # The Velocity
        self.delta = delta

        # If this planet is moving
        self.imovable = imovable

        # If this planet can be eaten by others.
        self.eatable = False
At the end of the constructor, we append the object itself to the planet list, so we don't have to do this manually.
        # Appending itself to the list so its process
        # function will later be called in a loop.
        planets.append(self)
Process Function
The process() function will be called for each planet in each frame. The movement code will be skipped if the imovable property is set to True. If the planet can move, it will loop through every other planet, and if the planet is not the object itself, we continue.
If the planet is too near to this one it will be eaten this is done by adding the radius of this planet to the other one and removing this planet from the list.
If that's not the case, we calculate the vector to the other planet, and then we add it to the delta. Now, this whole code is in a try-except block because it won't work if the planets are on top of each other. After that, we add the delta to the position:
    def process(self):
        # This function will be called once every frame
        # and it is responsible for calculating where the planet will go.

        # No Movement Calculations will happen if the planet doesnt move at all.
        # it also wont be eaten.
        if not self.imovable:
            for i in planets:
                if not i is self:
                    try:
                        if self.eatable:
                            if self.position.distance_to(i.position) < self.radius + i.radius:
                                print('Eaten')
                                i.radius += self.radius
                                planets.remove(self)
                        dir_from_obj  = (i.position - self.position).normalize() * 0.01 * (i.radius / 10)
                        self.delta += dir_from_obj
                    except:
                        print('In the same spot')

            self.position += self.delta
In the end, we draw the planet at its position, this is done even if the planet is immovable:
        # Drawing the planet at the current position.
        pygame.draw.circle(
            screen,
            [255, 255, 255],
            self.position,
            self.radius,
        )
Main Loop
Last but not least, we have the main loop which will cool the process function on each planet in the planets list every frame.
# Game loop.
while  True:
    screen.fill((0, 0, 0))
    for event in pygame.event.get():
        if event.type == pygame.QUIT:
            pygame.quit()
            sys.exit()

    for p in planets:
        p.process()

    pygame.display.flip()
    fpsClock.tick(fps)
Now, this code won't spawn planets by itself. In the next part, we look at some examples.
Examples
Sun and Two Opposing Planets
This code is run right before the main loop, and it will spawn three planets. After the code, you see it in action.
# Sun and two opposing Planets
Planet(Vector2(400, 400), radius=50, imovable=True)

Planet(Vector2(400, 200), delta=Vector2(3, 0), radius=10)
Planet(Vector2(400, 600), delta=Vector2(-3, 0), radius=10)
Sun and Four Opposing Planets
# Sun and four opposing Planets
Planet(Vector2(400, 400), radius=50, imovable=True)

Planet(Vector2(400, 200), delta=Vector2(3, 0), radius=10)
Planet(Vector2(400, 600), delta=Vector2(-3, 0), radius=10)
Planet(Vector2(600, 400), delta=Vector2(0, 3), radius=10)
Planet(Vector2(200, 400), delta=Vector2(0, -3), radius=10)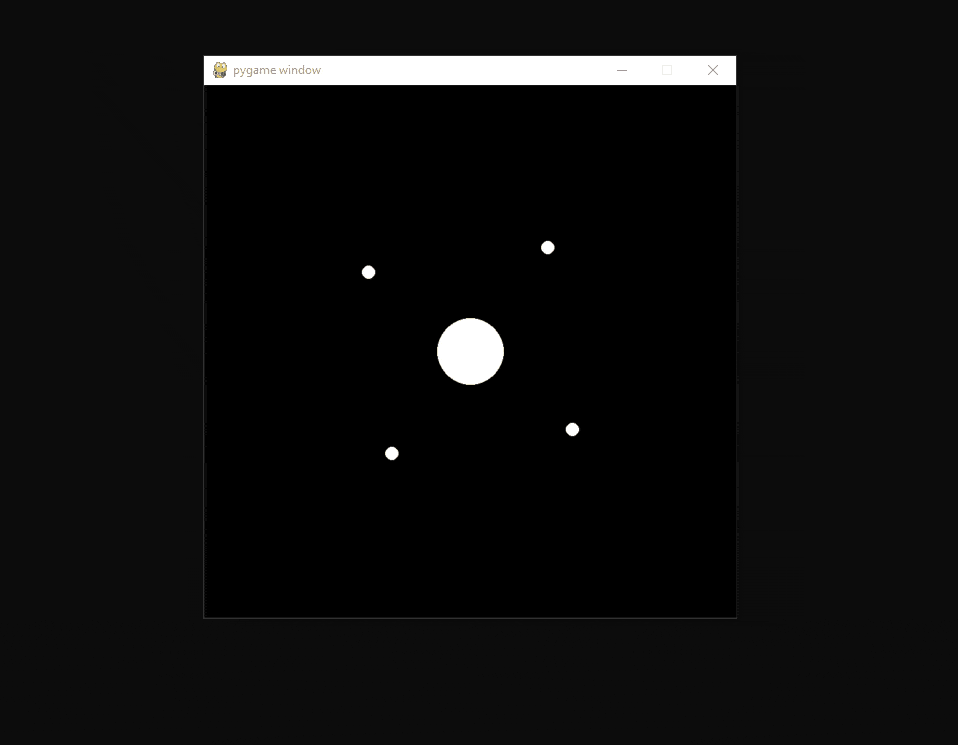
Two Suns and Two Planets
# Two Suns and two planets
Planet(Vector2(600, 400), radius=20, imovable=True)
Planet(Vector2(200, 400), radius=20, imovable=True)

Planet(Vector2(400, 200), delta=Vector2(0, 0), radius=10)
Planet(Vector2(400, 210), delta=Vector2(1, 2), radius=5)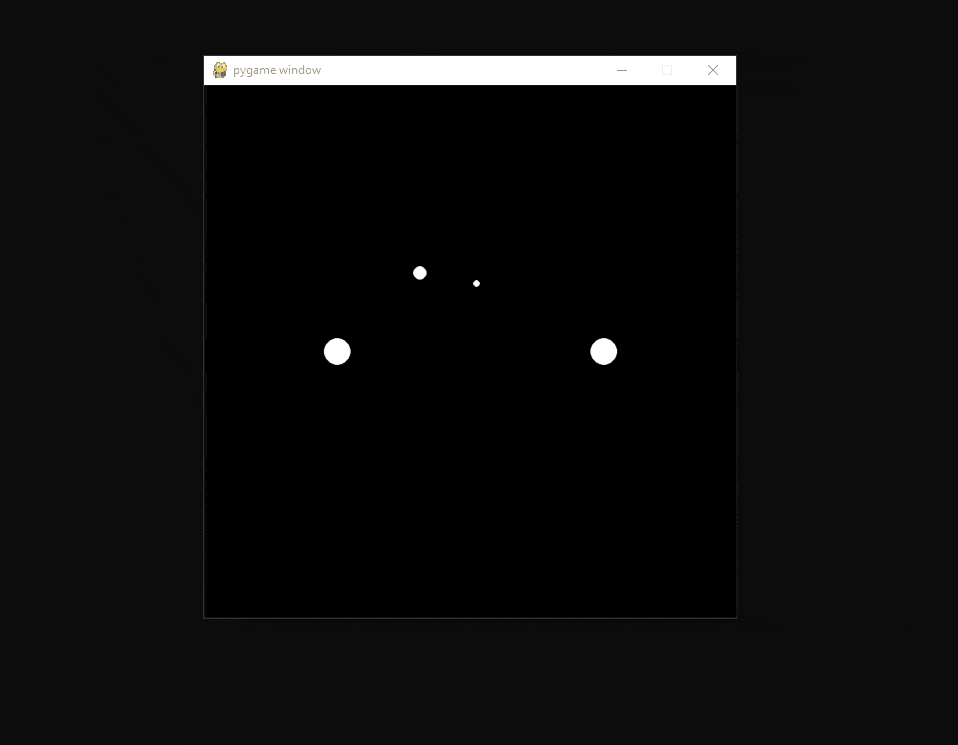
Grid
# Grid
gridDimension = 10
gridgap = 80
for x in range(gridDimension):
    for y in range(gridDimension):
        Planet(Vector2(gridgap * x + 40, gridgap * y + 40), radius=3, imovable=True)

Planet(Vector2(200, 200), delta=Vector2(randrange(-3, 3), 2), radius=5)
Conclusion
Excellent! You have successfully created a planet simulation program using Python! You can always experiment with different planet settings and see the results for yourself.
If you want to build more GUIs with Python, check our GUI programming tutorials page!
Get the complete code here.
Learn also: How to Make a Drawing Program in Python.
Happy coding ♥
Take the stress out of learning Python. Meet our Python Code Assistant – your new coding buddy. Give it a whirl!
View Full Code Assist My Coding


Got a coding query or need some guidance before you comment? Check out this Python Code Assistant for expert advice and handy tips. It's like having a coding tutor right in your fingertips!