Step up your coding game with AI-powered Code Explainer. Get insights like never before!
This tutorial will show a simple spreadsheet app with the UI Library Tkinter. We will make it so cells can either just hold a value or reference other cells and do some calculations. Each cell will have a coordinate consisting of a letter and a number representing the row and column.
Last but not least, we also make it so if the user provides the path to a CSV file, it will open it and insert the values at the proper positions. It will be a bit like Microsoft Spreadsheet App Excel, but we will focus on the functionality, not the looks. Let's get started!
Imports
First, let us go over the Modules we need for this program. Of course, to make the UI, we need the Tkinter, which comes with Python. We import everything from there with * so we can easily use the constants from there. Normally it would be advised only to get the functions and classes you need. We also import string that has a constant called ascii_lowercase which holds all lowercase letters of the alphabet. We can use this to make the x-axis for the spreadsheet.
Then we get sys so we can get the arguments the user has provided in the command line. We should use argparse to streamline our command-line application for a larger program. Last but not least, we get ctypes to enable DPI awareness, so the window has sharper graphics. In the last line, you see the function that does this:
# Imports
from tkinter import *
import string
import sys
import ctypes

# Increase Dots Per inch so it looks sharper
ctypes.windll.shcore.SetProcessDpiAwareness(True)
Setup
Now let us set up a bunch of important things for our program. We start by getting the first seven letters from the string.ascii_lowercase constant. This will be the x-axis, so you can regulate the number of columns with the number of letters taken from there. We do something similar for the y-axis with the range() function.
Usually, this is used in loops, but this function just returns a list of numbers in the given range. So we make 12 rows. Lastly, we also define the cells variable that holds a dictionary. It will have the string variables and labels:
# Define X and Y Axis Lists
xAxis = string.ascii_lowercase[0:7]
yAxis = range(0, 12)

# Cells will hold the strings vars and the labels
cells = {}
Continuing, we open the file given in the command line. But we first define the variable that will hold this content. This is done so the later program will not stop because it checks the value of an uninitiated variable.
Then we check if the sys.argv is longer than 1, meaning the user requested a file opening. The first argument is the Python file name itself. After that, we open this file path with a context manager and split the content by the new line. Then we loop over this list, and we split these lines by a ,:
# Open the content of the given file
# if one was provided and save it as a two
# dimensional list.
CsvContent = ''
if len(sys.argv) > 1:
    with open(sys.argv[1], 'r') as f:
        CsvContent = f.read().split('\n')
        for i, layer in enumerate(CsvContent):
            CsvContent[i] = layer.split(',')
Then we make a new top-level window that will act as the root of our GUI application, and we set the title. If the program is opened with a file, we append this name to the title; if not, it just says Spreadsheet App. We do this with a ternary operator:
# Make a new Top Level Element (Window)
root = Tk()
# Set the the title to also mention the given file name
# if there is one
title = "Spreadsheet App" if CsvContent == '' else f"Spreadsheet App - {sys.argv[1]}"
root.title(title)
Make the Elements
Now let us generate some elements. We start with the labels for the Y and X axis. For the yAxis, we simply loop over it and make a new Label element, where the text is the value of the iteration. Then we specify the position with the grid() function where we add on to the row because the top row is the x labels:
# Display the Y-axis labels
for y in yAxis:
    label = Label(root, text = y, width=5, background='white')
    label.grid(row=y + 1, column=0)
For the X axis, we have to use the enumerate() function because a letter is not a valid value for the column parameter of the grid function. We set the width to be 35 pixels:
# Display the X-axis labels with enumerate
for i, x in enumerate(xAxis):
    label = Label(root, text = x, width=35, background='white')
    label.grid(row=0, column=i + 1, sticky='n')
Then we also make the cells themself. To do this, we make a nested loop with the y and x-axis. Once again, we need to enumerate. Right after that, we create a unique id that identifies the cell with the two axes:
# Display the Cells, by using a nested loop
for y in yAxis:
    for xcoor, x in enumerate(xAxis):
        # Generate a Unique ID for the cell with the coordinates
        id = f'{x}{y}'
After that, we make a StringVar() that has a unique id as name. This object enables us to trace the value of this cell later:
        # Make String Var associated with the Cell
        var = StringVar(root, '', id)
Then we make two elements; one Entry where the user can enter the desired value and one label that will show the evaluated value of the entry. We once again place these elements with the grid() function. We add 1 to both axes because of the labels that we made earlier. The entry has a width of 30, and the label has a width of 5 which is the same as the letter labels.
        # Make Entry and label, offset each axis by one because of the lables
        e = Entry(root, textvariable=var, width=30)
        e.grid(row=y + 1, column=xcoor + 1)

        label = Label(root, text = '', width=5)
        label.grid(row=y + 1, column=xcoor + 1, sticky='e')
After that, we save the string var and the reference to the label and add the specified id in the cells dictionary. If we did not save the string variable at all, it would be destroyed:
        # Save the string var and a reference to the labels in the dictionary
        cells[id] = [var, label]
Last but not least, we check if a CSV file was opened, and if that's the case, we try to get the content at the current position in the grid and set the string var value:
        # Insert CSV content if it possible
        if CsvContent != '':
            try:
                var.set(CsvContent[y][xcoor])
            except:
                pass
At the very end of the program, we call our updateAllCells() function, which will update all cells every ten milliseconds, and we call the main loop function, so the window is shown:
# Start the updating Process
updateAllCells()
# Run the Mainloop
root.mainloop()
Functions
Now let us define two important functions that enable the reference system. Remember that these functions have to be defined before the code earlier in the program.
Evaluation Function
The evaluateCell() function will be called for each cell; it will either evaluate the cell's content or simply insert its value into the label. It has to be recursive, so multilayered references are possible. It will take the cellId. in the function; we first get the string var from the cell dictionary and then the value from there. We also make the content lower:
# Evaluating a cell
def evaluateCell(cellId):

    # Get the content from the string var
    # and make it lowercase
    content = cells[cellId][0].get()
    content = content.lower()
Then we also get the label element from the cell dictionary:
    # get the reference to the label
    label = cells[cellId][1]
Then we check if the content starts with a =. If that's true, we know the value of these cells is evaluated, and we start to loop over all the other cells. If the cell name/id appears in the content, we know it's a reference, so we replace the reference with the evaluated value from that id:
    # if the cell starts with a = it is evaluated
    if content.startswith('='):
        # Loop through all cells ...
        for cell in cells:
            # ... and see if their name appears in this cell
            if cell in content.lower():
                # if it is then replace the name occurences
                # with the evaluated content from there.
                content = content.replace(cell, str(evaluateCell(cell)))
After we have inserted all the values from other cells, we remove the = from the beginning, and we try to evaluate the content. If that does not work, we set the content to be NAN. Last but not least, we set the text content of the label to be the evaluated content and return it:
        # Get the content without the = and try to evaluate it
        content = content[1:]
        try:
            content = eval(content)
        except:
            content = 'NAN'
        label['text'] = content
        return content
We skip all that if the content does not start with a = and just set the text content and return it:
    # If not, the label just shows the content
    else:
        label['text'] = content
        return content
Evaluate All Function
Now, this function will call itself once every ten milliseconds. We do this by calling the after(ms, func) method on the root. And we loop over all cells and call the evaluateCell() function for each one:
# Call the eval function for every cell every ten milliseconds.
def updateAllCells():

    # Call it again
    root.after(10, updateAllCells)

    # Loop through all cells
    for cell in cells:
        evaluateCell(cell)
Showcase
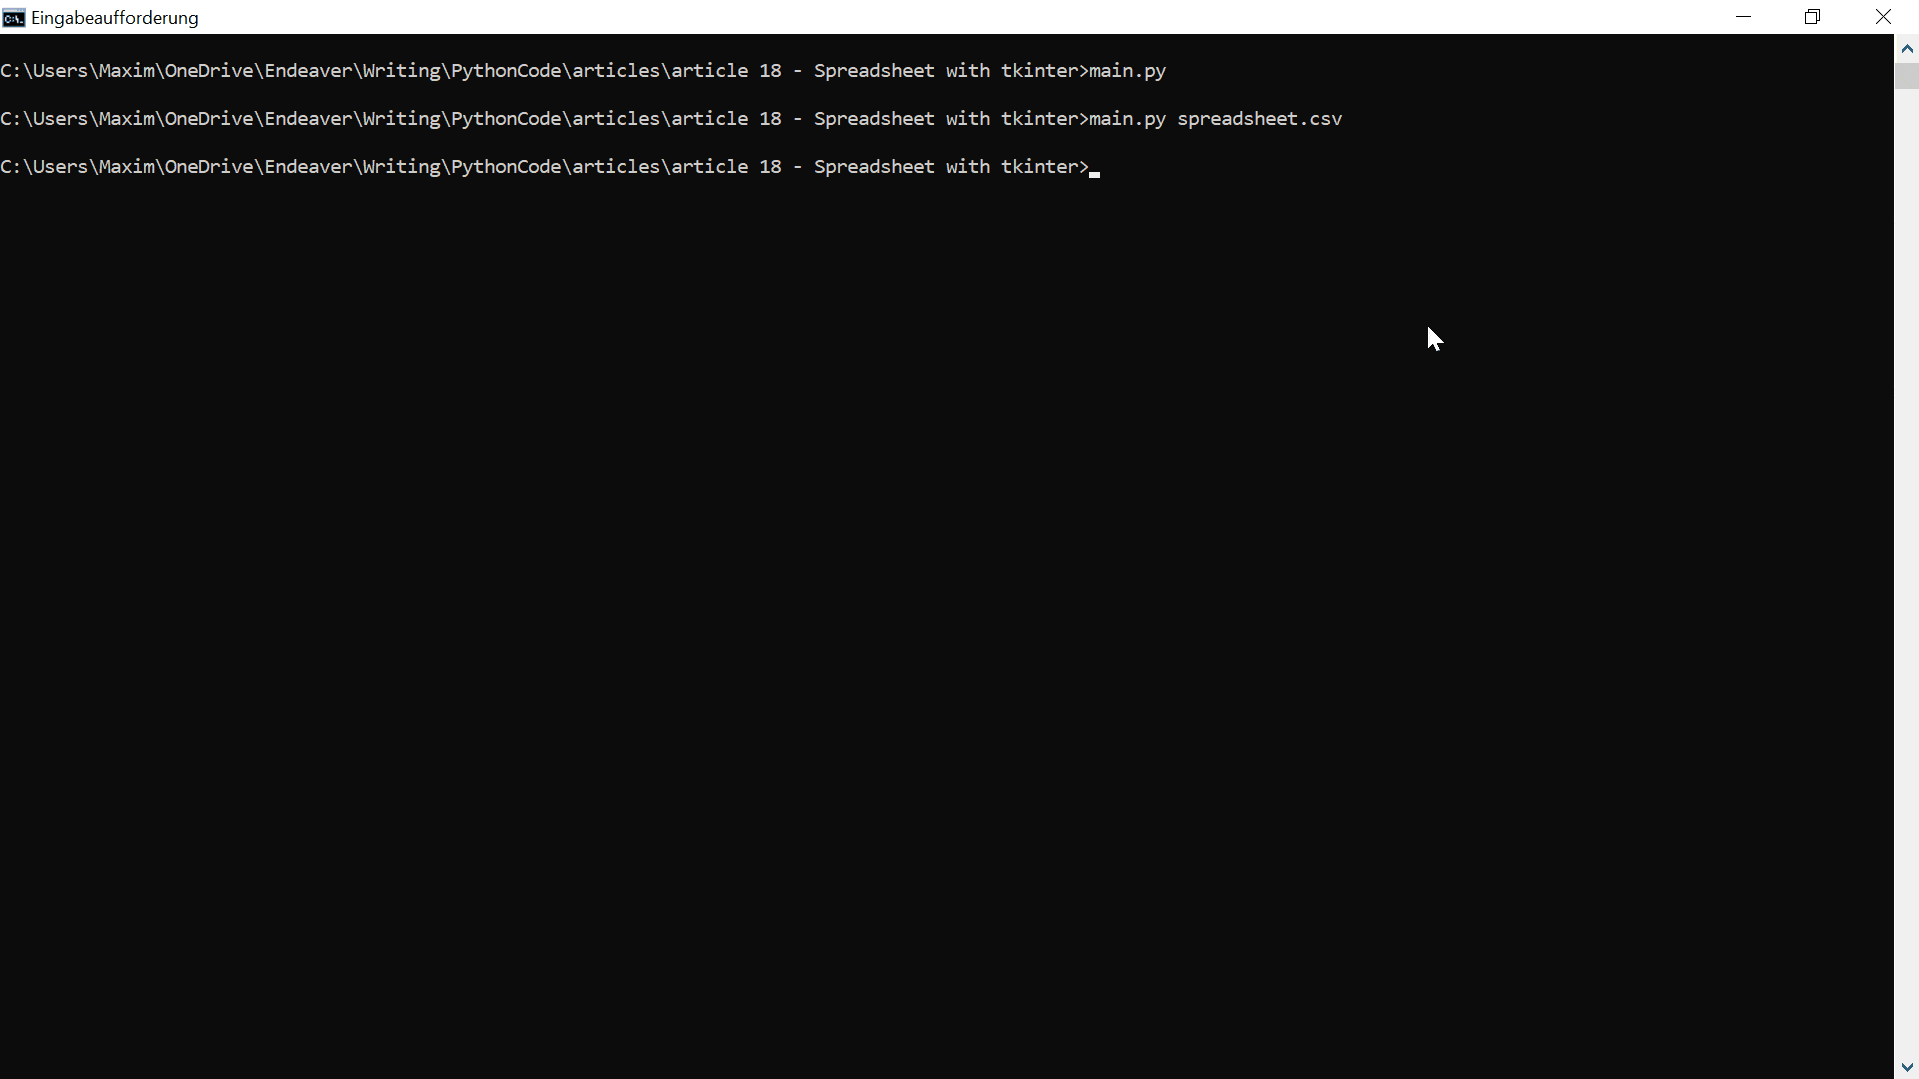
Now let's look at our program in action. First, we simply open the program and write some cells. And then, we open the program with a CSV file, so the content is inserted from there:
Conclusion
Excellent! You have successfully created a Simple Spreadsheet App using Python code! See how you can add more features to this program, such as saving the CSV file once loaded.
Learn also: How to Make a Markdown Editor using Tkinter in Python.
Happy coding ♥
Loved the article? You'll love our Code Converter even more! It's your secret weapon for effortless coding. Give it a whirl!
View Full Code Convert My Code


Got a coding query or need some guidance before you comment? Check out this Python Code Assistant for expert advice and handy tips. It's like having a coding tutor right in your fingertips!