Struggling with multiple programming languages? No worries. Our Code Converter has got you covered. Give it a go!
PDF is an abbreviation that stands for portable document format, it was created by adobe and in the world of documents it has proved to be an easy and reliable way of exchanging documents. In this tutorial we will be building a PDF viewer with a graphical user interface (GUI), we will cover topics like designing the GUI, mining the PDF data, and displaying the PDF in the app.
Building your own PDF viewer with a GUI is a great way to master some of the cool concepts of Python, this tutorial is about that and if you are excited let us get right into it. We will use the Tkinter module for the GUI and for doing operations on PDF files like getting metadata, page, and text we will use the fitz module that is part of the PyMuPDF module.
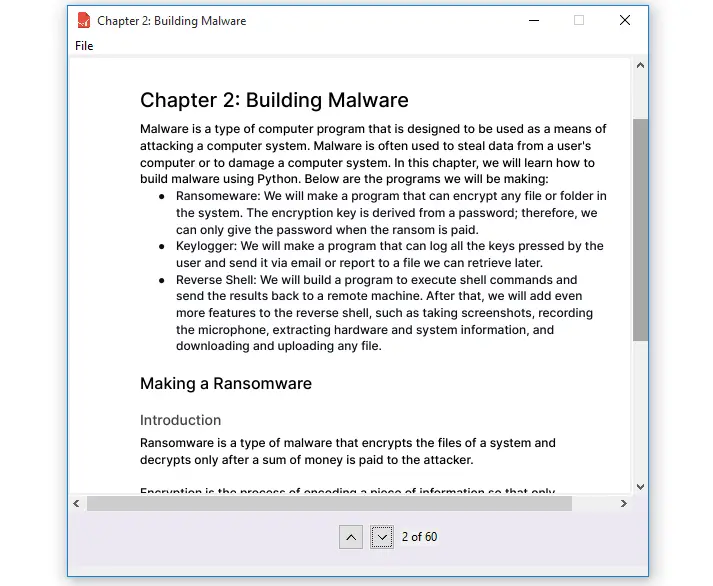
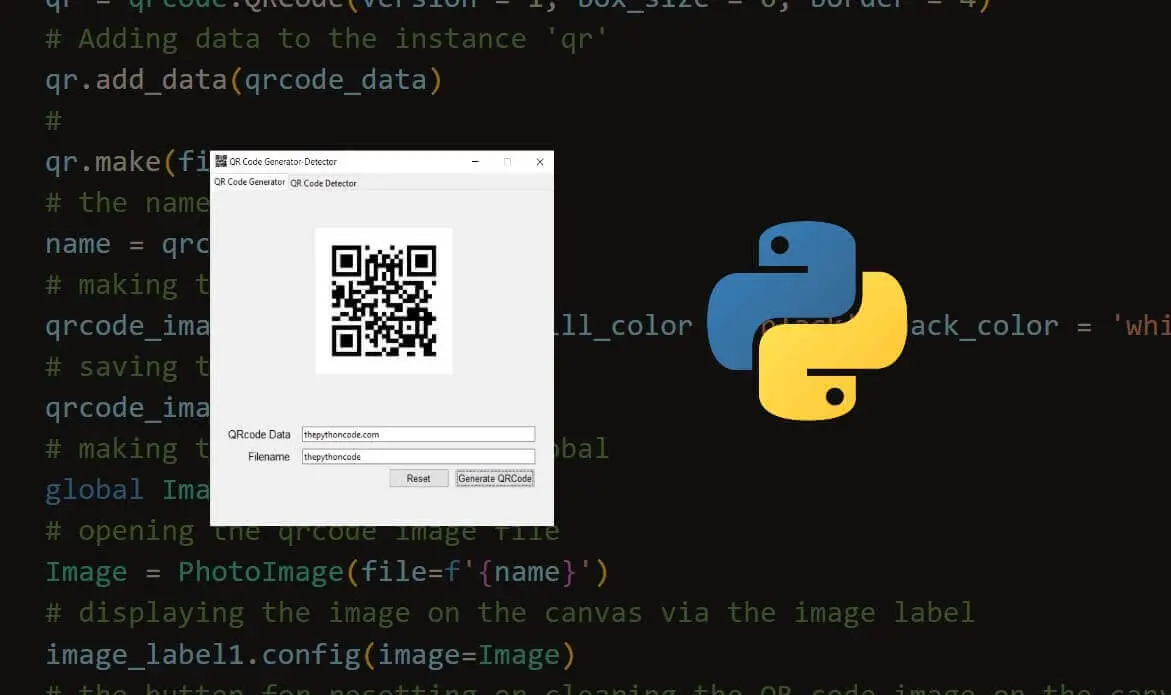
Here is what we are going to build at the end of this tutorial:
This application will be built from the ground up and there will be an in-depth coverage of the concepts so that you understand everything.
If you're curious what's that PDF document, it's the free chapter of our Ethical Hacking with Python EBook!
Here is the table of contents:
- Getting Started
- Importing all the Required Modules
- Creating the App Class
- Declaring the Necessary Variables in the Class
- Designing the GUI
- Creating the Main Window and Adding Icon
- Adding the Menu to the Main Window
- Creating the Top and Bottom Frames
- Creating the Vertical and Horizontal Scrollbars
- Adding the Canvas to the Top Frame and Configuring its scrollbars
- Adding The Up, Down Buttons and the Label to the Bottom Frame
- Implementing the Closing Application Functionality
- Creating the
miner.pyFile - Implementing the App Functionalities
- Conclusion
Getting Started
Let us begin by installing the required modules, fortunately, we will need to install one module for this project, the other modules are pre-installed. So in your terminal enter this command:
$ pip install pymupdfRelated: How to Extract Text from PDF in Python.
Importing all the Required Modules
Now let us create a Python file and name it pdfviewer.py, here you can call the file any name you prefer but the name should be meaningful. Open the file and add this code:
# importing everything from tkinter
from tkinter import *
# importing ttk for styling widgets from tkinter
from tkinter import ttk
# importing filedialog from tkinter
from tkinter import filedialog as fd
# importing os module
import os
We are importing all the functions and built-in modules from the tkinter module, and the second line imports ttk from tkinter, this is for styling the widgets (Buttons, Labels, Entries, etc). The third line of code imports filedialog from tkinter again as fd and in the last line, we import the os module, this will help us get the current working directory and retrieving the PDF file from the path.
Creating the App Class
We will use object-oriented programming approach to build this application. Now that the imports have been taken care of, let us create a class for the application, below the imports paste this code:
# creating a class called PDFViewer
class PDFViewer:
    # initializing the __init__ / special method
    def __init__(self, master):
        pass
The code snippet creates a PDFViewer class, and inside it, we have a constructor or an __init__() function whose arguments are self and master. Something worth mentioning here, every function inside a class takes self as the first argument. Inside the constructor, we are doing nothing via the pass statement as of now. To test the program, paste this code below the PDFViewer class:
# creating the root window using Tk() class
root = Tk()
# instantiating/creating object app for class PDFViewer
app = PDFViewer(root)
# calling the mainloop to run the app infinitely until user closes it
root.mainloop()
Here we are creating the root window using the tkinter Tk() built-in class, then we are creating an object whose argument is the main window root. Note, the root being passed will replace the master inside the constructor and finally, we are running the main window infinitely until it is closed by the user.
To run the program, enter this command in your terminal:
$ python pfdviewer.pyIf you are using an advanced editor like vs code or pycharm, they come with a feature for running Python scripts.
The output will be as follows:
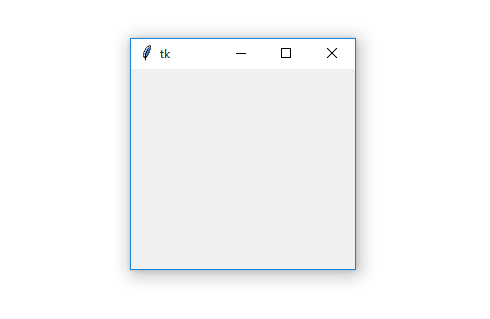
The output is just a basic window do not worry about it we will work on it just in a moment.
Download: Practical Python PDF Processing EBook.
Declaring the Necessary Variables in the Class
Now let us declare the variables that we will use in the application, inside the constructor paste these lines of code:
        # path for the pdf doc
        self.path = None
        # state of the pdf doc, open or closed
        self.fileisopen = None
        # author of the pdf doc
        self.author = None
        # name for the pdf doc
        self.name = None
        # the current page for the pdf
        self.current_page = 0
        # total number of pages for the pdf doc
        self.numPages = None
In the code snippet we have declared these variables:
self.path– this is for the path of the PDF document, currently set toNone.self.fileisopen– the state of the document, whether opened or closed, currently set toNone.self.author– the author of the document, currently set toNone.self.name– the name of the document, currently set toNone.self.current_page– the current page, currently set to 0.self.numPages– the total number of pages, currently set toNone.
The above variables will start to make sense the moment we start using them.
Designing the GUI
In this section, we will design the GUI for the application, we will focus on improving the look of the basic window we just saw.
Creating the Main Window and Adding Icon
Now inside the constructor, replace the pass statement with this code:
        # creating the window
        self.master = master
        # gives title to the main window
        self.master.title('PDF Viewer')
        # gives dimensions to main window
        self.master.geometry('580x520+440+180')
        # this disables the minimize/maximize button on the main window
        self.master.resizable(width = 0, height = 0)
        # loads the icon and adds it to the main window
        self.master.iconbitmap(self.master, 'pdf_file_icon.ico')
We are creating the main window master, we are then giving it a title via the title() function.
To control the window’s dimensions, we are using the geometry() function which takes 580 as width and 520 as height, for positioning the window vertically we have 440 and horizontally we have 180.
With the dimensions set for the window, we are making it non-resizable using the resizable() function, both the width and the height are set to 0. Finally, we have loaded and added the icon to the main window using the iconbitmap() function.
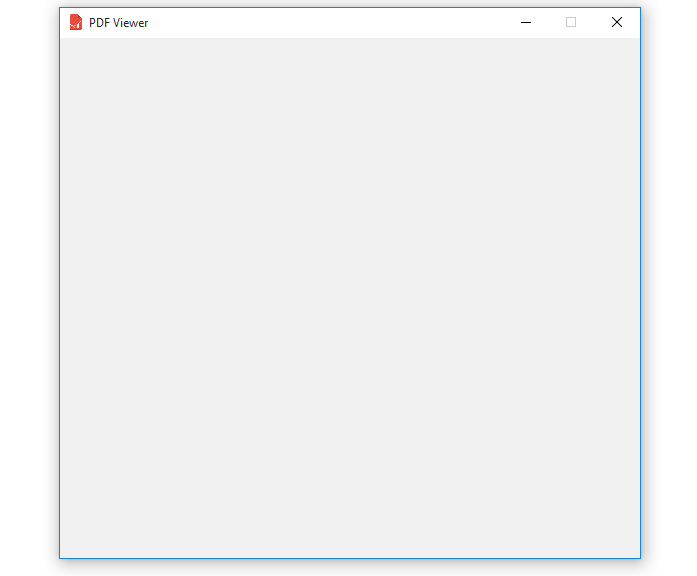
With the above code, we will get this output:
On the top left corner of the main window, we have an icon and a title:
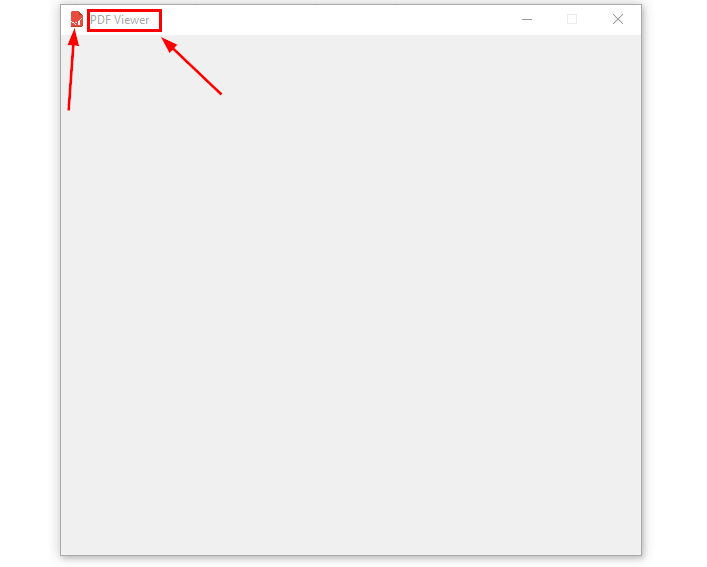
Here just make sure the icon is in the same folder as the program file.
Download: Practical Python PDF Processing EBook.
Adding the Menu to the Main Window
Now let us add a menu bar to the main window, this menu will have two buttons, the Open File button, and the Exit button. Just below the main window’s code, paste this code:
        # creating the menu
        self.menu = Menu(self.master)
        # adding it to the main window
        self.master.config(menu=self.menu)
        # creating a sub menu
        self.filemenu = Menu(self.menu)
        # giving the sub menu a label
        self.menu.add_cascade(label="File", menu=self.filemenu)
        # adding a two buttons to the sub menus
        self.filemenu.add_command(label="Open File")
        self.filemenu.add_command(label="Exit")
We are creating a menu bar using Menu() function whose argument is the main window and to add the menu bar to the main window we are using the config() function.
To create a file menu we are using the same Menu() function and to add it to the menu bar we are using the add_cascade() function, which takes the label and menu as arguments. Now to add a sub-menus to the main menu, we use the add_command() function, which as well takes the label as an argument, in our case, we have two sub-menus, Open File and Exit.
Running the program, we will get this output:
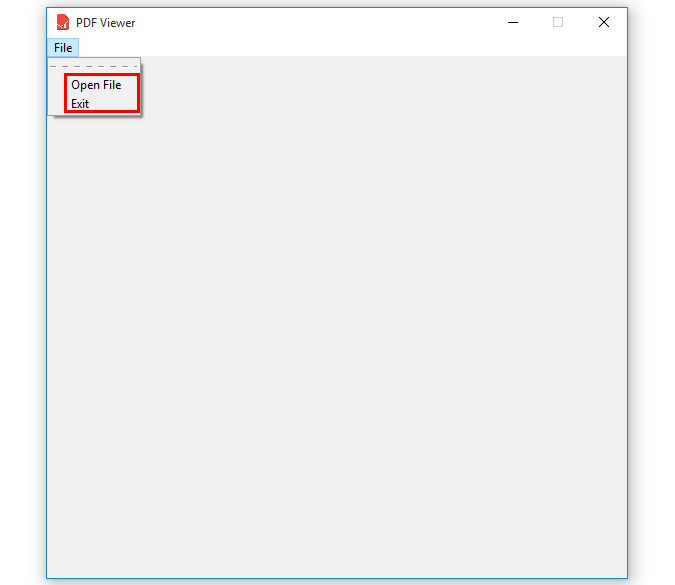
If you click the File button, the two sub-menus will collapse so that you can click them. Note, the sub-menus are buttons and they can take the command argument as well.
Creating the Top and Bottom Frames
Let’s move on to create the two frames, the top and bottom frames. Inside the top frame we will have a Canvas for displaying the PDF pages and inside the bottom frame we will have the up and down button and the label for displaying the page number. So below the menu, add this code:
        # creating the top frame
        self.top_frame = ttk.Frame(self.master, width=580, height=460)
        # placing the frame using inside main window using grid()
        self.top_frame.grid(row=0, column=0)
        # the frame will not propagate
        self.top_frame.grid_propagate(False)
        # creating the bottom frame
        self.bottom_frame = ttk.Frame(self.master, width=580, height=50)
        # placing the frame using inside main window using grid()
        self.bottom_frame.grid(row=1, column=0)
        # the frame will not propagate
        self.bottom_frame.grid_propagate(False)
In the code snippet, we are creating two frames, top and bottom frames using the ttk.Frame() function. We are adding the top frame to the main window, giving it height and width of 580 and 460 and we place it in the 0th row and column.
The same with the bottom frame, we add it to the main window, give it a height of 580 and a width of 50, and place it in the 1st row and 0th column. If you notice both these frames have a grid_progagate() function whose input is False, this will help the frames to take the defined size regardless of the contents.
Creating the Vertical and Horizontal Scrollbars
In this section, we will create the vertical and horizontal scrollbars, this will help us view the PDF page in case it is bigger than the display canvas. So below the frames code paste this code:
        # creating a vertical scrollbar
        self.scrolly = Scrollbar(self.top_frame, orient=VERTICAL)
        # adding the scrollbar
        self.scrolly.grid(row=0, column=1, sticky=(N,S))
        # creating a horizontal scrollbar
        self.scrollx = Scrollbar(self.top_frame, orient=HORIZONTAL)
        # adding the scrollbar
        self.scrollx.grid(row=1, column=0, sticky=(W, E))
We are creating two scrollbars inside the top frame, the first scrollbar has vertical orient and the second has horizontal orient. And using grid() we are placing the vertical scrollbar in the 0th row and 1st column and we are finally sticking it in N and S directions. The horizontal scrollbar is placed in the 1st row and 0th column and W and E directions.
Get Our Practical Python PDF Processing EBook
Master PDF Manipulation with Python by building PDF tools from scratch. Get your copy now!
Download EBookAdding the Canvas to the Top Frame and Configuring Its Scrollbars
Now let us create the Canvas for displaying the pages and add it to the top frame, we will then configure the scrollbars to the Canvas. Below the scrollbars let us paste these lines of code:
        # creating the canvas for display the PDF pages
        self.output = Canvas(self.top_frame, bg='#ECE8F3', width=560, height=435)
        # inserting both vertical and horizontal scrollbars to the canvas
        self.output.configure(yscrollcommand=self.scrolly.set, xscrollcommand=self.scrollx.set)
        # adding the canvas
        self.output.grid(row=0, column=0)
        # configuring the horizontal scrollbar to the canvas
        self.scrolly.configure(command=self.output.yview)
        # configuring the vertical scrollbar to the canvas
        self.scrollx.configure(command=self.output.xview)
Here via the Canvas() function, we are creating a Canvas inside the top frame, we are giving it some background color, a width of 560, and a height of 435. To insert the scrollbars into the Canvas, we are using the configure() function which takes the vertical and horizontal scrollbars as arguments. Then we are placing the Canvas in the 0th row and column using the grid() function.
Now to display these scrollbars on the Canvas, we are using the configure() function again, it takes command whose value is the canvas direction view, for the vertical scrollbar we have self.output.yview, and for the horizontal scrollbar we have self.output.xview
If we run the program, this is the output that we will get:
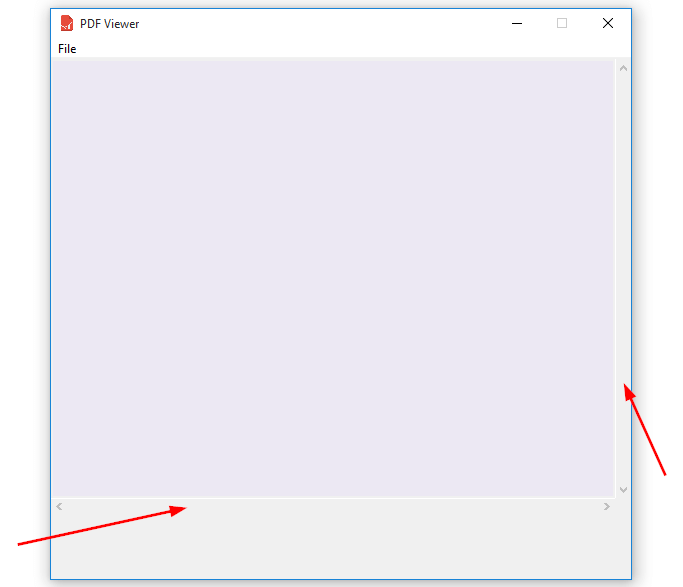
The scrollbars have been added to the Canvas, for now, they are disabled since we have no content inside the Canvas.
Adding The Up, Down Buttons and the Label to the Bottom Frame
Now that the widgets in the top frame are taken care of, let us add widgets in the bottom frame, below this line of code:
        # configuring the vertical scrollbar to the canvas
        self.scrollx.configure(command=self.output.xview)
Add this code:
        # loading the button icons
        self.uparrow_icon = PhotoImage(file='uparrow.png')
        self.downarrow_icon = PhotoImage(file='downarrow.png')
        # resizing the icons to fit on buttons
        self.uparrow = self.uparrow_icon.subsample(3, 3)
        self.downarrow = self.downarrow_icon.subsample(3, 3)
        # creating an up button with an icon
        self.upbutton = ttk.Button(self.bottom_frame, image=self.uparrow)
        # adding the button
        self.upbutton.grid(row=0, column=1, padx=(270, 5), pady=8)
        # creating a down button with an icon
        self.downbutton = ttk.Button(self.bottom_frame, image=self.downarrow)
        # adding the button
        self.downbutton.grid(row=0, column=3, pady=8)
        # label for displaying page numbers
        self.page_label = ttk.Label(self.bottom_frame, text='page')
        # adding the label
        self.page_label.grid(row=0, column=4, padx=5)
With this code snippet, we are loading two icons for the buttons using the PhotoImage() function, we are then resizing the icons to fit inside the buttons properly. To create the buttons we use ttk.Button() function, which takes the bottom frame and the image as arguments.
For the first button via the grid() we are placing it in the 0th row and 1st column, to kind of push it to the center we are using the padx=(270, 5) and to push it 8 pixels horizontally we use pady=8.
For the second button, using grid() again we place it in the 0th row and 3rd column and it also occupies 8 pixels horizontally.
Finally, we are creating a label to display the number of pages, we place it in the same row as the buttons.
Let us see how the application is looking:
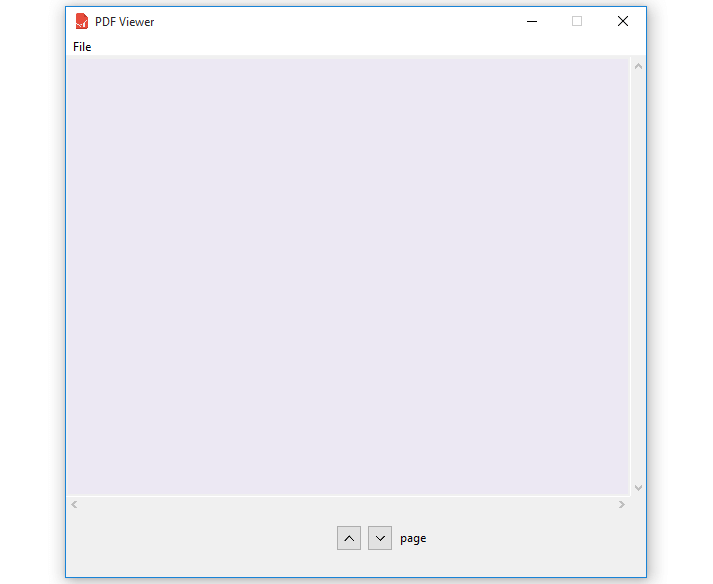
Two buttons and a label have been added, as mentioned earlier all the icons for your application must be in the same folder as your program file.
Read also: How to Convert HTML to PDF in Python.
Implementing the Closing Application Functionality
Let us wrap up the GUI design by making the Exit button of the menu close the application. This is simple, edit this line of code:
self.filemenu.add_command(label="Exit")And make it look like this:
self.filemenu.add_command(label="Exit", command=self.master.destroy)With this simple line of code, we are able to close the application, the destroy is a tkinter built-in function that simply closes the main window.
Congratulations on successfully the GUI! Now let's get into the PDF stuff.
Get Our Practical Python PDF Processing EBook
Master PDF Manipulation with Python by building PDF tools from scratch. Get your copy now!
Download EBookCreating the miner.py File
In this section, we will create a miner.py file, this file is for doing PDF operations like opening the document, zooming the document, getting PDF metadata, getting the page, and getting the text. Now create the file and make sure it is in the same folder as the pdfviewer.py file:
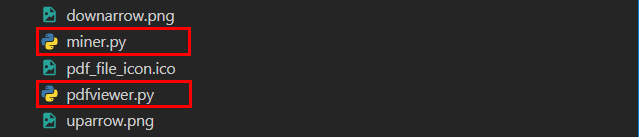
Open it and do the following imports:
# this is for doing some math operations
import math
# this is for handling the PDF operations
import fitz
# importing PhotoImage from tkinter
from tkinter import PhotoImage
We are importing the math module, which will help us do some math conversions and we are also importing the fitz module which is for doing operations on PDF documents. Finally, we are importing PhotoImage from tkinter for loading image data.
Just below the imports let us create the PDFMiner class and inside it we will have the constructor. So add this code:
class PDFMiner:
    def __init__(self, filepath):
        # creating the file path
        self.filepath = filepath
        # opening the pdf document
        self.pdf = fitz.open(self.filepath)
        # loading the first page of the pdf document
        self.first_page = self.pdf.load_page(0)
        # getting the height and width of the first page
        self.width, self.height = self.first_page.rect.width, self.first_page.rect.height
        # initializing the zoom values of the page
        zoomdict = {800:0.8, 700:0.6, 600:1.0, 500:1.0}
        # getting the width value
        width = int(math.floor(self.width / 100.0) * 100)
        # zooming the page
        self.zoom = zoomdict[width]
We are creating a PDFMiner class. Inside the constructor, we are creating the filepath, then we are opening it using the fitz.open() function and assign it the self.pdf variable.
To get the first page of the PDF file, we use the load_page() function whose input is 0 and to get the width and height of the page we use the rect.width and rect.height functions respectively. We also have a dictionary of zoom values, if the page has a width of 800 it will be zoomed by 0.8, if it has 700 as its width it will be zoomed by 0.6, and the width of 600 and 500 will be zoomed by 1.0.
To get the width value we are dividing the self.width by 100 and the result is multiplied by 100 as well, then the width is converted to an integer. Finally, we are zooming the page using the calculated width.
Let us create another function for getting the PDF document metadata, below the constructor paste this code:
    # this will get the metadata from the document like
    # author, name of document, number of pages
    def get_metadata(self):
        # getting metadata from the open PDF document
        metadata = self.pdf.metadata
        # getting number of pages from the open PDF document
        numPages = self.pdf.page_count
        # returning the metadata and the numPages
        return metadata, numPages
So in the code snippet, we are creating a get_metadata() function, inside it we are retrieving the metadata from the opened PDF file via the self.pdf.metadata. To get the number of pages we are using the self.pdf.page_count then we are returning the metadata and the numPages.
For more details, I invite you to check this tutorial that is for the sole purpose of extracting metadata from PDF documents.
We will create another function for getting the page, below the get_metadata() function paste this code:
    # the function for getting the page
    def get_page(self, page_num):
        # loading the page
        page = self.pdf.load_page(page_num)
        # checking if zoom is True
        if self.zoom:
            # creating a Matrix whose zoom factor is self.zoom
            mat = fitz.Matrix(self.zoom, self.zoom)
            # gets the image of the page
            pix = page.get_pixmap(matrix=mat)
        # returns the image of the page
        else:
            pix = page.get_pixmap()
        # a variable that holds a transparent image
        px1 = fitz.Pixmap(pix, 0) if pix.alpha else pix
        # converting the image to bytes
        imgdata = px1.tobytes("ppm")
        # returning the image data
        return PhotoImage(data=imgdata)
Here we are creating the get_page() function which takes self and page_num as arguments then we are loading the pdf page via the load_page() function. We have an if/else block, inside the if statement we are creating a matrix using the Matrix() whose zoom factor is self.zoom. To get the image of the current page we use get_pixmap() and inside the else statement we are just returning the image.
And outside the if/else block, we are creating a variable for holding the image data, then this image data is converted to bytes by the tobytes() function and finally, we are returning the image with PhotoImage() function.
The last function in the miner.py file is the get_text(), this will extract text from the current page, so below the get_page() function paste this code:
    # function to get text from the current page
    def get_text(self, page_num):
        # loading the page
        page = self.pdf.load_page(page_num)
        # getting text from the loaded page
        text = page.getText('text')
        # returning text
        return text
The get_text() function takes self and page_num as arguments, inside it we are loading the PDF document page, after loading the page we get its text using the getText() function then finally we return the text.
Read also: How to Convert HTML to PDF in Python.
Implementing the App Functionalities
Now it is time we start implementing the application’s functionalities since we have taken care of most parts of the application, so let’s dive in!
Open a PDF File
The first functionality to implement is that of selecting the PDF file to view, so open the pdfviewer.py file and below the imports paste this code:
# importing the PDFMiner class from the miner file
from miner import PDFMiner
Here we are just importing the PDFMiner class, this means that we will be able to access all its functions.
So below the PDFViewer’s class constructor, add the following code:
    # function for opening pdf files
    def open_file(self):
        # open the file dialog
        filepath = fd.askopenfilename(title='Select a PDF file', initialdir=os.getcwd(), filetypes=(('PDF', '*.pdf'), ))
        # checking if the file exists
        if filepath:
            # declaring the path
            self.path = filepath
            # extracting the pdf file from the path
            filename = os.path.basename(self.path)
            # passing the path to PDFMiner
            self.miner = PDFMiner(self.path)
            # getting data and numPages
            data, numPages = self.miner.get_metadata()
            # setting the current page to 0
            self.current_page = 0
            # checking if numPages exists
            if numPages:
                # getting the title
                self.name = data.get('title', filename[:-4])
                # getting the author
                self.author = data.get('author', None)
                self.numPages = numPages
                # setting fileopen to True
                self.fileisopen = True
                # calling the display_page() function
                self.display_page()
                # replacing the window title with the PDF document name
                self.master.title(self.name)
First of all, we are creating open_file() function, in which we declare a variable filepath that is assigned to the actual file path. To get the path we use the askopenfilename() function, which takes title, initialdir, and filetypes as arguments. The initial directory will be the current working directory because of os.getcwd() and the files to select from will only be PDFs.
If the filepath exists, we are setting path to filepath then we are retrieving the PDF file from the path using os.path.basename(), then this PDF file is assigned to filename.
We then create the self.miner object for the PDFMiner class, we pass the self.path to the class as an input, so using the object we are accessing data and numPages from the get_metadata() function. Then we are setting current_page to 0.
The last if statement checks if numPages exists, then we are doing the following:
- Getting the name and author of the document using
data.get()function. - Setting
self.numPagestonumPages. - Setting
self.fileisopentoTrue. - Calling the
self.display_page()function, we will create this in a moment. - Then replacing the main window’s title with the document name.
Let us now bind the open_file() function to the Open File button in the menu, edit this line:
self.filemenu.add_command(label="Open File")So that it looks like this:
self.filemenu.add_command(label="Open File", command=self.open_file)Run the program and click the Open File button, this is the output you will get:
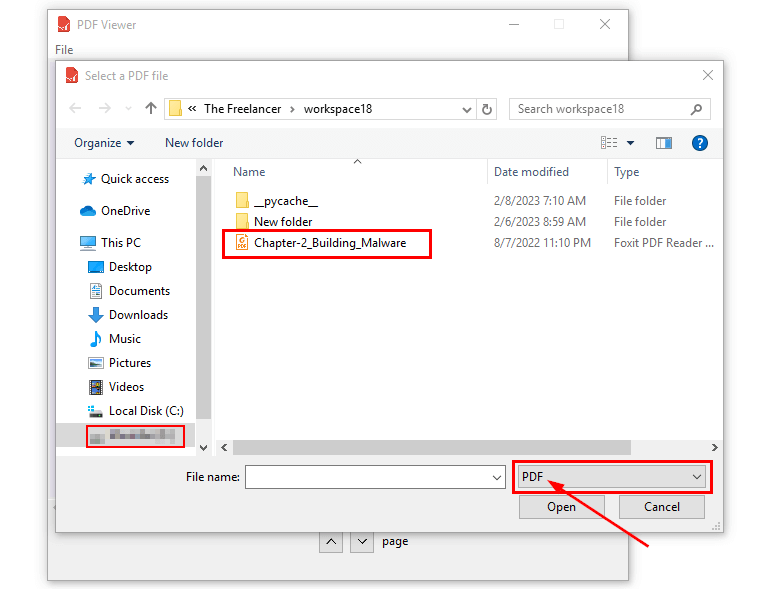
The functionality is working just fine, in the current directory the only files we have are PDFs.
Get Our Practical Python PDF Processing EBook
Master PDF Manipulation with Python by building PDF tools from scratch. Get your copy now!
Download EBookDisplay Page
Now let's work on the display page functionality, just below the open_file() function, paste the following code:
    # the function to display the page
    def display_page(self):
        # checking if numPages is less than current_page and if current_page is less than
        # or equal to 0
        if 0 <= self.current_page < self.numPages:
            # getting the page using get_page() function from miner
            self.img_file = self.miner.get_page(self.current_page)
            # inserting the page image inside the Canvas
            self.output.create_image(0, 0, anchor='nw', image=self.img_file)
            # the variable to be stringified
            self.stringified_current_page = self.current_page + 1
            # updating the page label with number of pages
            self.page_label['text'] = str(self.stringified_current_page) + ' of ' + str(self.numPages)
            # creating a region for inserting the page inside the Canvas
            region = self.output.bbox(ALL)
            # making the region to be scrollable
            self.output.configure(scrollregion=region)
We have an if statement that checks if 0 is less than or equal to the current_page which is less than numPages. Then we are getting the image of the current page via get_page() and this image is inserted inside the Canvas using the create_image() function.
We are then updating the page_label with the current page and the total number of pages.
Finally, we are creating a region inside the Canvas for inserting the images then to make this region scrollable we use configure() function whose scrollregion argument points to the region
Note, you do not have to bind this function to any button since it has been called inside the open_file() function.
To test this functionality, run the program and select any PDF document, make sure you get this output:
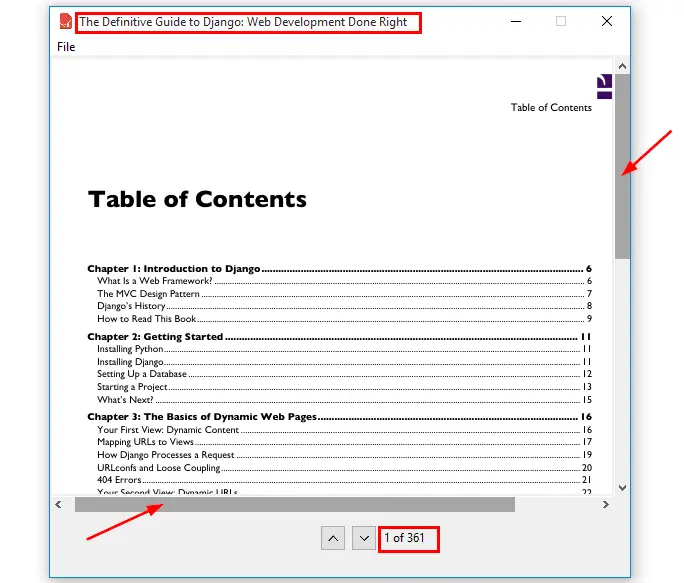
So many things have changed, now the window title is replaced with the document name, both scrollbars have been enabled, and the page label has been updated as well.
Next Page
Let us make the application more interactive where the user clicks the down button and the next page displays on Canvas. We will create a function for that, below the display_page() function, paste this code:
    # function for displaying next page
    def next_page(self):
        # checking if file is open
        if self.fileisopen:
            # checking if current_page is less than or equal to numPages-1
            if self.current_page <= self.numPages - 1:
                # updating the page with value 1
                self.current_page += 1
                # displaying the new page
                self.display_page()
Here we are just creating a next_page() function, the first if statement checks if the fileisopen, and the second if statement checks if current_page is less than or equal to numPages-1. Then we are updating the current_page by 1 and we are calling the display_page() function.
Let us bind this function to the down button so that the code looks like this:
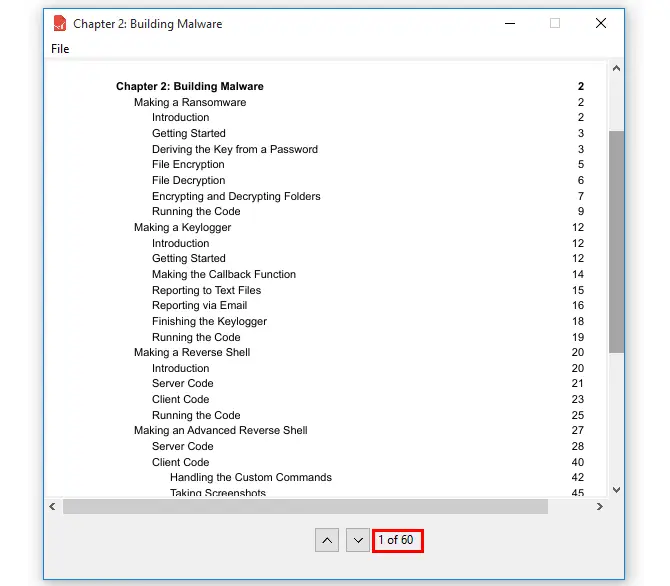
self.downbutton = ttk.Button(self.bottom_frame, image=self.downarrow, command=self.next_page)Just running the program, the current page is 1:
If you click the down button, you will go to the next page and the page label will also update:
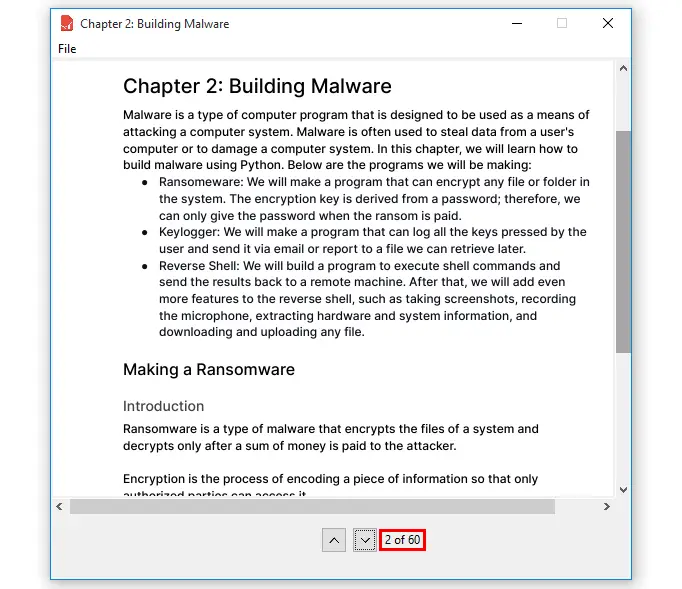
Great! The application is working as expected.
Previous Page
Now let us make it possible to go back to the previous page after clicking the up button, below or above the next_page() function paste this code:
    # function for displaying the previous page
    def previous_page(self):
        # checking if fileisopen
        if self.fileisopen:
            # checking if current_page is greater than 0
            if self.current_page > 0:
                # decrementing the current_page by 1
                self.current_page -= 1
                # displaying the previous page
                self.display_page()
For the previous_page() function, we are checking if fileisopen is True, and if current_page is greater than 0. Then we update the current_page by decrementing it by 1 and we called the display_page() function.
Run the program and click the down button to go to any page:
And now click the up button to go back to the previous page:
Conclusion
That’s it from this tutorial! This article has walked you through building a GUI PDF viewer using Tkinter and PyMuPDF in Python. We hope you have learned a lot and that the knowledge you have acquired will be useful in future projects.
Learn also: How to Sign PDF Files in Python
Get the complete code here.
Finally, for more PDF handling guides on Python, you can check our Practical Python PDF Processing EBook, where we dive deeper into PDF document manipulation with Python, make sure to check it out here if you're interested!
Happy coding ♥
Let our Code Converter simplify your multi-language projects. It's like having a coding translator at your fingertips. Don't miss out!
View Full Code Transform My Code


Got a coding query or need some guidance before you comment? Check out this Python Code Assistant for expert advice and handy tips. It's like having a coding tutor right in your fingertips!