Kickstart your coding journey with our Python Code Assistant. An AI-powered assistant that's always ready to help. Don't miss out!
The versatility of Python makes it a go-to programming language when it comes to building applications with graphical user interfaces (GUIs). Building an advanced application like an image editor using Python makes one to have a solid understanding of different concepts of the language. An image editor is an application used for manipulating images of different formats, you can use it for applying a wide range of effects, like Blur, Black and White, Smooth, etc. and some of the manipulations you can apply are image flip and rotate. Finally, we can draw on an image.
In this article, we will build an image editor in Python using the ttkbootstrap and Pillow libraries. We will use the ttkbootstrap to create Bootstrap 5 modern-looking widgets and the pillow library for our image operations.
If you are curious and you want to learn more about the pillow library, check out these articles:
- How to Compress Images in Python
- How to Extract Image Metadata in Python
- How to Extract Images from PDF in Python
And if you want to build a drawing application using PyGame you can check this tutorial.
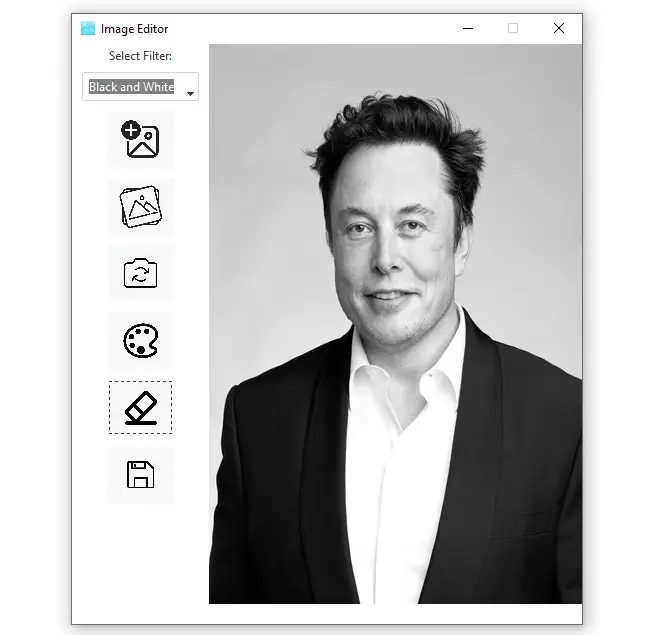
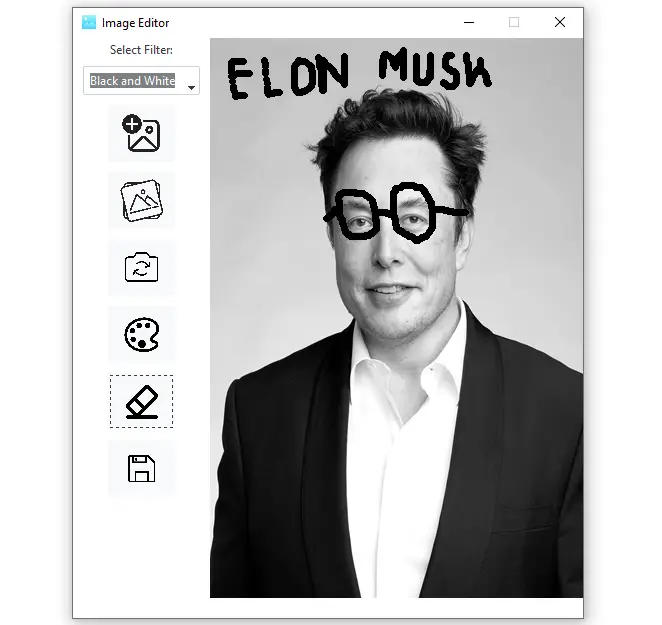
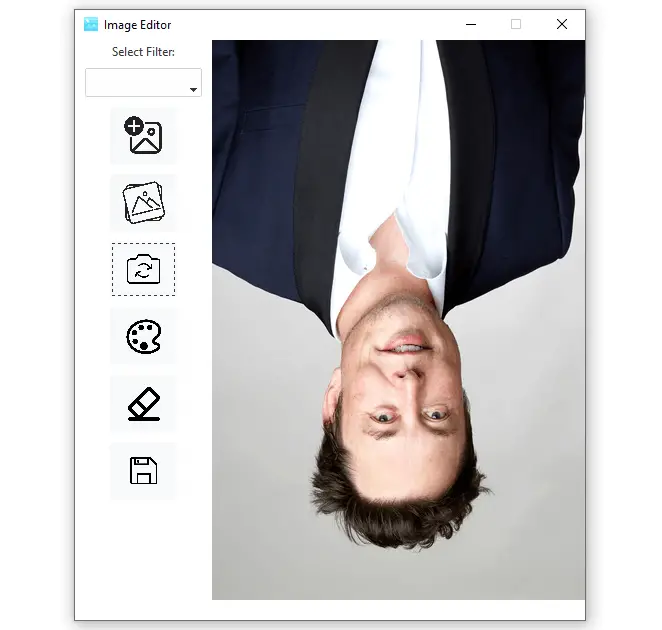
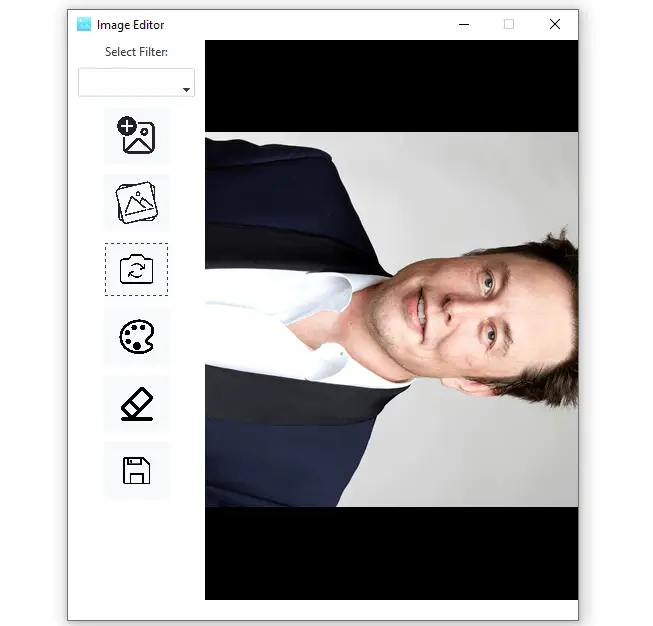
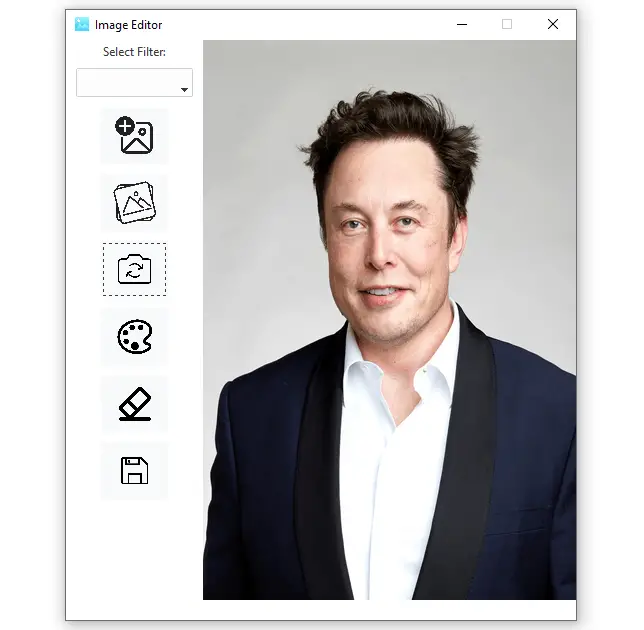
Here is a glimpse of the application that we will build at the end of this article:

 And:
And:
We will be building every piece of this application from the ground up so that in the end you will be a pro in building GUI applications in Python.
Here is what we will cover:
- Environment Set up
- Importing all the Required Libraries
- GUI designing
- Implementing all the Application’s Functionalities
- Testing the Application
- Conclusion
Environment Set up
The first task will be to set up the environment, we will start by installing the required libraries. Now pull up your terminal and execute this command:
$ pip install pillow ttkbootstrapImporting all the Required Libraries
Let us import all the required libraries for this project. Create a new file and call it gui-image-editor.py and paste this block of code:
import ttkbootstrap as ttk
from tkinter import filedialog
from tkinter.messagebox import showerror, askyesno
from tkinter import colorchooser
from PIL import Image, ImageOps, ImageTk, ImageFilter, ImageGrab
The code imports various libraries including ttkbootstrap that provides bootstrap-themed widgets for Tkinter GUI applications. The filedialog is for opening and saving files, the showerror and askyesno is for displaying error and confirmation messages respectively, and the colorchooser is for choosing colors.
The last line imports various modules from the PIL library, including Image, ImageOps, ImageTk, ImageFilter, and ImageGrab. These modules provide functions for image processing, creating Tkinter PhotoImage objects from images, applying image filters, and grabbing images from the screen.
Related: How to Make a PDF Viewer in Python.
GUI designing
The second task will be to design the GUI for the app. The application will have widgets like a label, Frame, Canvas, Combobox, and four buttons.
Creating the Main Window
Let us kick off the GUI design by creating the main window. Below the imports add the following code:
root = ttk.Window(themename="cosmo")
root.title("Image Editor")
root.geometry("510x580+300+110")
root.resizable(0, 0)
icon = ttk.PhotoImage(file='icon.png')
root.iconphoto(False, icon)
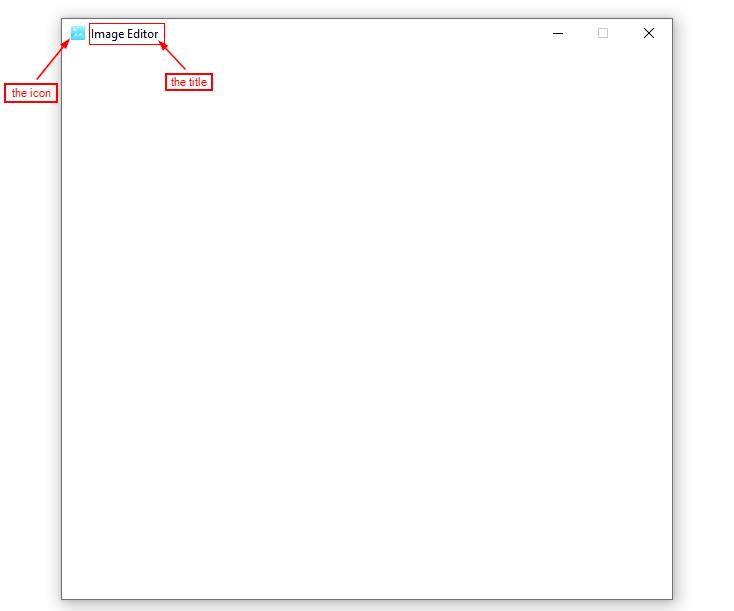
root.mainloop()With the code snippet, we are creating a tkinter window using the ttkbootstrap module. The Window class is used to create the window with the theme name cosmo. The title() method is used to set the title of the window to Image Editor. The geometry method is used to set the size of the window to 510x580 pixels and position it at coordinates (300, 110) on the screen. The resizable method is used to prevent the user from resizing the window.
The next line of code loads an image file named icon.png using the PhotoImage class from the ttkbootstrap module, and assigns it to the variable icon. The iconphoto() method is then used to set the window's icon to the loaded image.
Finally, the mainloop() method is called to start the tkinter event loop.
The output we get after running the code is this:
To avoid errors make sure all the icons are in the same folder as the program file.
Creating the Frame and Canvas
We will now create the Frame and the Canvas. The Frame will be placed on the left side of the window and it will contain the label, Combobox, and the four buttons. The Canvas will be on the right side of the window and it will display the image to be edited.
Just below the imports, let us, first of all, declare the global variables as below:
# defining global variables
WIDTH = 750
HEIGHT = 560
file_path = ""
pen_size = 3
pen_color = "black"
The WIDTH and HEIGHT are for the Canvas that we will create in a moment and the file_path variable will be used to store the path of the image file, in the meantime it is an empty string. And we have pen_size set to a default 3 and pen_color set to the default color black.
So below:
root.iconphoto(False, icon)Add these lines:
# the left frame to contain the 4 buttons
left_frame = ttk.Frame(root, width=200, height=600)
left_frame.pack(side="left", fill="y")

# the right canvas for displaying the image
canvas = ttk.Canvas(root, width=WIDTH, height=HEIGHT)
canvas.pack()
Here, we are creating a left frame using the ttk.Frame() method from the ttk module, with a specified width and height of 200 and 600 pixels, respectively. The pack() method is then used to place the frame on the left side of the root window and fill the y-direction.
The right canvas is created using the ttk.Canvas() method, with a specified width and height of WIDTH and HEIGHT pixels, respectively. The pack() method is then used to place the canvas in the root window.
Remember that WIDTH and HEIGHT are global variables created below the imports.
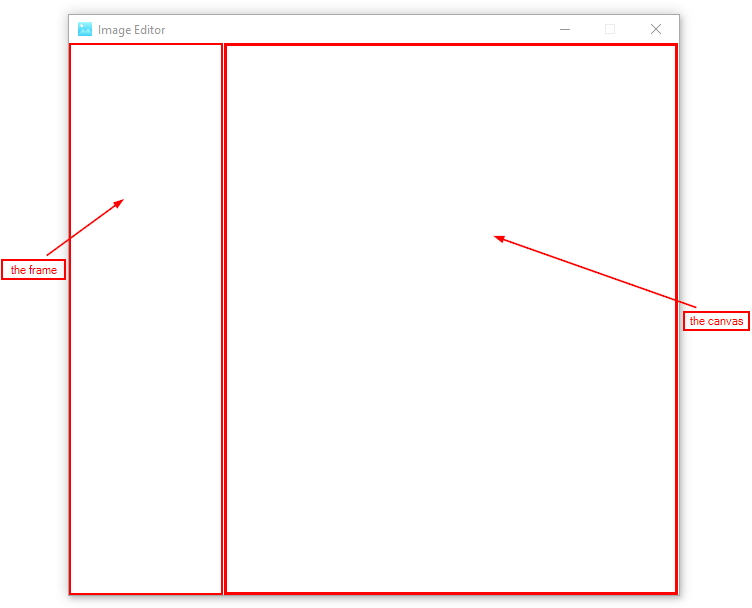
If you run the program you won’t see any frame or Canvas but here is how they are taking up space in the main window:
Adding Widgets to the Frame
We will now add widgets to the left frame. In the left frame, we will add the label, Combobox, and buttons.
Label and Combobox
The code for the label and Combobox will look like this:
# label
filter_label = ttk.Label(left_frame, text="Select Filter:", background="white")
filter_label.pack(padx=0, pady=2)

# a list of filters
image_filters = ["Contour", "Black and White", "Blur", "Detail", "Emboss", "Edge Enhance", "Sharpen", "Smooth"]

# combobox for the filters
filter_combobox = ttk.Combobox(left_frame, values=image_filters, width=15)
filter_combobox.pack(padx=10, pady=5)
In this block of code, we are creating a label with the text Select Filter: and a white background color using the ttk.Label() method. The pack() method is used to add some padding with 0 pixels in the x-direction and 2 pixels in the y-direction and display the label in the left_frame.
The image_filters variable is a list of strings that contains the names of several image filters that will be displayed in the Combobox.
The ttk.Combobox() method creates a Combobox that displays the image_filters list as options. The width parameter is set to 15 to determine the width of the Combobox, and the pack() method is used to add some padding, 10 pixels in the x-direction and 5 pixels in the y-direction and display the Combobox in the left_frame.
By default, the Combobox will display the first item in the image_filters list as its current value.
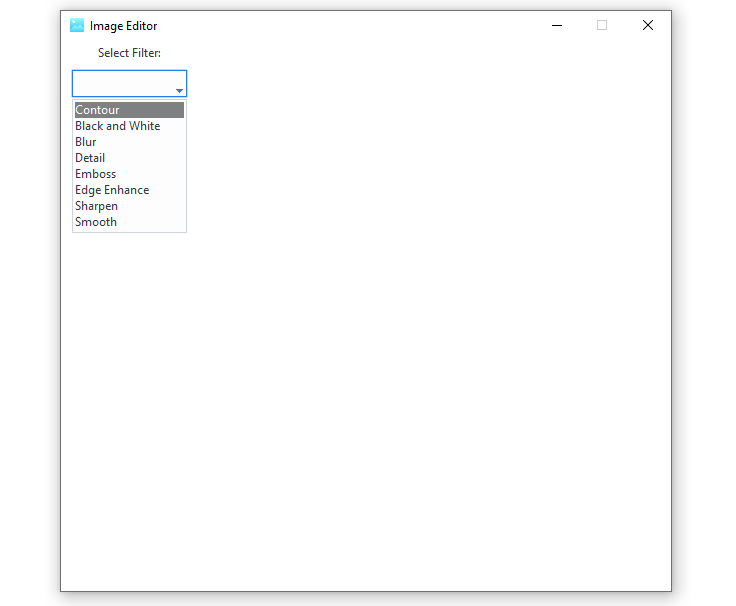
Run the program and click inside the Combobox, here is what you will get:
 Buttons
Below the Combobox, we will add six buttons. The code will look as follows:
# loading the icons for the 4 buttons
image_icon = ttk.PhotoImage(file = 'add.png').subsample(12, 12)
flip_icon = ttk.PhotoImage(file = 'flip.png').subsample(12, 12)
rotate_icon = ttk.PhotoImage(file = 'rotate.png').subsample(12, 12)
color_icon = ttk.PhotoImage(file = 'color.png').subsample(12, 12)
erase_icon = ttk.PhotoImage(file = 'erase.png').subsample(12, 12)
save_icon = ttk.PhotoImage(file = 'saved.png').subsample(12, 12)

# button for adding/opening the image file
image_button = ttk.Button(left_frame, image=image_icon, bootstyle="light")
image_button.pack(pady=5)
# button for flipping the image file
flip_button = ttk.Button(left_frame, image=flip_icon, bootstyle="light")
flip_button.pack(pady=5)
# button for rotating the image file
rotate_button = ttk.Button(left_frame, image=rotate_icon, bootstyle="light")
rotate_button.pack(pady=5)
# button for choosing pen color
color_button = ttk.Button(left_frame, image=color_icon, bootstyle="light")
color_button.pack(pady=5)
# button for erasing the lines drawn over the image file
erase_button = ttk.Button(left_frame, image=erase_icon, bootstyle="light")
erase_button.pack(pady=5)
# button for saving the image file
save_button = ttk.Button(left_frame, image=save_icon, bootstyle="light")
save_button.pack(pady=5)
Here we are first of all loading the icons for the buttons and resizing them using the ttk.PhotoImage() and subsample() methods respectively.
We are then creating the six buttons using the ttk.Button() method which takes frame, image, and bootstyle as parameters. All these buttons are added to the frame using the pack() method and they will be stacked.
The output after adding the above code is as follows:
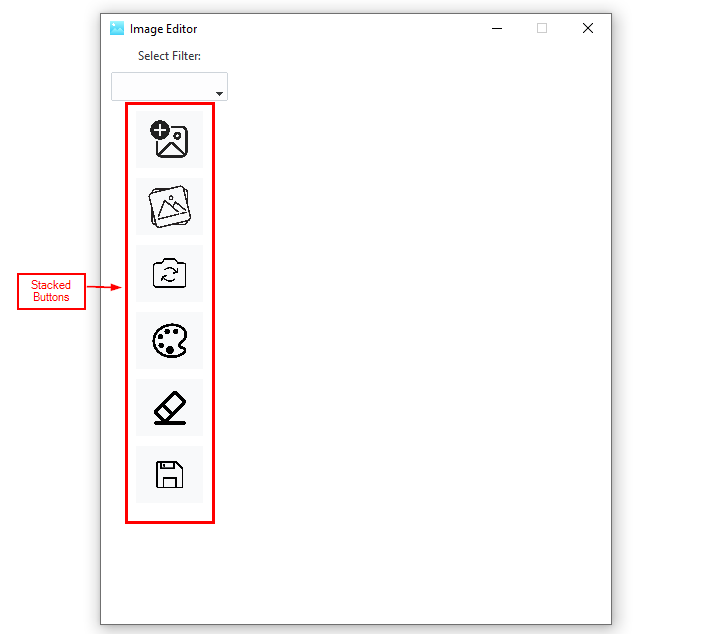
Each button has its functionality:

Great! The GUI is now taken care of.
Learn also: How to Build a Dictionary App with Tkinter in Python.
Implementing all the Application’s Functionalities
In this section, we are going to implement all the application’s functionalities from opening an image file to displaying it on Canvas and applying the effects and operations.
Open Image File
To open an image file we will create a function called open_image() below the global variables we created earlier. The function code will look like as below:
# function to open the image file
def open_image():
    global file_path
    file_path = filedialog.askopenfilename(title="Open Image File", filetypes=[("Image Files", "*.jpg;*.jpeg;*.png;*.gif;*.bmp")])
    if file_path:
        global image, photo_image
        image = Image.open(file_path)
        new_width = int((WIDTH / 2))
        image = image.resize((new_width, HEIGHT), Image.LANCZOS)

        image = ImageTk.PhotoImage(image)
        canvas.create_image(0, 0, anchor="nw", image=image)
With the function, the user can select an image file and displays it on the Canvas. The global keyword is used to access and modify the file_path variable defined earlier.
The filedialog.askopenfilename() method is used to display a file dialog box that allows the user to select an image file. If the user selects a file, the path to the file is stored in the file_path variable, and the code proceeds to open the image file using the PIL.Image.open() method.
The new_width variable is set to half the width of the Canvas, and the resize() method is used to resize the image while maintaining its aspect ratio. The ImageTk.PhotoImage() method is used to create a PhotoImage object from the resized image, which can then be displayed on the Canvas using the canvas.create_image() method.
The anchor parameter is set to nw to align the image with the top-left corner of the Canvas.
For this functionality to work, we need to bind the function to the open image button, so modify this code:
image_button = ttk.Button(left_frame, image=image_icon, bootstyle="light")And make it look like this:
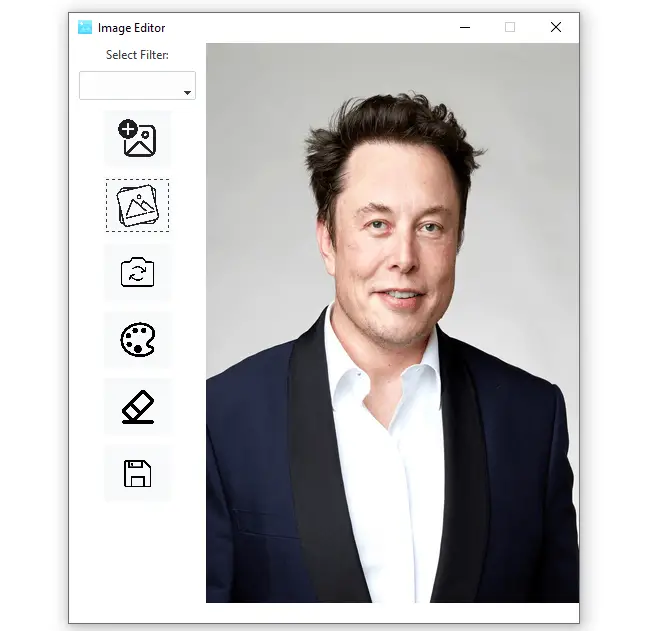
image_button = ttk.Button(left_frame, image=image_icon, bootstyle="light", command=open_image)Run the program, click the open image button, select any image you like and you will get an output similar to this:

Now you can select an image and display it on the Canvas.
Flipping Image
The second functionality to implement is the flipping image. This will enable you to flip the image from left to right and vice versa. Below the open_image() function paste this code:
# a global variable for checking the flip state of the image
is_flipped = False

def flip_image():
    try:
        global image, photo_image, is_flipped
        if not is_flipped:
            # open the image and flip it left and right
            image = Image.open(file_path).transpose(Image.FLIP_LEFT_RIGHT)
            is_flipped = True
        else:
            # reset the image to its original state
            image = Image.open(file_path)
            is_flipped = False
        # resize the image to fit the canvas
        new_width = int((WIDTH / 2))
        image = image.resize((new_width, HEIGHT), Image.LANCZOS)
        # convert the PIL image to a Tkinter PhotoImage and display it on the canvas
        photo_image = ImageTk.PhotoImage(image)
        canvas.create_image(0, 0, anchor="nw", image=photo_image)

    except:
        showerror(title='Flip Image Error', message='Please select an image to flip!')
This code defines a function called flip_image() which flips the currently displayed image horizontally, left to right using the PIL.Image.transpose() method. It also keeps track of the current state of the image using a global is_flipped variable.
If the is_flipped variable is False, the code opens the original image file using the Image.open() method, and then flips it left and right using the transpose() method with the Image.FLIP_LEFT_RIGHT argument. The is_flipped variable is then set to True.
If the is_flipped variable is already True, the code simply opens the original image file again and sets is_flipped to False.
After flipping the image, the code resizes the image to fit the Canvas using the resize() method and creates a PhotoImage object from the resized image using ImageTk.PhotoImage(), and displays it on the Canvas using the canvas.create_image() method. Finally, the except statement will catch all errors that might occur and display an error message.
To bind the function to its button make the button’s code look like this:
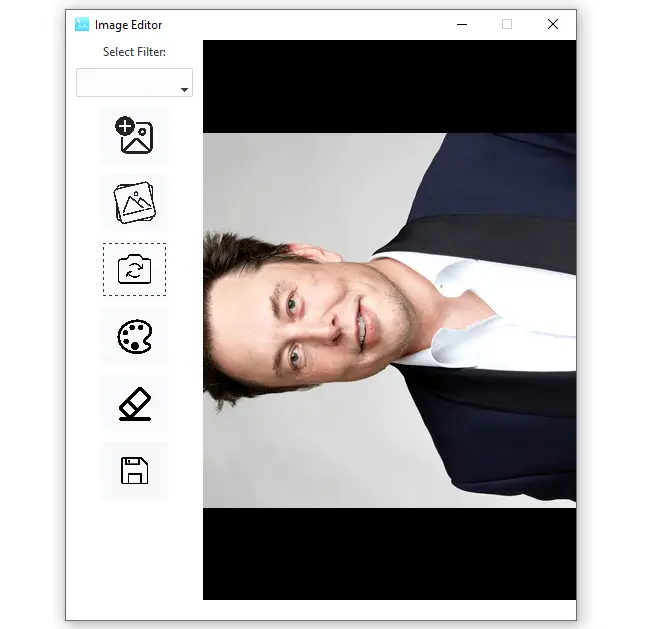
flip_button = ttk.Button(left_frame, image=flip_icon, bootstyle="light", command=flip_image)Run the program, open any image, and click the flip image button, the output will be similar to this:
If you click the flip image button repeatedly you will notice that the image is flipped from left to right and vice versa.
Related: Image Transformations using OpenCV in Python.
Rotating Image
The third functionality is rotating the opened image. Below the flip_image() function add this code:
# global variable for tracking rotation angle
rotation_angle = 0

# function for rotating the image
def rotate_image():
    try:
        global image, photo_image, rotation_angle
        # open the image and rotate it

        image = Image.open(file_path)
        new_width = int((WIDTH / 2))
        image = image.resize((new_width, HEIGHT), Image.LANCZOS)
        rotated_image = image.rotate(rotation_angle + 90)
        rotation_angle += 90
        # reset image if angle is a multiple of 360 degrees
        if rotation_angle % 360 == 0:
            rotation_angle = 0
            image = Image.open(file_path)
            image = image.resize((new_width, HEIGHT), Image.LANCZOS)
            rotated_image = image
        # convert the PIL image to a Tkinter PhotoImage and display it on the canvas
        photo_image = ImageTk.PhotoImage(rotated_image)
        canvas.create_image(0, 0, anchor="nw", image=photo_image)
    # catches errors
    except:
        showerror(title='Rotate Image Error', message='Please select an image to rotate!')
Before the rotate_image() function, we are defining a global variable rotation_angle that stores the current angle of rotation. The function opens the image file using PIL and resizes it to fit the canvas. It then rotates the image by the rotation_angle plus 90 degrees and increments rotation_angle by 90. If the rotation angle is a multiple of 360 degrees, rotation_angle is reset to 0, and the original image is used. Finally, the function converts the rotated PIL image to a Tkinter PhotoImage and displays it on the Canvas using the create_image() method. If there are any errors the exception catches them.
Edit the rotate image button and make it look like this:
rotate_button = ttk.Button(left_frame, image=rotate_icon, bootstyle="light", command=rotate_image)Now let us try to rotate an image multiple times. Load an image in the Canvas and click the rotate image button, this is the first output:
After the second rotation, the output will look like this:
The third rotation will give this output:
Our fourth click will reset the image to its original state:
Great! The rotating image functionality works perfectly.
Applying Image Filters
Let us make it possible to apply filters to the opened image. The code for that will look as follows:
# function for applying filters to the opened image file
def apply_filter(filter):
    global image, photo_image
    try:
        # check if the image has been flipped or rotated
        if is_flipped:
            # flip the original image left and right
            flipped_image = Image.open(file_path).transpose(Image.FLIP_LEFT_RIGHT)
            # rotate the flipped image
            rotated_image = flipped_image.rotate(rotation_angle)
            # apply the filter to the rotated image
            if filter == "Black and White":
                rotated_image = ImageOps.grayscale(rotated_image)
            elif filter == "Blur":
                rotated_image = rotated_image.filter(ImageFilter.BLUR)
            elif filter == "Contour":
                rotated_image = rotated_image.filter(ImageFilter.CONTOUR)
            elif filter == "Detail":
                rotated_image = rotated_image.filter(ImageFilter.DETAIL)
            elif filter == "Emboss":
                rotated_image = rotated_image.filter(ImageFilter.EMBOSS)
            elif filter == "Edge Enhance":
                rotated_image = rotated_image.filter(ImageFilter.EDGE_ENHANCE)
            elif filter == "Sharpen":
                rotated_image = rotated_image.filter(ImageFilter.SHARPEN)
            elif filter == "Smooth":
                rotated_image = rotated_image.filter(ImageFilter.SMOOTH)
            else:
                rotated_image = Image.open(file_path).transpose(Image.FLIP_LEFT_RIGHT).rotate(rotation_angle)
        elif rotation_angle != 0:
            # rotate the original image
            rotated_image = Image.open(file_path).rotate(rotation_angle)
            # apply the filter to the rotated image
            if filter == "Black and White":
                rotated_image = ImageOps.grayscale(rotated_image)
            elif filter == "Blur":
                rotated_image = rotated_image.filter(ImageFilter.BLUR)
            elif filter == "Contour":
                rotated_image = rotated_image.filter(ImageFilter.CONTOUR)
            elif filter == "Detail":
                rotated_image = rotated_image.filter(ImageFilter.DETAIL)
            elif filter == "Emboss":
                rotated_image = rotated_image.filter(ImageFilter.EMBOSS)
            elif filter == "Edge Enhance":
                rotated_image = rotated_image.filter(ImageFilter.EDGE_ENHANCE)
            elif filter == "Sharpen":
                rotated_image = rotated_image.filter(ImageFilter.SHARPEN)
            elif filter == "Smooth":
                rotated_image = rotated_image.filter(ImageFilter.SMOOTH)
            else:
                rotated_image = Image.open(file_path).rotate(rotation_angle)
        else:
            # apply the filter to the original image
            image = Image.open(file_path)
            if filter == "Black and White":
                image = ImageOps.grayscale(image)
            elif filter == "Blur":
                image = image.filter(ImageFilter.BLUR)
            elif filter == "Sharpen":
                image = image.filter(ImageFilter.SHARPEN)
            elif filter == "Smooth":
                image = image.filter(ImageFilter.SMOOTH)
            elif filter == "Emboss":
                image = image.filter(ImageFilter.EMBOSS)
            elif filter == "Detail":
                image = image.filter(ImageFilter.DETAIL)
            elif filter == "Edge Enhance":
                image = image.filter(ImageFilter.EDGE_ENHANCE)
            elif filter == "Contour":
                image = image.filter(ImageFilter.CONTOUR)
            rotated_image = image
        # resize the rotated/flipped image to fit the canvas
        new_width = int((WIDTH / 2))
        rotated_image = rotated_image.resize((new_width, HEIGHT), Image.LANCZOS)
        # convert the PIL image to a Tkinter PhotoImage and display it on the canvas
        photo_image = ImageTk.PhotoImage(rotated_image)
        canvas.create_image(0, 0, anchor="nw", image=photo_image)
    except:
        showerror(title='Error', message='Please select an image first!')
To be on the same page, let us break this code down. The apply_filter() function first checks if the image has been flipped or rotated using the global variables is_flipped and rotation_angle. If the image has been flipped, it creates a new image that is flipped left and right using the transpose method with the FLIP_LEFT_RIGHT constant. It then rotates the flipped image by the rotation angle. If the image has not been flipped but has been rotated, it rotates the original image by the rotation angle.
After the image has been flipped and/or rotated, or if it has not been flipped or rotated, the function applies the specified filter to the image. The available filter options are:
- Black and White
- Blur
- Contour
- Detail
- Emboss
- Edge Enhance
- Sharpen
- Smooth
If an unknown filter is specified, the function applies no filter and displays the original image.
Finally, the function resizes the rotated/flipped image to fit the Canvas and converts the PIL image to a Tkinter PhotoImage to display it on the Canvas. If no image is selected, the function displays an error message.
To call the apply_filter() function we will bind it to a ComboboxSelected event. Here, is what will happen, the user will select a filter from the Combobox and just after the selection the filter will be applied to the image displayed on the Canvas. So below the Combobox code add this line of code:
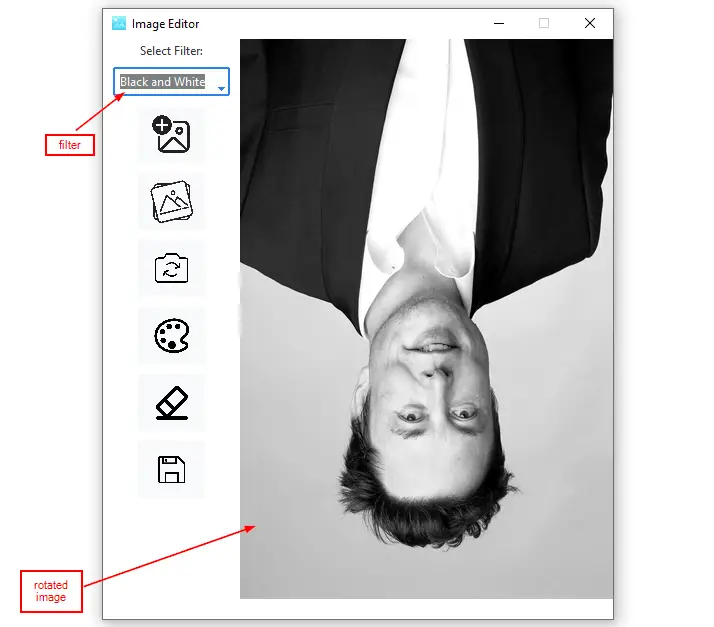
filter_combobox.bind("<<ComboboxSelected>>", lambda event: apply_filter(filter_combobox.get()))Now we will open an image and rotate it at any angle and then apply a filter. The output for that will be:
Read also: How to Build a GUI Voice Recorder App in Python.
Drawing on the Opened Image and Changing the Pen Color
Now let us make it possible to draw on the opened image and change the pen color. Below the apply_filter() function paste this block of code:
# function for drawing lines on the opened image
def draw(event):
    global file_path
    if file_path:
        x1, y1 = (event.x - pen_size), (event.y - pen_size)
        x2, y2 = (event.x + pen_size), (event.y + pen_size)
        canvas.create_oval(x1, y1, x2, y2, fill=pen_color, outline="", width=pen_size, tags="oval")
The draw() function creates an oval on the canvas with the create_oval method of the canvas widget. The position of the oval is determined by the coordinates of the mouse click event (event.x and event.y). The size of the oval is determined by the pen_size variable. The color of the oval is determined by the pen_color variable. The oval is added to the canvas with the tag "oval" so it can be easily deleted later. The function checks if a file path has been set before drawing, which means that an image has been opened to draw on.
Now we need to bind the draw function to the B1-Motion event on the canvas widget. To do that below the Canvas code add:
# binding the Canvas to the B1-Motion event
canvas.bind("<B1-Motion>", draw)
Let us test this functionality, open an image and try to draw over it, you will get an output similar to this:

Now let us make it possible to change the color of the pen, so below the draw() function add this code:
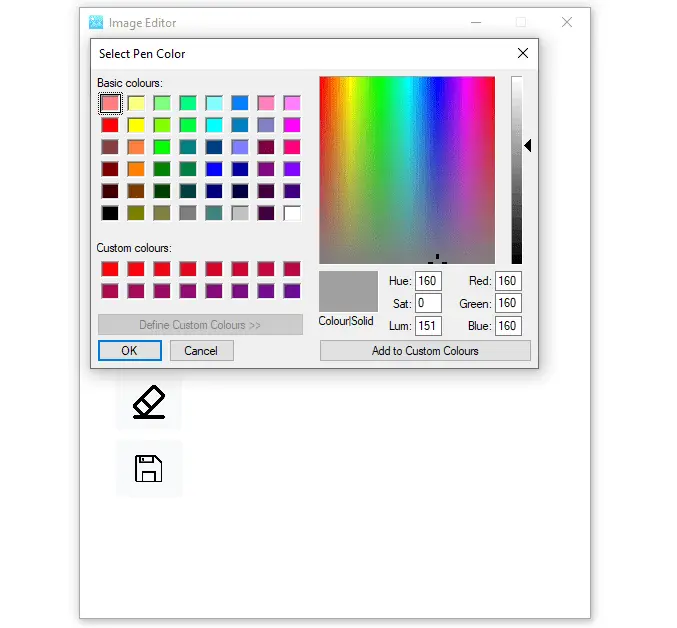
# function for changing the pen color
def change_color():
    global pen_color
    pen_color = colorchooser.askcolor(title="Select Pen Color")[1]
The function change_color() allows the user to select a new pen color using the colorchooser dialog, and then updates the pen_color global variable to the selected color.
To bind this function to a choose color button make this code look like this:
color_button = ttk.Button(left_frame, image=color_icon, bootstyle="light", command=change_color)Run the program and click the Choose the color button, this is what you will get:
Pick any color, open an image, and draw over it, this is the output:
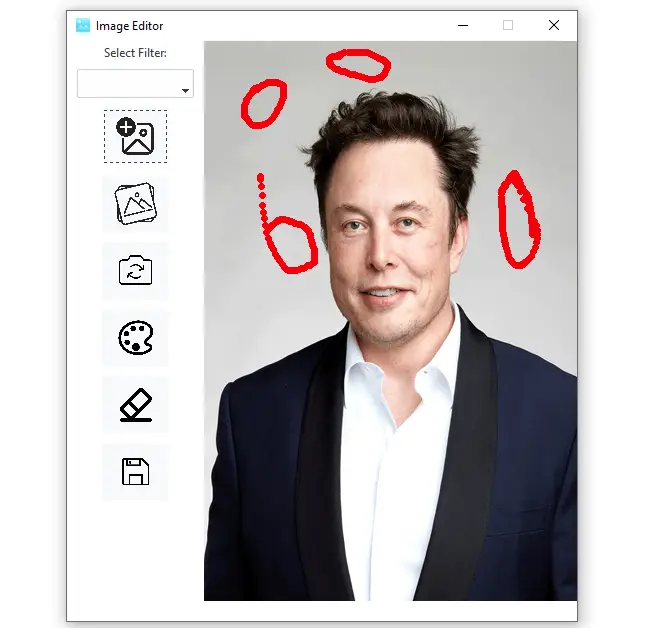
Great!! the functionality is working as we expected.
Erasing Drawn Lines Over the Opened Image
We will now make it possible to erase the drawn lines over an image. The code for this is as follows:
# function for erasing lines on the opened image
def erase_lines():
    global file_path
    if file_path:
        canvas.delete("oval")
The erase_lines() function is used to remove all the oval shapes drawn on the Canvas that has a tag of oval. It checks if a file is currently opened before deleting the ovals.
Open an image and draw over it as follows:
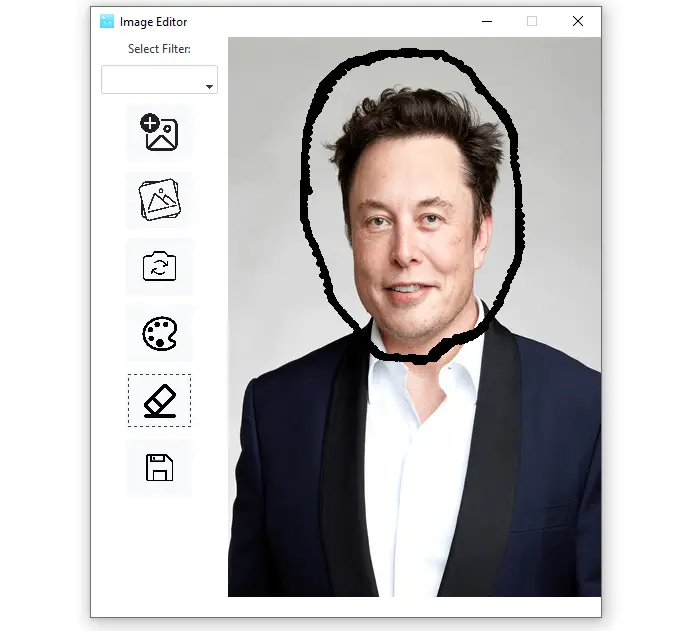
If you click the erase button, the ovals will be cleared.
Saving Image
The last functionality to implement will be the save image. We want to be able to save the image after edit. So below the apply_filter() function paste this code:
# the function for saving an image
def save_image():
    global file_path, is_flipped, rotation_angle
    if file_path:
        # create a new PIL Image object from the canvas
        image = ImageGrab.grab(bbox=(canvas.winfo_rootx(), canvas.winfo_rooty(), canvas.winfo_rootx() + canvas.winfo_width(), canvas.winfo_rooty() + canvas.winfo_height()))
        # check if the image has been flipped or rotated
        if is_flipped or rotation_angle % 360 != 0:
            # Resize and rotate the image
            new_width = int((WIDTH / 2))
            image = image.resize((new_width, HEIGHT), Image.LANCZOS)
            if is_flipped:
                image = image.transpose(Image.FLIP_LEFT_RIGHT)
            if rotation_angle % 360 != 0:
                image = image.rotate(rotation_angle)
            # update the file path to include the modifications in the file name
            file_path = file_path.split(".")[0] + "_mod.jpg"
        # apply any filters to the image before saving
        filter = filter_combobox.get()
        if filter:
            if filter == "Black and White":
                image = ImageOps.grayscale(image)
            elif filter == "Blur":
                image = image.filter(ImageFilter.BLUR)
            elif filter == "Sharpen":
                image = image.filter(ImageFilter.SHARPEN)
            elif filter == "Smooth":
                image = image.filter(ImageFilter.SMOOTH)
            elif filter == "Emboss":
                image = image.filter(ImageFilter.EMBOSS)
            elif filter == "Detail":
                image = image.filter(ImageFilter.DETAIL)
            elif filter == "Edge Enhance":
                image = image.filter(ImageFilter.EDGE_ENHANCE)
            elif filter == "Contour":
                image = image.filter(ImageFilter.CONTOUR)
            # update the file path to include the filter in the file name
            file_path = file_path.split(".")[0] + "_" + filter.lower().replace(" ", "_") + ".jpg"
        # open file dialog to select save location and file type
        file_path = filedialog.asksaveasfilename(defaultextension=".jpg")
        if file_path:
            if askyesno(title='Save Image', message='Do you want to save this image?'):
                # save the image to a file
                image.save(file_path)
The code snippet creates a save_image() function that is used to save the edited image with any applied filter and rotation changes. The function first initializes the global variables file_path, is_flipped, and rotation_angle. Then it checks if the file_path is not empty and then creates a new PIL image object using the ImageGrab method which is for capturing screenshots on the Canvas. If the image has been rotated or flipped, the function creates a new PIL Image object with the rotated or flipped version of the image. It then resizes the image and updates the file_path to include the modifications in the file name.
If the image has not been rotated or flipped, the function opens the original image. The function then checks if any filters have been selected from the filter_combobox widget. If a filter is selected, the function applies the selected filter to the image using the appropriate filter method from the ImageFilter module of the PIL library. The file_path is then updated to include the filter in the file name.
Next, the function opens a file dialog to select the save location. If the user chooses to save the image, the function saves the modified image to the selected location using the save() method of the PIL Image object.
Note:
The image will be saved with a jpg extension which has been specified as the default extension via this line of code:
file_path = filedialog.asksaveasfilename(defaultextension=".jpg")To bind this function to the save image button edit the code and make it look like this:
save_button = ttk.Button(left_frame, image=save_icon, bootstyle="light", command=save_image)Let us edit our first image and try to save it. Run the program, open an image, apply a filter, draw over it, and try to save it, for demonstrating purposes save the image in the same folder as the program files and save it as test. If you click the save image button you will be asked to name the image and select a folder where you want to save it. After confirming that you want to save the image, go to the project’s folder:
![]()
And try to open the test.jpg using any image viewer application on your machine, the output is this:

Testing the Application
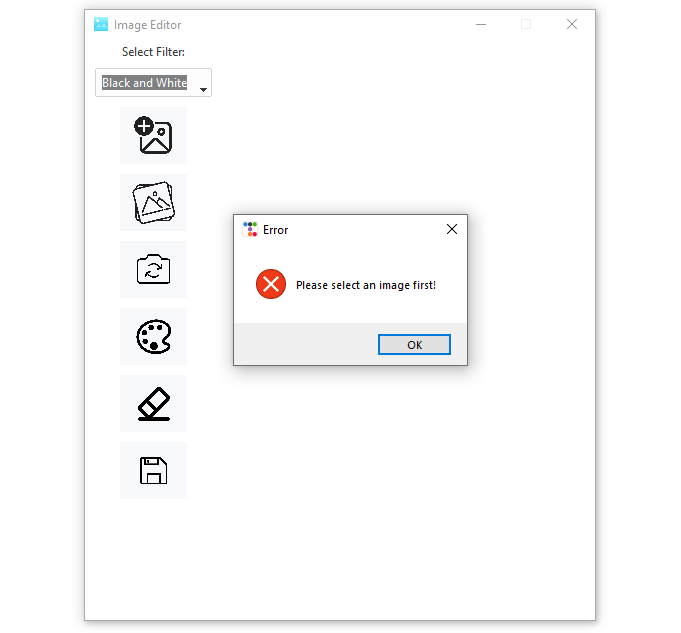
The application seems to be working fine, but what if the user tries to apply a filter on an empty Canvas? The output would be:
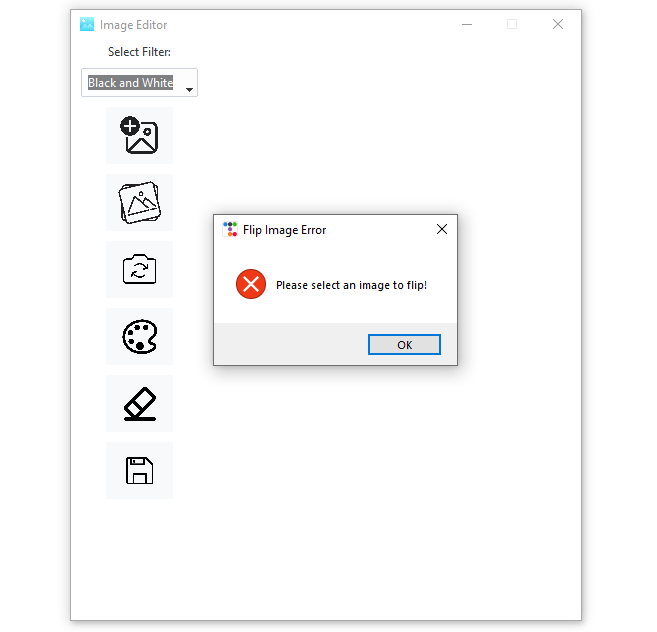
If the user clicks the flip image button without an opened image, this is the output:
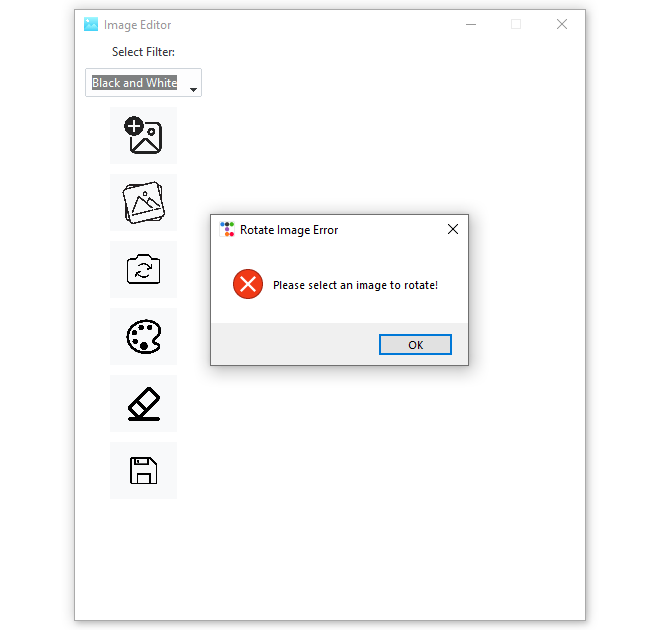
And if the user clicks the rotate image button without any image loaded in the Canvas, this is the output:
Conclusion
That’s it from this article, we hope there has been so much that you have learned and that the knowledge acquired will be used in your future Python projects!
Get the complete code here.
Learn also: How to Build a GUI QR Code Generator and Reader in Python.
Happy coding ♥
Want to code smarter? Our Python Code Assistant is waiting to help you. Try it now!
View Full Code Transform My Code


Got a coding query or need some guidance before you comment? Check out this Python Code Assistant for expert advice and handy tips. It's like having a coding tutor right in your fingertips!